 As I have previously mentioned, Michelangelo would normally not have pressed or poured clay into prepared plaster molds. Though he did have experience working with bronze and the making of casts, he preferred to simply jump from the maquette stage directly to carving marble. With the master’s near bottomless supply of financial support… literally buckets of ducats, he could afford to live well on the florins shovelled out by Florence. Papal Scudos, Parman Neapolitan Piastras. (sounds yummy)
But in today’s world, the working artist needs to be self supportive. And having an inventory of “clay originals” for sale will help you during the long years ahead wile you lovingly labour on stone.
Remember that these additional works are still ‘originals’ and not copies. And should be sold as such. According to international laws and conventions regarding the duplication of the original sculpted work, the artist is permitted to create twelve casts that will still be considered the artist’s original work. So number or track your first twelve pieces. These will be ‘originals’. Then feel free to continue with a limited numbered run (out of 100 for example) Of course this gets complicated.. You can work and change the clay after casting… The French master Auguste Rodin, would interchange the pieces of different molds to produce new statues… But that’s a story for another day
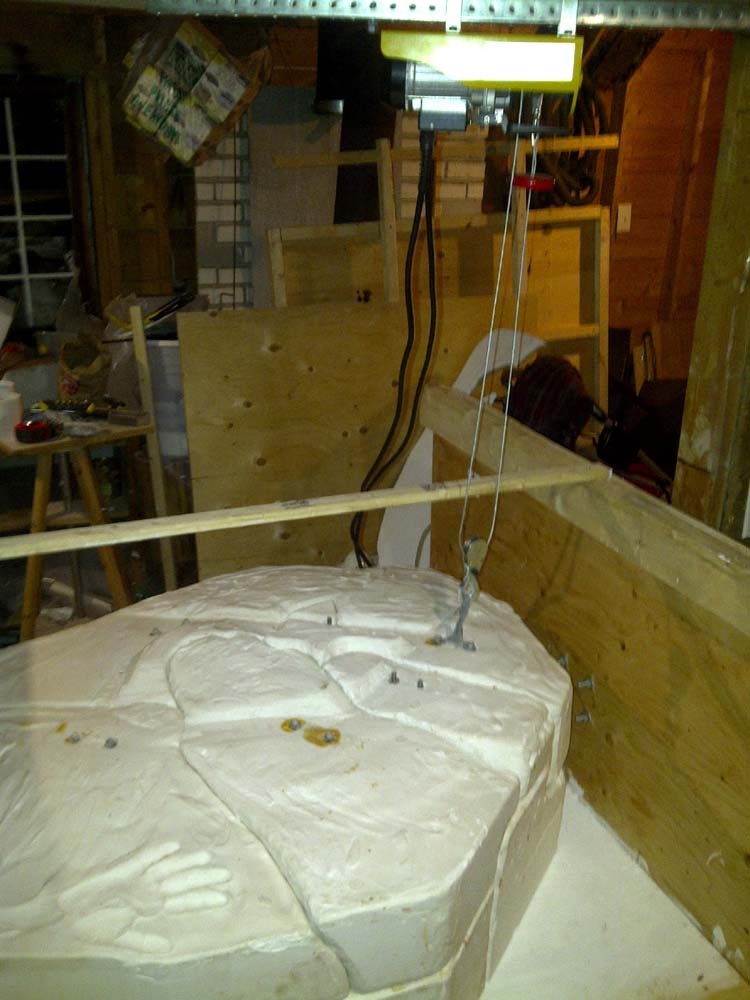
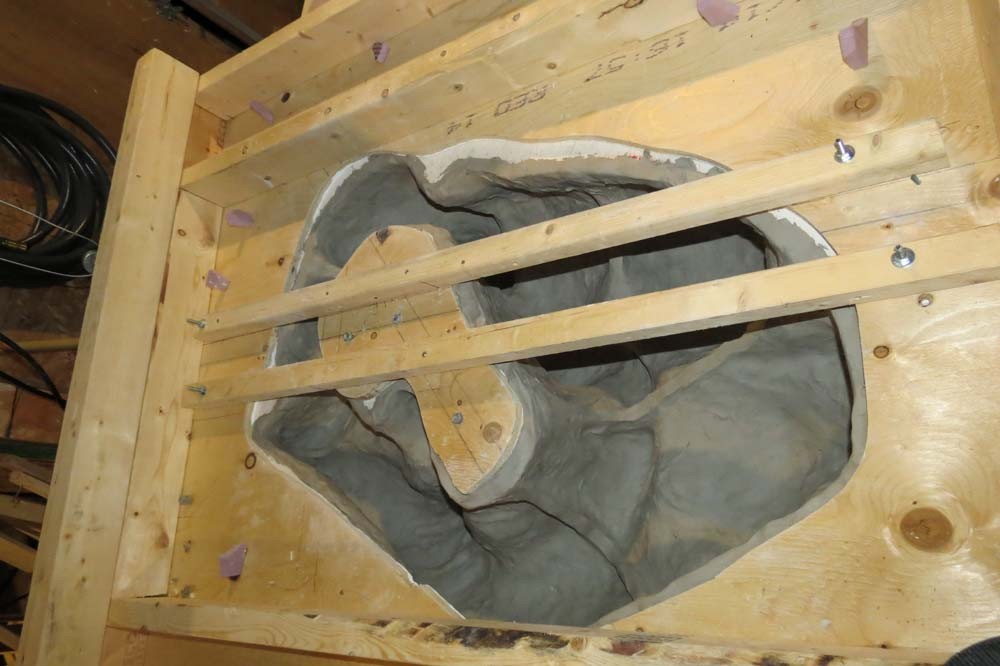
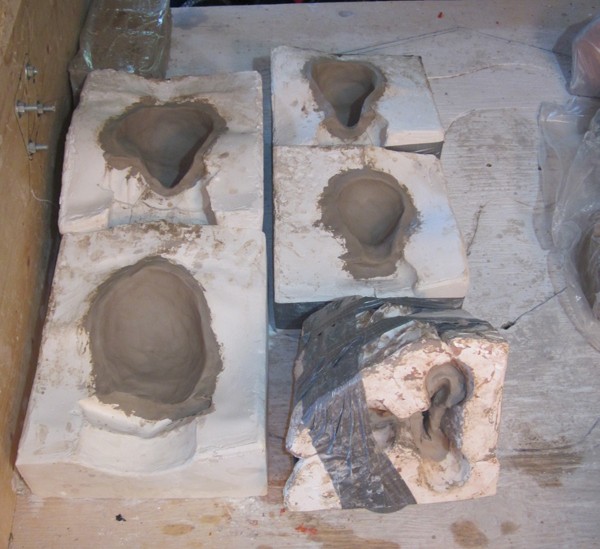
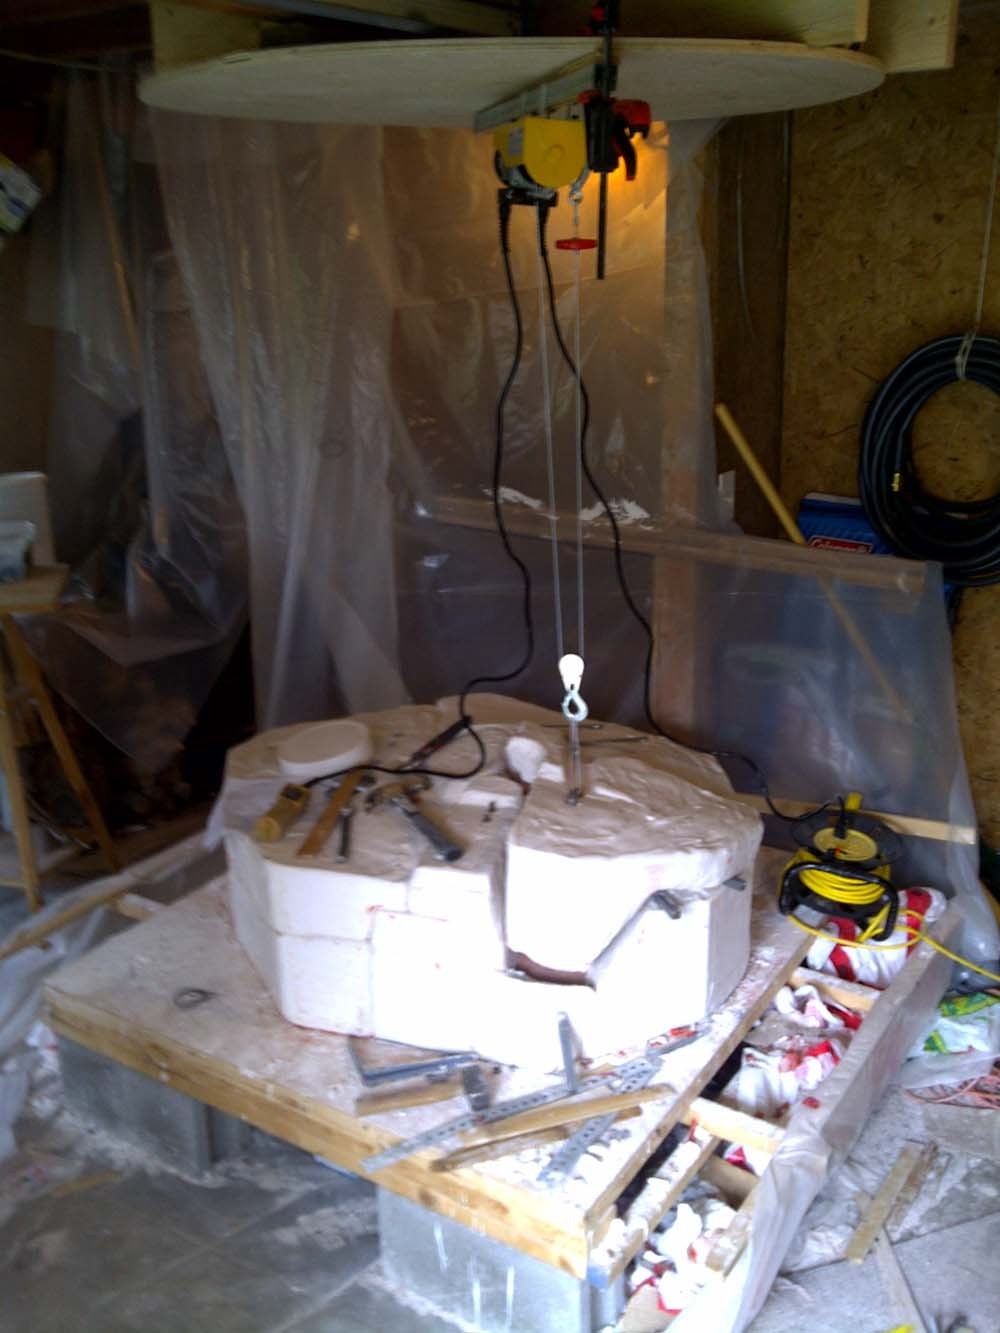 Once your mold feels dry (but still cool) to the touch, it is ready to open. This is the most sensitive time in the casting process. The plaster though strong, is also very brittle and can break away around the nooks and crannies. To make matters worse, because none of us are perfect, there are probably more than one pinch point that will lock the pieces to your original. Then there is the weight of the individual units. In my Pieta, the larger sections are over 50 lbs… try to maneuver that hefty weight while stooped over, balancing on your knees. You can see from my studio that I have an overhead winch. This is attached to the bolts that I had poured in with my plaster and takes the strain out of lifting.
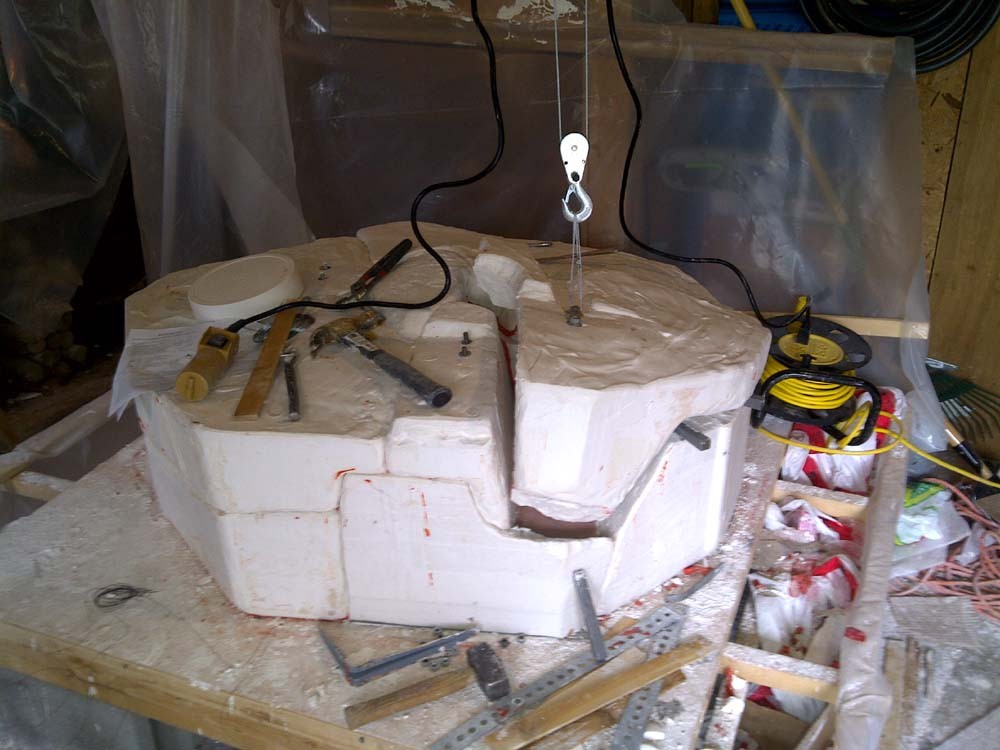
Ensure you do not simply winch up and haul away, the plaster will break. Instead apply gradual lifting support while shimming around the separation lines. The section will then move up and over in the direction required. If you break off a chunk, don’t worry, plaster can be repaired later.
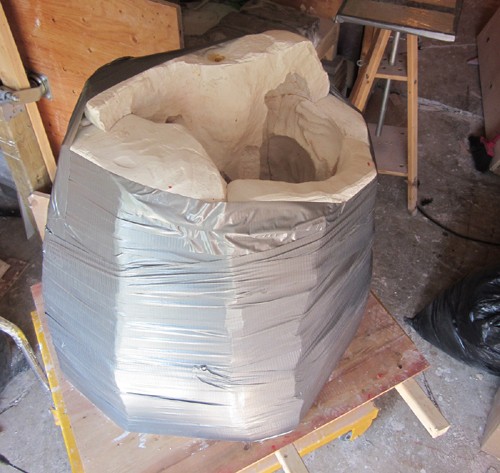
Once all pieces have been separated, allow the individual sections to continue to dry. When completely dry the plaster will produce a powder when scrapped. Try the ‘Tongue Test‘… if you touch your tongue to it, it will stick a bit. (fun at parties) This is as dry as your environment can make it. The mold is now ready. Using a combination of finesse and strength use your winch to reassemble on the platform. Using silicon caulking, fill and seal the cracks between pieces and in my case, lock together using metal back straps and duck tape. This will make the complete piece reasonably water tight.
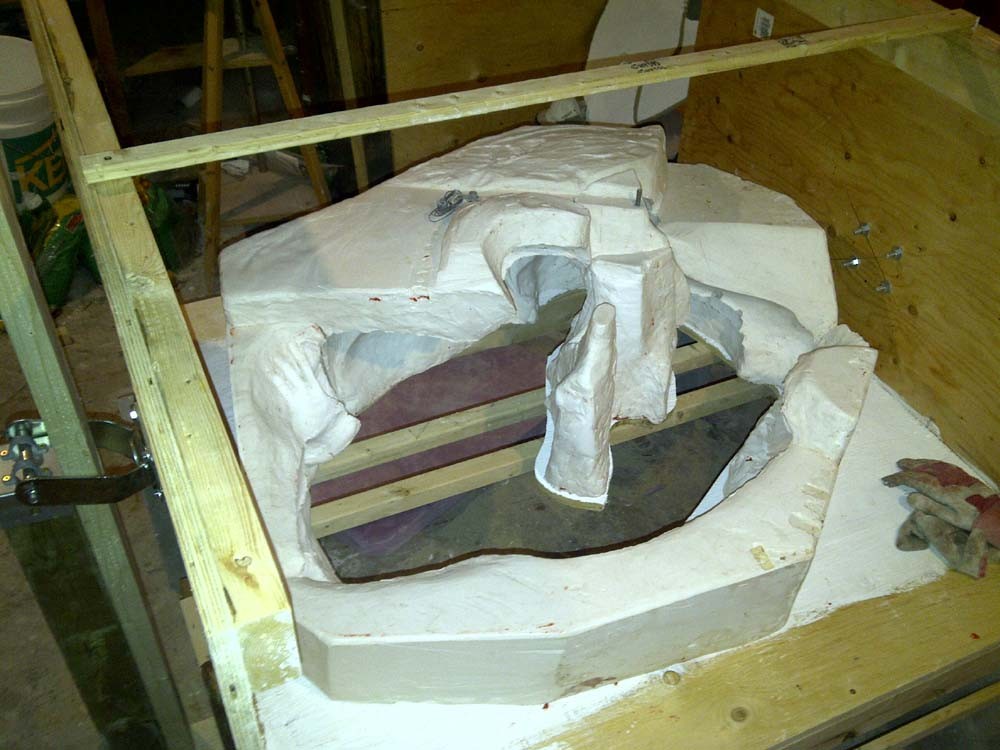
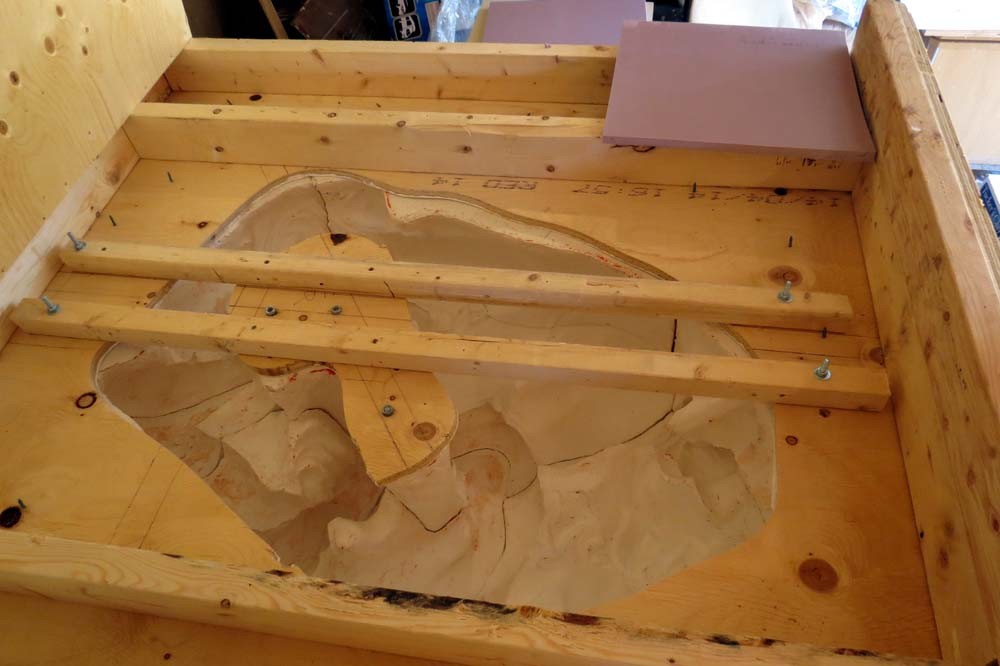
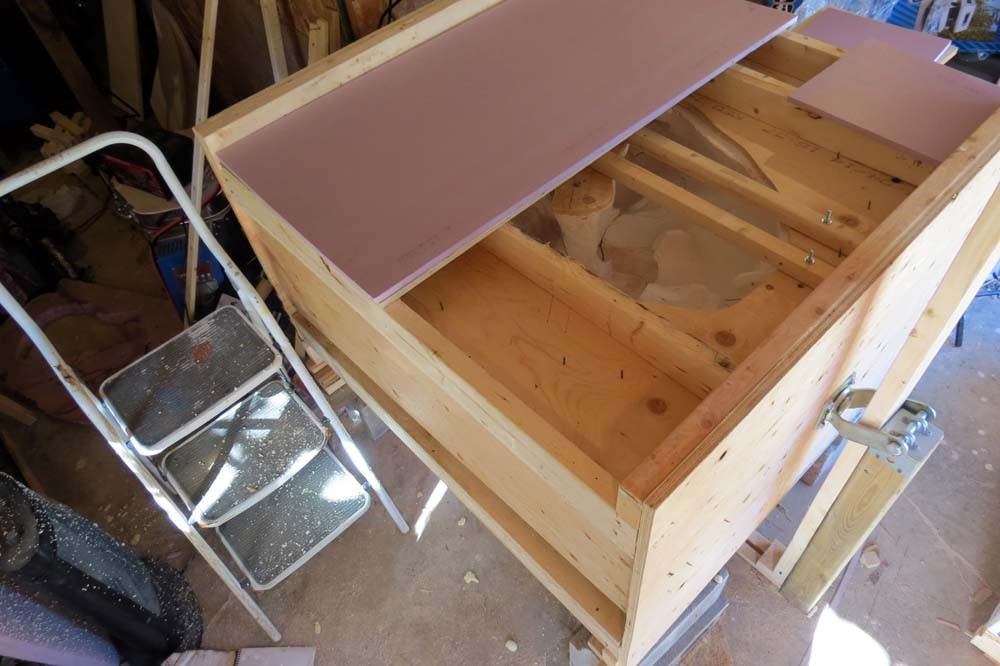
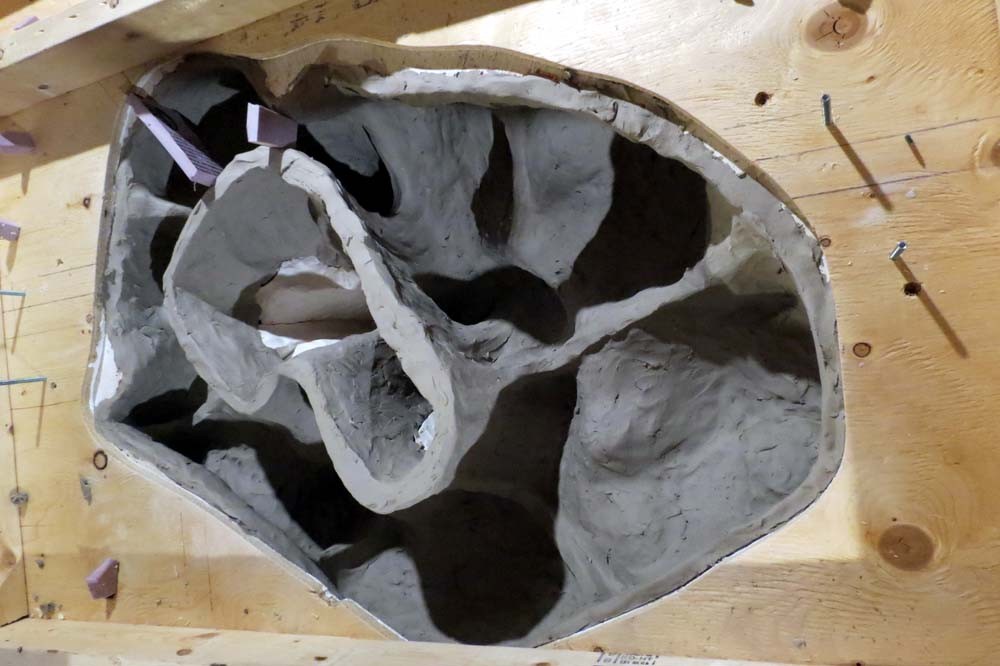
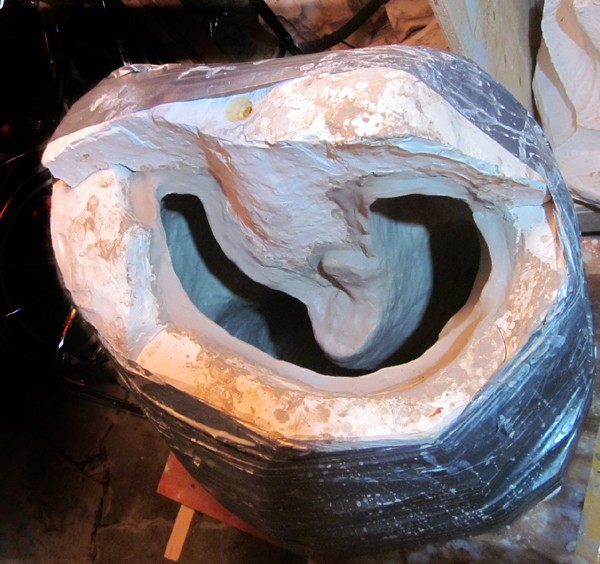
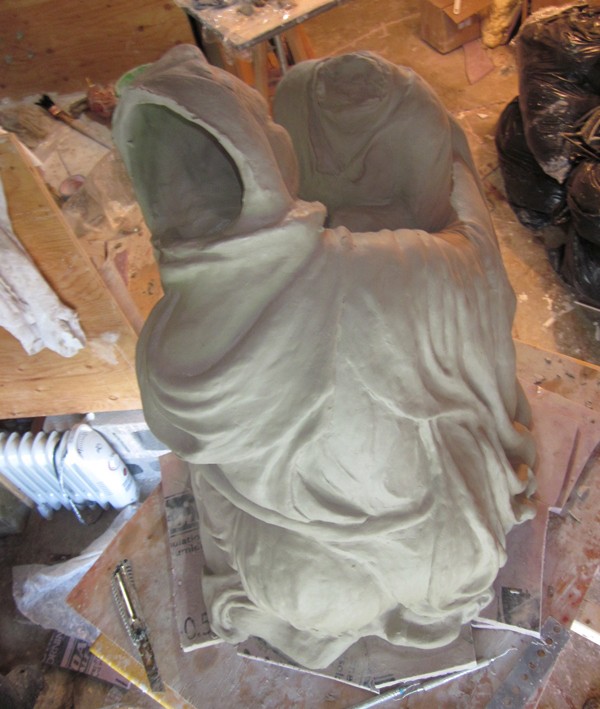
Now, a word or two on Tipping Boxes.(see tools of the trade) Typically, a plaster mold is built from the ground up. There is a top and a bottom. When done, it will be the vessel that holds the liquid slip or pliable wet clay. Like a cup or bowl, the opening needs to be at the top. So, we assemble the pieces, then spin the whole unit upside down exposing the opening at the top. Clay is then pressed into the mold, (as my Pieta example) or poured in like a slurry chocolate cream. Once the clay has been pressed, or the slip has set to a ¼ or ½ thickness, the complete project will need to be flipped right side up again (draining the slip back into a bucket) and allowing us to release the mold.
This is easier than you may think.. Just needs a lot of planning and preparation.

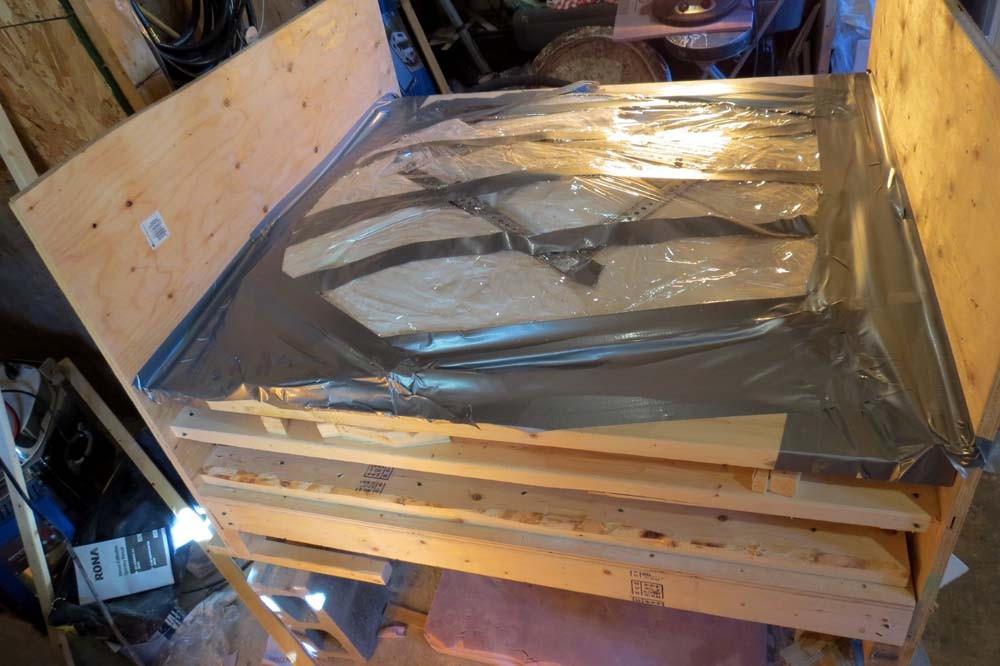
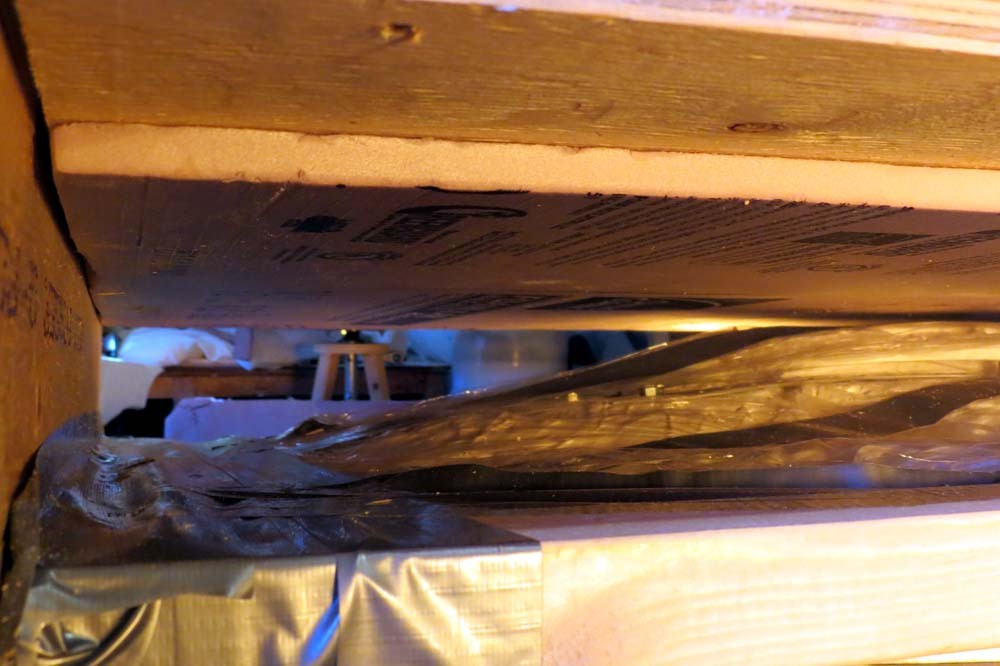
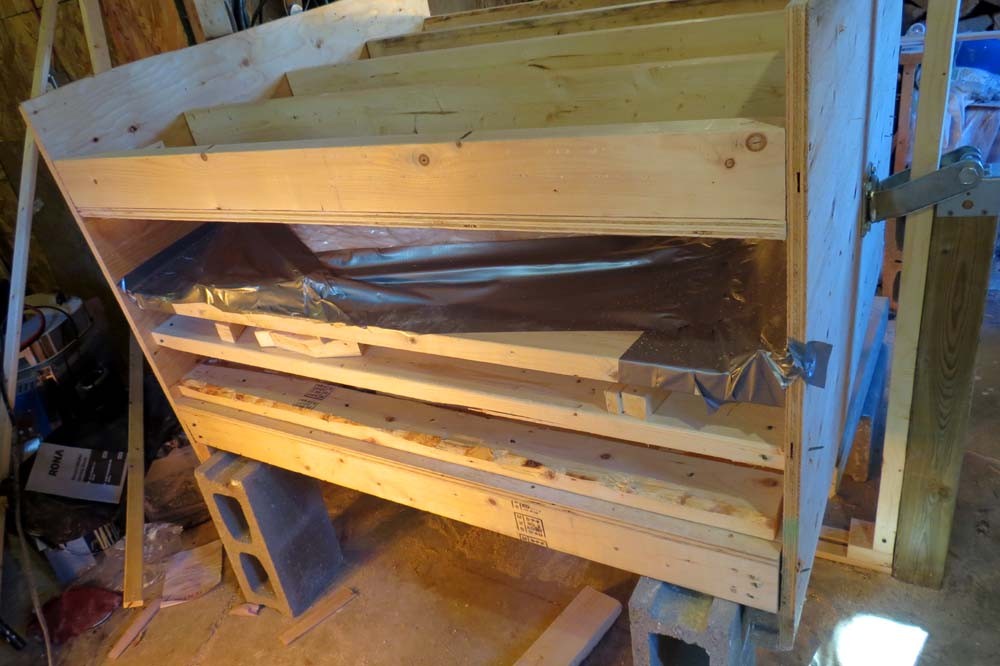
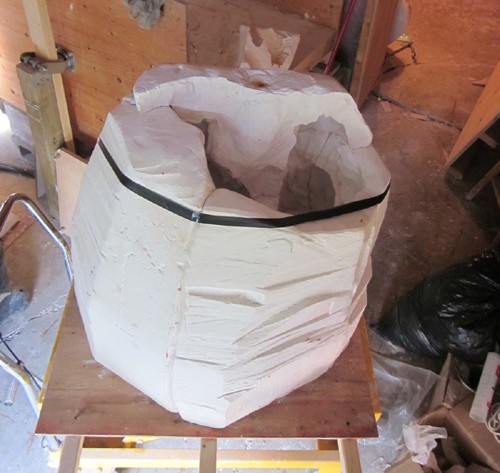
Remember that the combination of plaster and clay will be heavy. In my case, over 1000 lbs. Even a small quarter life sized statue will be far to heavy for you to lift. So plan as if you are building a deck that is sturdy enough to hold you, your family, and the BBQ. You will need lots of lumber, plywood, and heavy hubs with metal bearings.
You will want to secure your mold in the centre or apex so that when the projects spins, there is very little perceived weight. The tipping box is built around the plaster piece. Wood beams are screwed not nailed and foam is shimmed and blown into open spaces to ensure there is no movement. As you can appreciate every art piece will be different and so the accompanying tipping board will be unique to each project. If you're careful during construction and teardown, you will be able to reuse the whole table a dozen times or more.
As my Pieta design provided a large opening, that was easily accessible, I did not need to pour slip, but rather press clay. This is easier, lighter and stronger.
Half a day later, while lounging comfortably atop the box, on a bed of pink insulation, I pressed and poked my way inside and around the mold. Actually, I thought I was going to die. I cramped up, rigor mortis had set in. Clay shrinks quickly while it dries… so I chose to finish in one go.
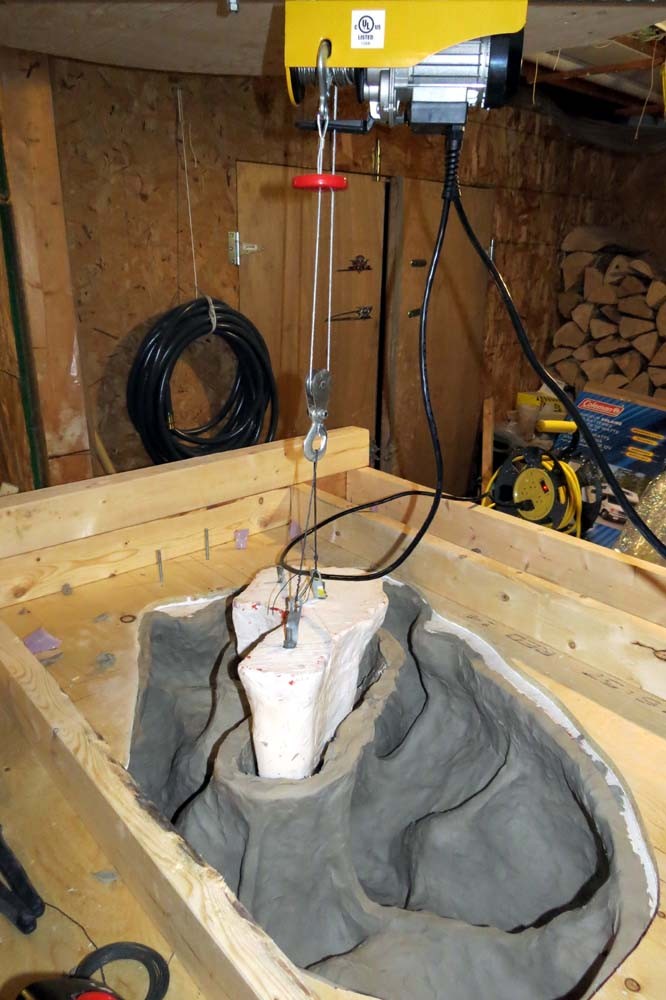
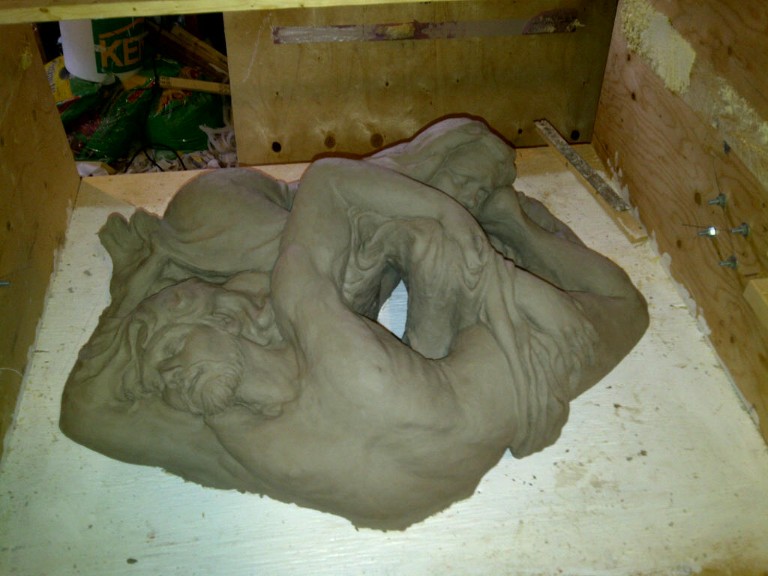
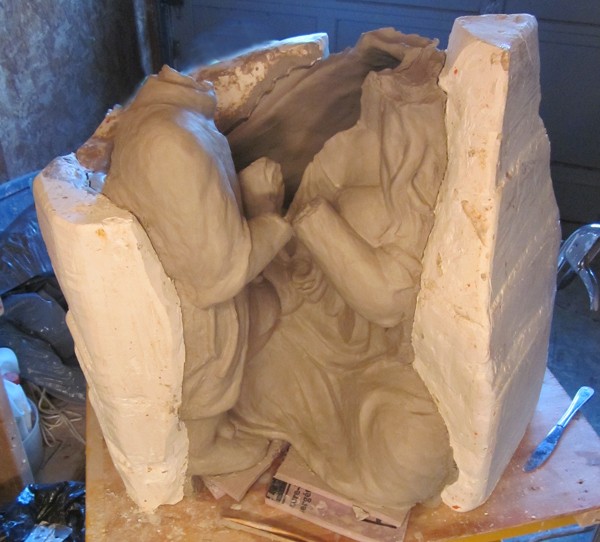
The winch again is an indispensable tool seen in the photo removing the key locking piece of my project.
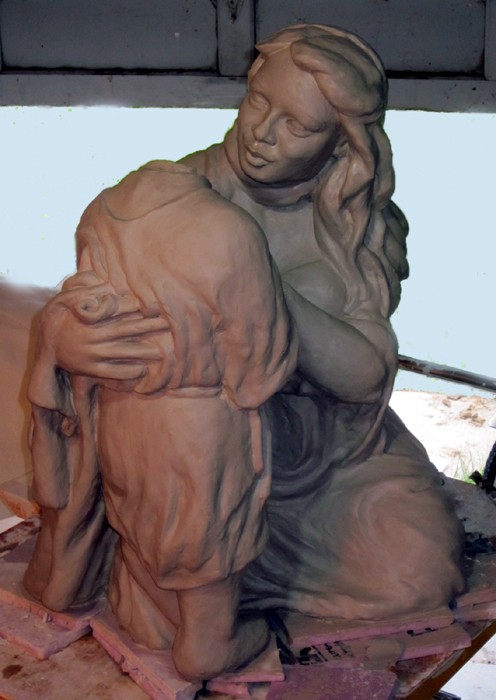
The tipping box is once again spun right side up and all pieces are removed in the same manner as before. Slow but sure. Clay is very forgiving so don’t worry if there are small tears or breaks. This can me filled and smoothed over the next day or so. Just ensure the clay remains uniformly damp while you add pieces and finish repairs. Once bone dry, you can sand or brush smooth. My Pieta is now ready to be fired in the kiln.
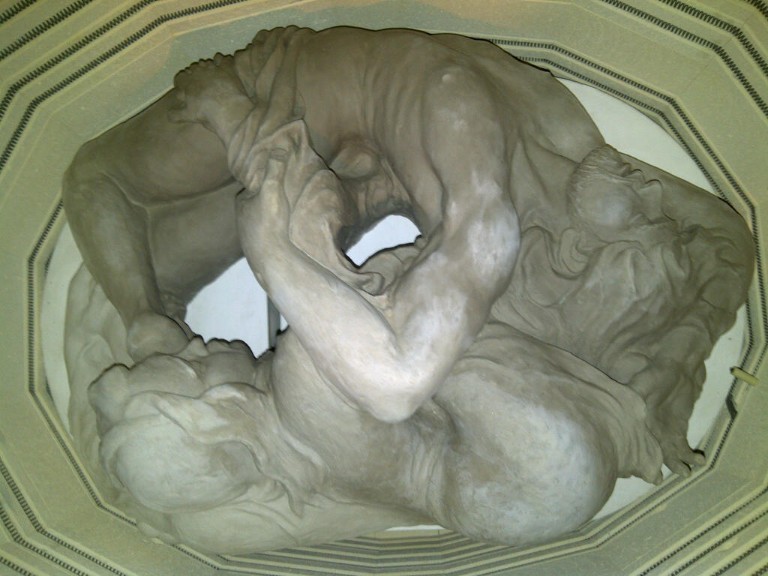
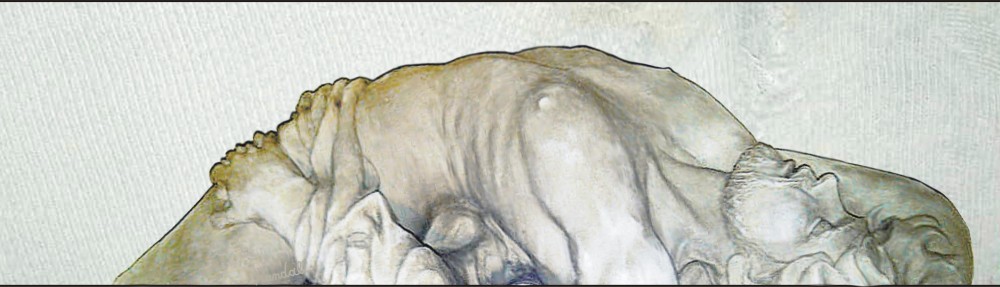
Pieta Amare Clay Original
There are very solid reasons why many avoid the mold and clay making process. Its expensive and risky. Several months have been invested just to get to this moment where actual clay can be formed into a new statue. Just think of the risk of wasting all this time and money toward a goal that hasn't proved its value. And worse yet, the original maquette has been destroyed while making the plaster impression. The payoff is in the hope that subsequent clay castings will provide the means to sell several ‘originals’. If your successful, these multiple statues will help overcome the original costs, and ideally create a modest profit. So goes the theory.
My 18 piece mold can support either a slip casting or a pressed clay process. However, as my Pieta Amare design is very tall, over 26 inches, there is a real possibility that the liquid slip clay may collapse from its own weight before it has the time to harden and set. Weight will not be an issue with pressed paper clay. The thickness of the clay can also be adjusted with the lower third of the statue being pressed to a one inch thickness wile the upper sections being limited to half inch or less.
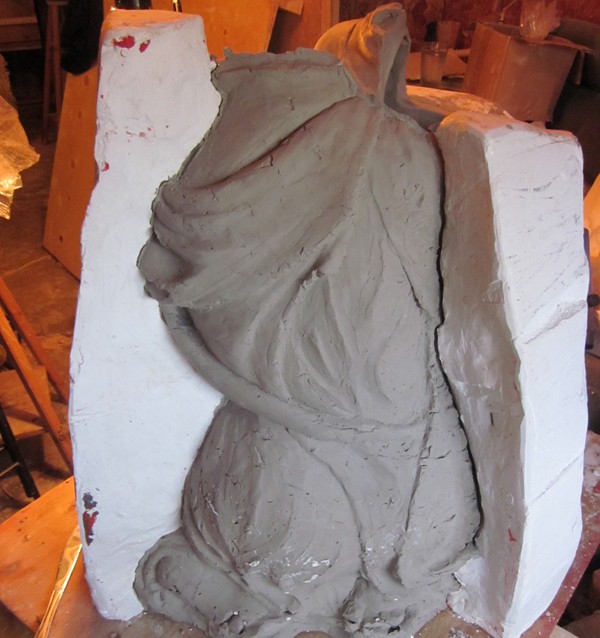
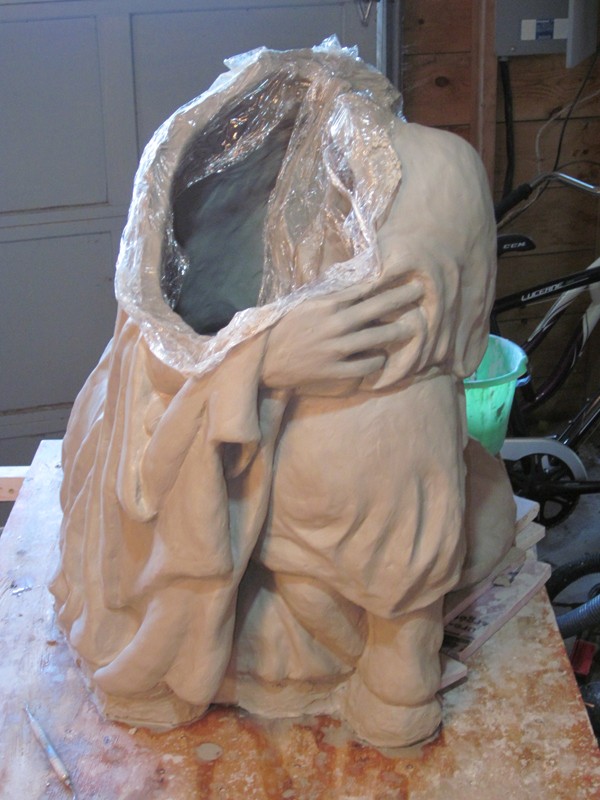
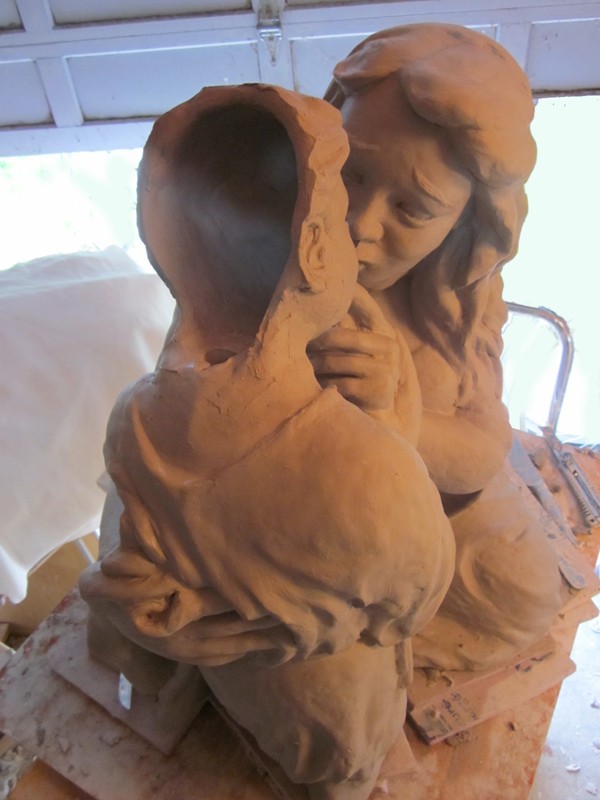
As I had mentioned in an earlier post, Pieta Amare will be assembled in sections. With the body being worked on first. Once the clay has been pressed, simply remove one piece at a time. You will notice that each exposed section needs to be cleaned and repaired before moving on the adjacent piece. This will take some time, so as you take a break, cover the exposed unfinished areas with plastic to keep the clay moist.
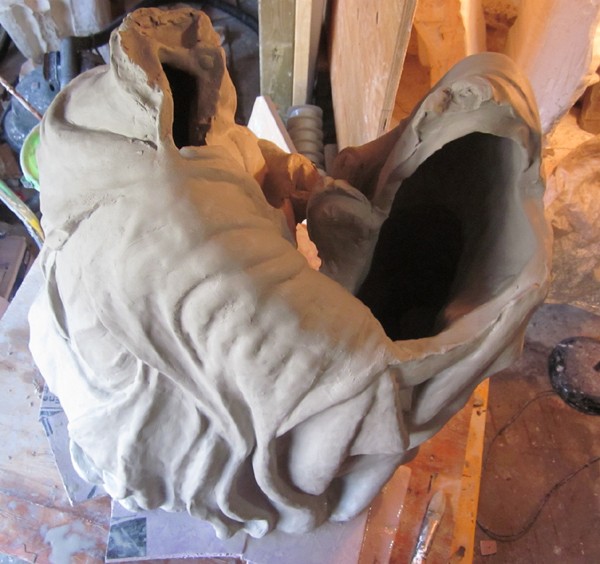
Individual parts are pressed separately and connected to the main body with liquid slip and moist scraps of clay. While you assemble, you will also notice that border areas may not line up perfectly or that connective seams tend to pop out or show there lines… That normal, just remember that clay is a very forgiving medium and that all can be smoothed out and remodelled as you go.
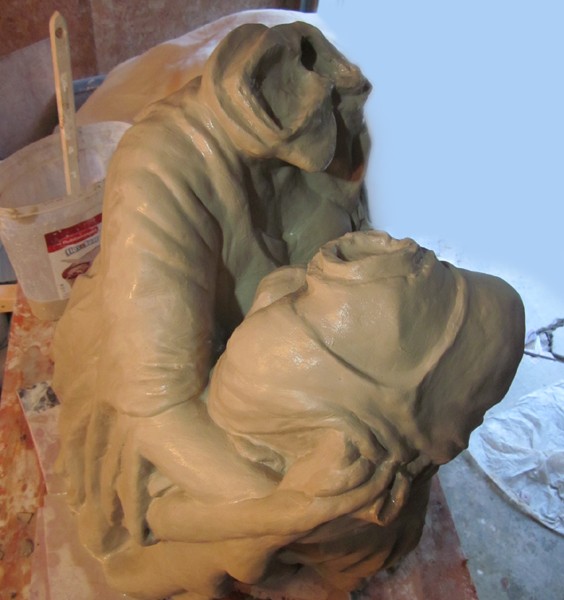
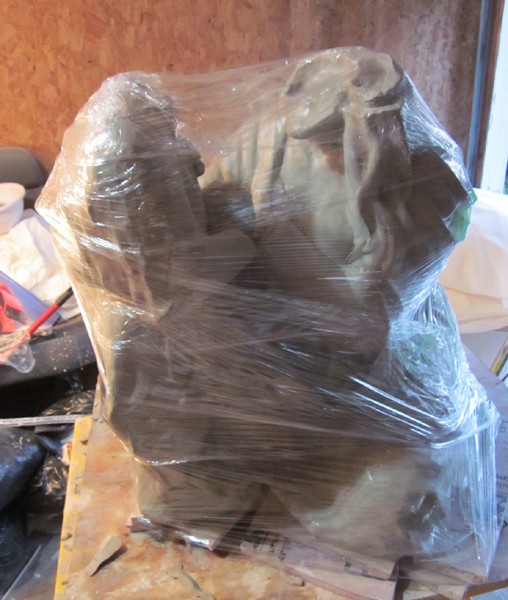
A statue of this size could take days to complete. So make sure you have lots of cellophane handy. Before stopping for the evening, spray the whole statue down with water, then wrap to help ensure the project doesn't dry overnight. This is critically important. Clay shrinks as it dries.. As much as 12 percent depending on the clay type. If the body is allowed to dry overnight, exposed to the air, the next day it will be just that much smaller… and the newer sections, freshly attached the next day will be just that much larger… the end result will be mismatched seams and cracks between the sections. Once these form and the statue dries, they can prove very challenging to close. In fact, a deep crack may never heal completely…. Even if you manage to seal the line with fresh clay, you will always be struggling with moisture differences. And these cracks will tend to open up again once the art has been fired in the kiln.
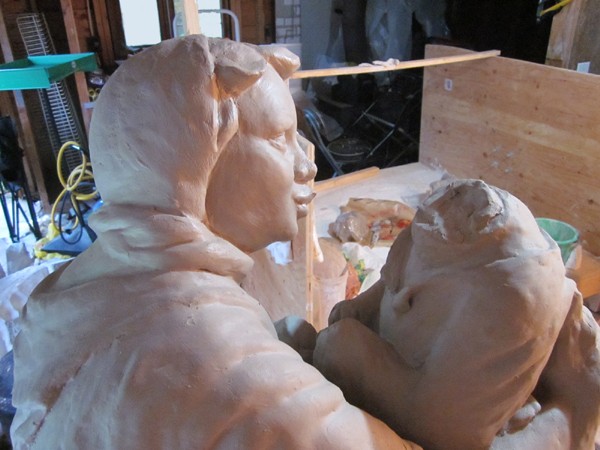
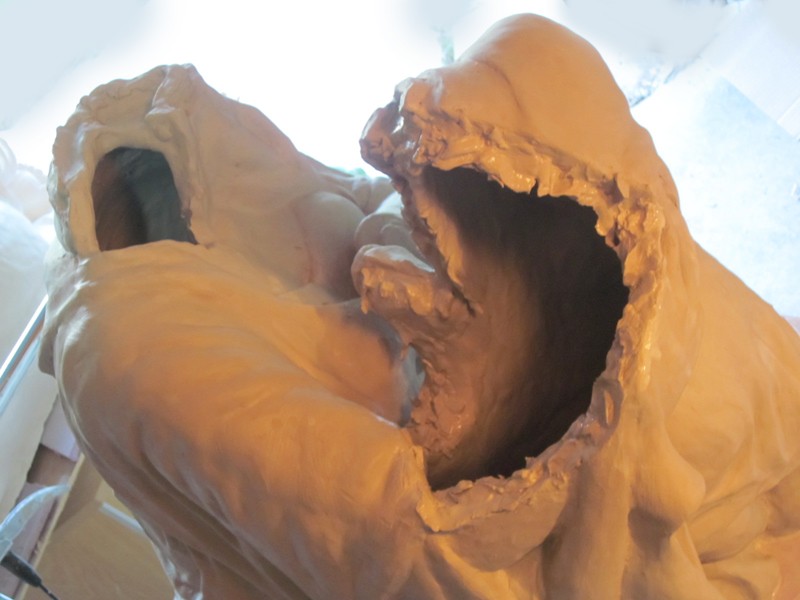
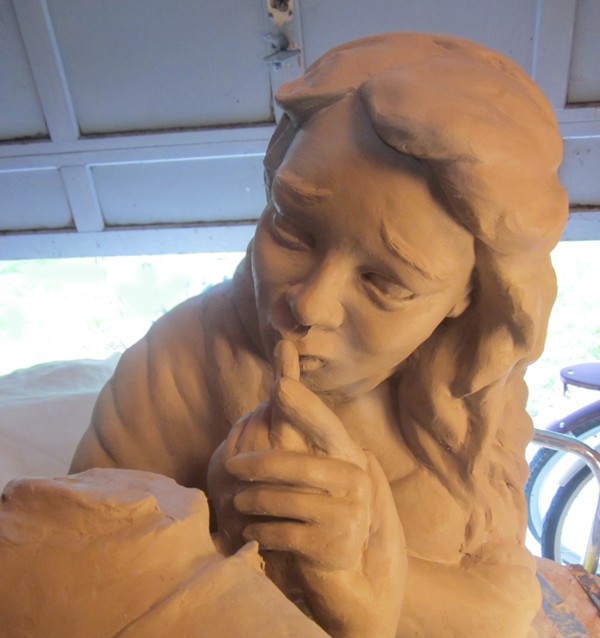
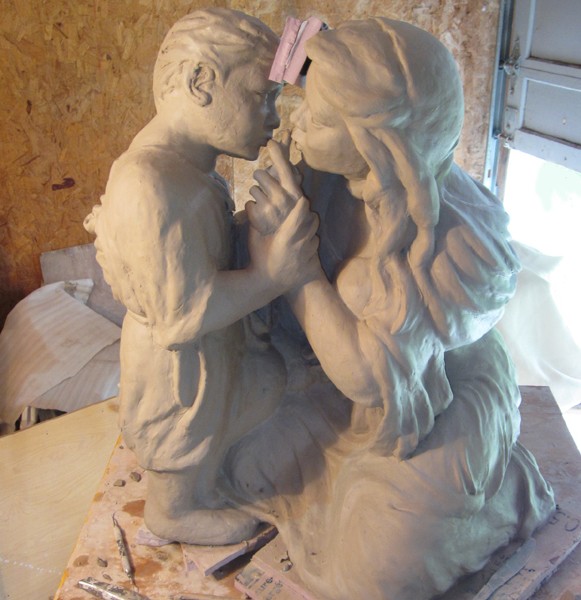
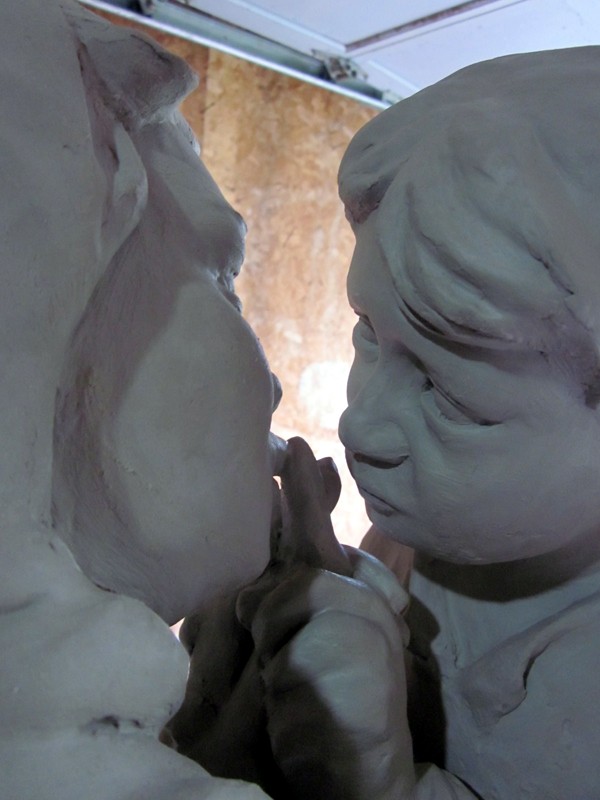
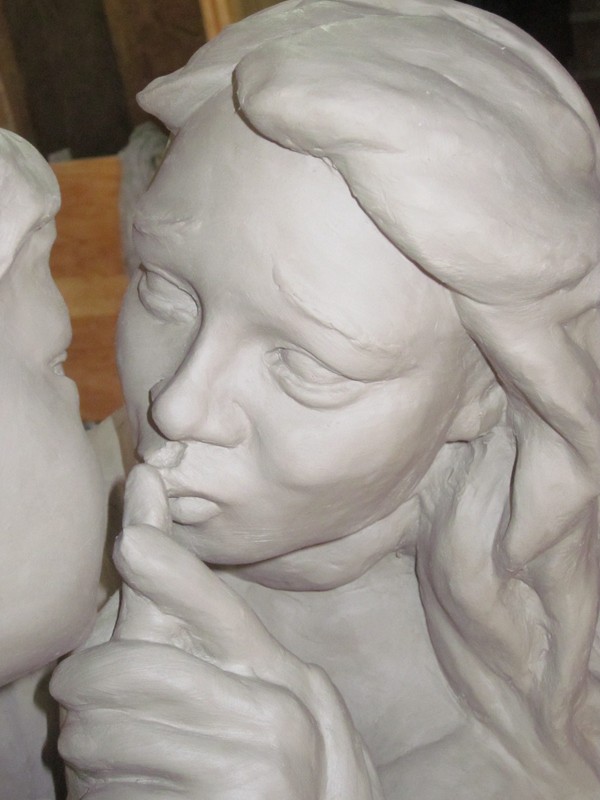
Its also important to work on areas while they are accessible… Both Mary’s face and hands will soon be hard to reach. Before Jesus is finished, I will need to ensure that Mary’s lips are well positioned. A little buffer between them will keep each one in their place as the whole assembly dries.
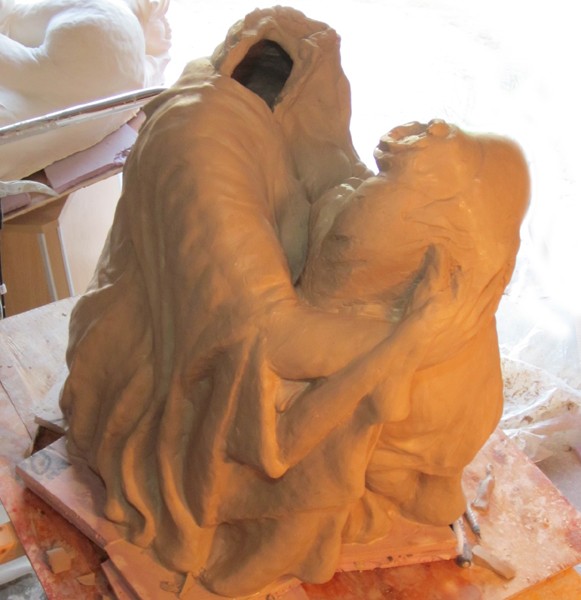
Pieta Amare is now 90 percent finished. The remaining details and finishing touches will be completed after the kiln fire. This is my own somewhat unusual method. If you prefer, you could continue to perfect the statue while it is still unfired leather clay. Of course the statue is very heavy and very fragile and with one mistake you will create a fresh crack (that may never repair) or worse, you’ll create a crumbled mess on the floor. I prefer to play it safe and Low Fire to Bisque. This fired intermediate stage is much stronger and still very easy to carve and sand.
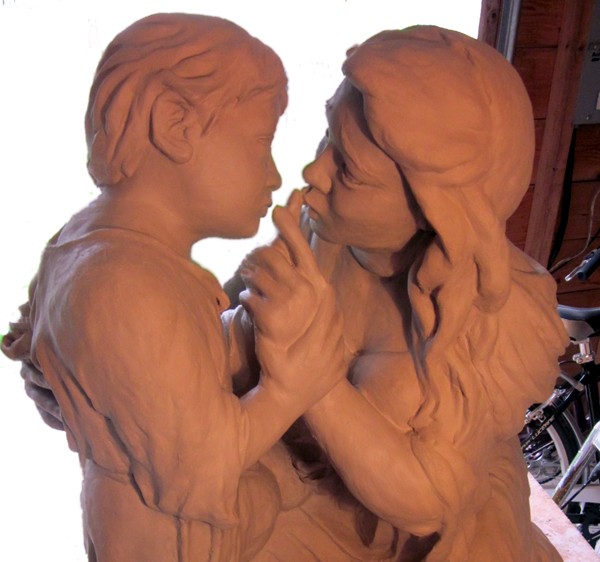
According to accepted legal convention, the first twelve impressions can be considered ‘Original Editions’ and as such they should not be numbered. There is a very good reason for this. As you can see from these series of photos, though Pieta Amare was cast from an original maquette, each subsequent art piece will be unique. It is in the assembly, cleaning and finishing process that artistic nuances are imparted. Expressions, emotions, flowing clothes, gestures of the hands, gentle embrace, a tender kiss. This is all revealed from your hands to the wet clay. Life’s free movement is transferred from you to this earthly mud. Though there may be twelve similar final works, they will each be unique in how they are finished and refined. And in support of this convention, I letter my first 12 using the classical Greek alphabet; α (alpha) through to μ (mu). After this I would suggest breaking the plaster mold.
.
