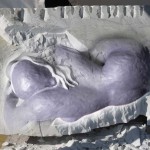
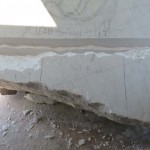
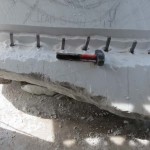
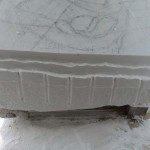
When studying your stone, and planning how to best fit your maquette into the marble, you need to remember that you are drawing in Three Dimensions. This is easier said than done when you consider that you are dealing with an irregular shaped block that most likely has flaws.
The goal is to maximize the marble, minimize the work while doing your best to ensure that a nose does not slide off along a fault line, or dark vein does not run between the eyes.
Marble was once alive, created in part by trillions of barnacles, oysters and crabs. Then folded and pressed onto itself creating layers and swirls or solid tones depending on the mix of original ingredients.
Nothing in life is perfect, that’s part of the beauty. As artist we work within the natural boundaries of nature. We go with the flow. But no one likes surprises.. Kind of like enjoying a thunderstorm without being zapped by lighting.
And so it is with marble. We work with the natural form of the stone while ensuring these irregularities do not destroy our work.
With a human body, it is preferred to have a uniform tone… so random hidden discolorations or darkened veins can be a real problem. (unless you want to carve a sixth chakra or third nipple)
Early on in his career Michelangelo had little choice but to live with the flaws that the stone presented. Baccus, the Roman God of Wine and one of his earlier works, had discolorations that could not be avoided… veins running down his back and stains on the face… To Michelangelo artistic eye… these flaws forever marred the beauty of the piece.
Later, he would have the resources to purchase only the finest purest blocks and could throw away stone that was less than perfect. Michelangelo would spend months choosing the best quality Carrara marble and yet still he would find hidden disfiguring blemishes. These he would have to chip out or work around.
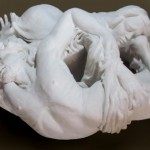
And so, I will be following the same process with my marble and my new Pieta.
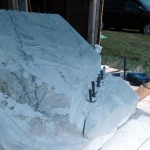
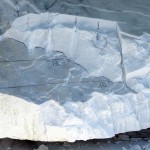
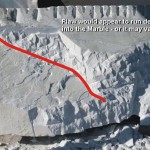
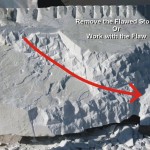
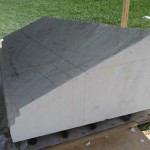
My block has a major flaw running down on an angle. Along with this there are veins of darker harder stone flowing through along the line. I can imagine how this will affect the positioning of the Pieta, but can not be sure until I do a little probing. I have enough room within to rotate the statue with the fault in mind, but I also want to ensure that my Pieta when finished is as large as the stone block will allow. Positioning my design on a 45 degree angle will give me the space to carve a larger than life statue… but how will the flaw run? How deep? Does it tend to crack or does it simply blend in or fade away? Before I get too far into carving I will need to know.
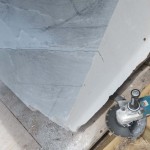
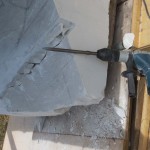
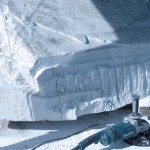
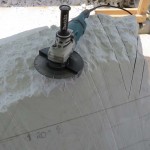
After drawing boundary lines that mark the outside areas of excess stone I can start to explore the seriousness of the fault. The trick is not to make the crack worse… or create new fissures with thoughtless hammering. This is why I start with a clean saw cut. This serves to separate the shock of the chisel from stone that I want to preserve. Especially important when you're not sure how natural fractures are running or are concealed. Once a line is cut, I can hammer away without the danger of bruising or damaging the carving section of marble.
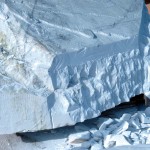
“Feather and Wedges” are the fastest way to split stone… but again, without full understanding of the hidden faults… I wanted to limit the distance of the final split.
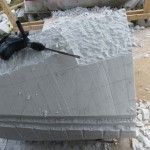
Once I have exposed much of the flaw, it is apparent that it runs deeper and at a more radical angle than I had originally imagined. But it also seems not to run completely through the block. This new information means I have to rethink how I am going to position the Pieta..
Michelangelo considered his maquettes as guides only… he would often change his mind while carving to accommodate unforeseen flaws.
In my case, I am lucky that my maquette will fit neatly as I had planned though I will have to position Mother Mary on the fault line so that if this crack does show through, the line will flow along the curve of her back.
This is why it's best to move slowly and thoughtfully as you start the project. In the end, I have moved the layout almost 180 degrees from where I was to originally start carving. A complete reversal. And the statue will be a little smaller, though still life size. If I had started cutting without testing the nature of the stone, it is very possible that Jesus’ chest or hips could have fractured. Mary’s hips are wider and so if the fault does show, it will follow the curve and folds of her clothes.
Blocking out your Statue - cutting down to size
Up in the mountains of Carrara, while the marble was still at the quarry, Michelangelo would have cut his original block down to size. This was needed to reduce weight and transportation cost. Today, this is less important, and the extra stone that will be feathered away can be used for smaller carvings.
In my last post I probed my block looking for flaws that could prove disastrous if ignored. Now that I have settled on a safe layout for my Pieta, I can continue to cut the extra stone away. Ideally, this will conserve large pieces for later… no sense reducing half the original weight into chips and chunks of expensive gravel.
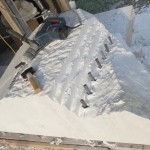
So once again I follow the same procedure… Saw, Hammer & Feather along my demarcation lines.
My Goal is to bring the outer boundaries of the stone down within 2 inches of the final statue. This will give me a little wiggle room to adjust the Pieta one way or another if I run into a hidden flaw or if a nose or finger falls off.
The two inches will also act as a buffer between the hammer, and final carved area. As I mentioned previously, marble is easily bruised, so while I’m using the heavier tools, I want to ensure there is lots of room between the blade and the polish.
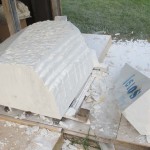
With the marble block cut down to size, and extra pieces set aside for future statues, I am left with a manageable stone that will fit my Pieta perfectly.
Michelangelo’s method
So how did Michelangelo do it? Swinging his hammer against chisel transforming a large singular block into the living Pieta. Revealing the life of Jesus and Mary through the incremental liberation of tens of thousands of marble flakes. Did he just go at it? Releasing the animal, his inner id? Or was there more method and planning?
No one really knows for sure. Michelangelo was fanatical at working in private, chastising anyone who may interrupt his rhythm. There are few who have witness him in action.
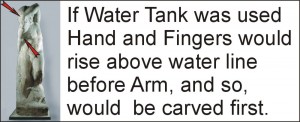
Giorgio Vasari who claimed to have first hand knowledge, a singular witness, has described how Michelangelo would immerse his wax models in water and gradually raise them up wile carving stone as the figure was revealed above the water line. Though this was a common technique of the time, it was unlikely that the master used this method. If you look at his unfinished statues, the torsos are carved first with less attention to the extremities… If an immersion water tank was used, then in the case of the slave, the hand should be carved with either the upper or lower arm (depending on attitude)… as they emerge from the waterline simultaneously.
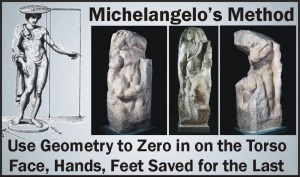
No, Michelangelo is doing something different, he is attacking the body first; the torso the limbs, and then moving on to the extremities; the hands feet and head.
As a classically trained master, he would have been very familiar with Hellenistic Greek sculpture which employing the Grid or Point system. Points would be measured on the original Maquette and then increased in size to the correct proportions to be carved onto the marble. A common method but less than precise. When we look at the perfection that is Michelangelo’s work, clearly he did not rely on a simple Point System.
So what method did this secretive master employ?
Did Michelangelo stumble on a new invention? Did he jealously keep this radical new method close to heart; not wishing his fellow sculptors from mastering the new tool? Competition was fierce for scarce lucrative commissions.
Just before Michelangelo’s time, Leon Battista Alberti, a Florentine architect invented a new tool to copy statues; the Finitroium. What is in today’s standards a very simple geometric tool, was during the early Renaissance a great leap forward in combining geometry with art. Just as a navigator could fix the location of the ship at sea using angles and bearings, so could an artist fix the location of a model within a block of marble using fixed angles bearing and distances. Simple and very precise. Alberti’s invention, was just at the right time and place for the young Michelangelo.
In reality, there would be a combination of methods, starting with the generalized Greek Grid System to get the general layout of the stone. Followed by the more precise geometric Finitroium to ensure the statue rang true to the visionary maquette. Finally, to finish off the detail, the master would switch to callipers and his personal artistic flair found in his own hands.
But it’s the Finitroium that I will be using as I continue to block my Pieta. I want to ensure that I stay steady and true to my original design, despite that my marble sits off centre, askew and with irregular sides. This is where a simple nautical tool will ensure my chisel glides the contours of my Maquette in spite of my eyes losing perspective.
Securing the protractor to the centre of both the Maquette and Marble, I can now easily convert bearing distances and depths. The final statue will be life-size and so I will need to increase the model by 1.3 percent, as reflected between the red and blue units of measurement. I leave a two unit buffer as a margin of error and so I only remove 8 units but note that there is 10 units of actual depth.
The beauty of the geometric system is that it can be worked on the fly, quickly taking measurement, confirming depths. In no time, you have safely removed a significant amount of stone without the worry of removing too much.
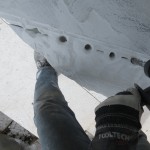
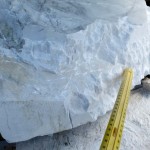
Also, math don’t lie. When you're up close and personal laying on your stone holding over your head a grinding wheel, often you can start to loose focus. (OK, exaggeration for dramatic effect) As you can see from the photos above, with geometry, a depth of 12 units looks different from left to right. But sure enough once the bubble is placed on it, the line is true, its my perspective that is off.
The difficulty with “artistic realism” is it’s a real challenge to keep it real.
It’s much easier to just go with the flow, release your inner id and carve beautiful flowing shapes. Nothing wrong with that. But if you’re in search for realism in the renaissance tradition, then geometry will ensure your tools run true.
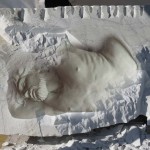
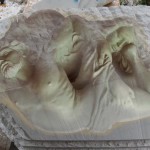
With Michaelangelo method, the use of geometry to guide the cuts and chisel blows, I now have reduced the large irregular marble block down to within a few inches of my planned Pieta. This is only the first and easiest step. More of a craft then art really. Michaelangelo had the budget and support to hire apprentice sculptors who would have normally chipped away reducing the stone down to this stage. As a master, Michaelangelo's time was invested in the unique artistic expression of the original maquette, and then after the blocking was complete, the master would coax the flesh from the stone. His genius was reserved for final touch that would form the muscles and tease out inflections.
For me, I am happy to look back and see how my Pieta designed fits within the blocked marble. I have the inch or two needed for a buffer to adjust for future mistakes, flaws or last minute inspiration. It's time for the true sculpting to begin.

