Michelangelo would normally not have created plaster castings of his maquettes. He would either fire the clay as is, or simply allow the sun to dry the template.
Under protest, he was commissioned to create a bronze sculpture of Pope Julius ll, and complained in writing to his family how the process was exceptionally challenging. The Maquette he used was full size and weighed almost as much as the final bronze.
Plaster mold making is still a very time intensive proposition. Tremendous care and attention must be applied to how each piece will fit together and release apart.
The final puzzle must lock into place and be able to support its own weight and the weight of the clay pushed or poured inside.
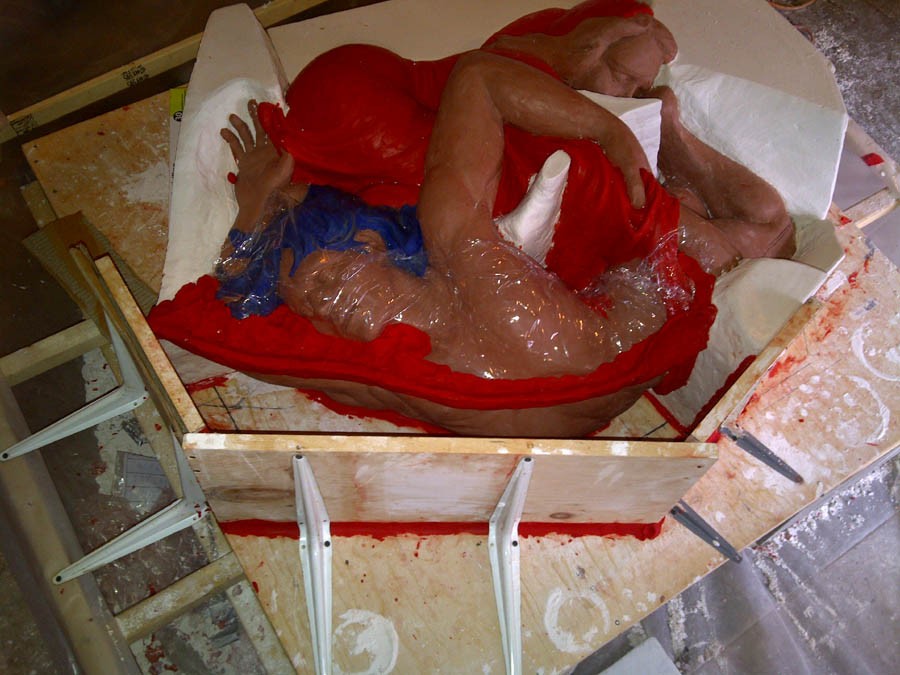
In the case of my Pieta, the combined material weight could exceed 1000 lbs. The work platform will need to be sturdy and of sufficient area to build wooded forms and contain any plaster spills. Once my Maquette is centered on the decking, a close examination will be needed to plan each piece of this mold…

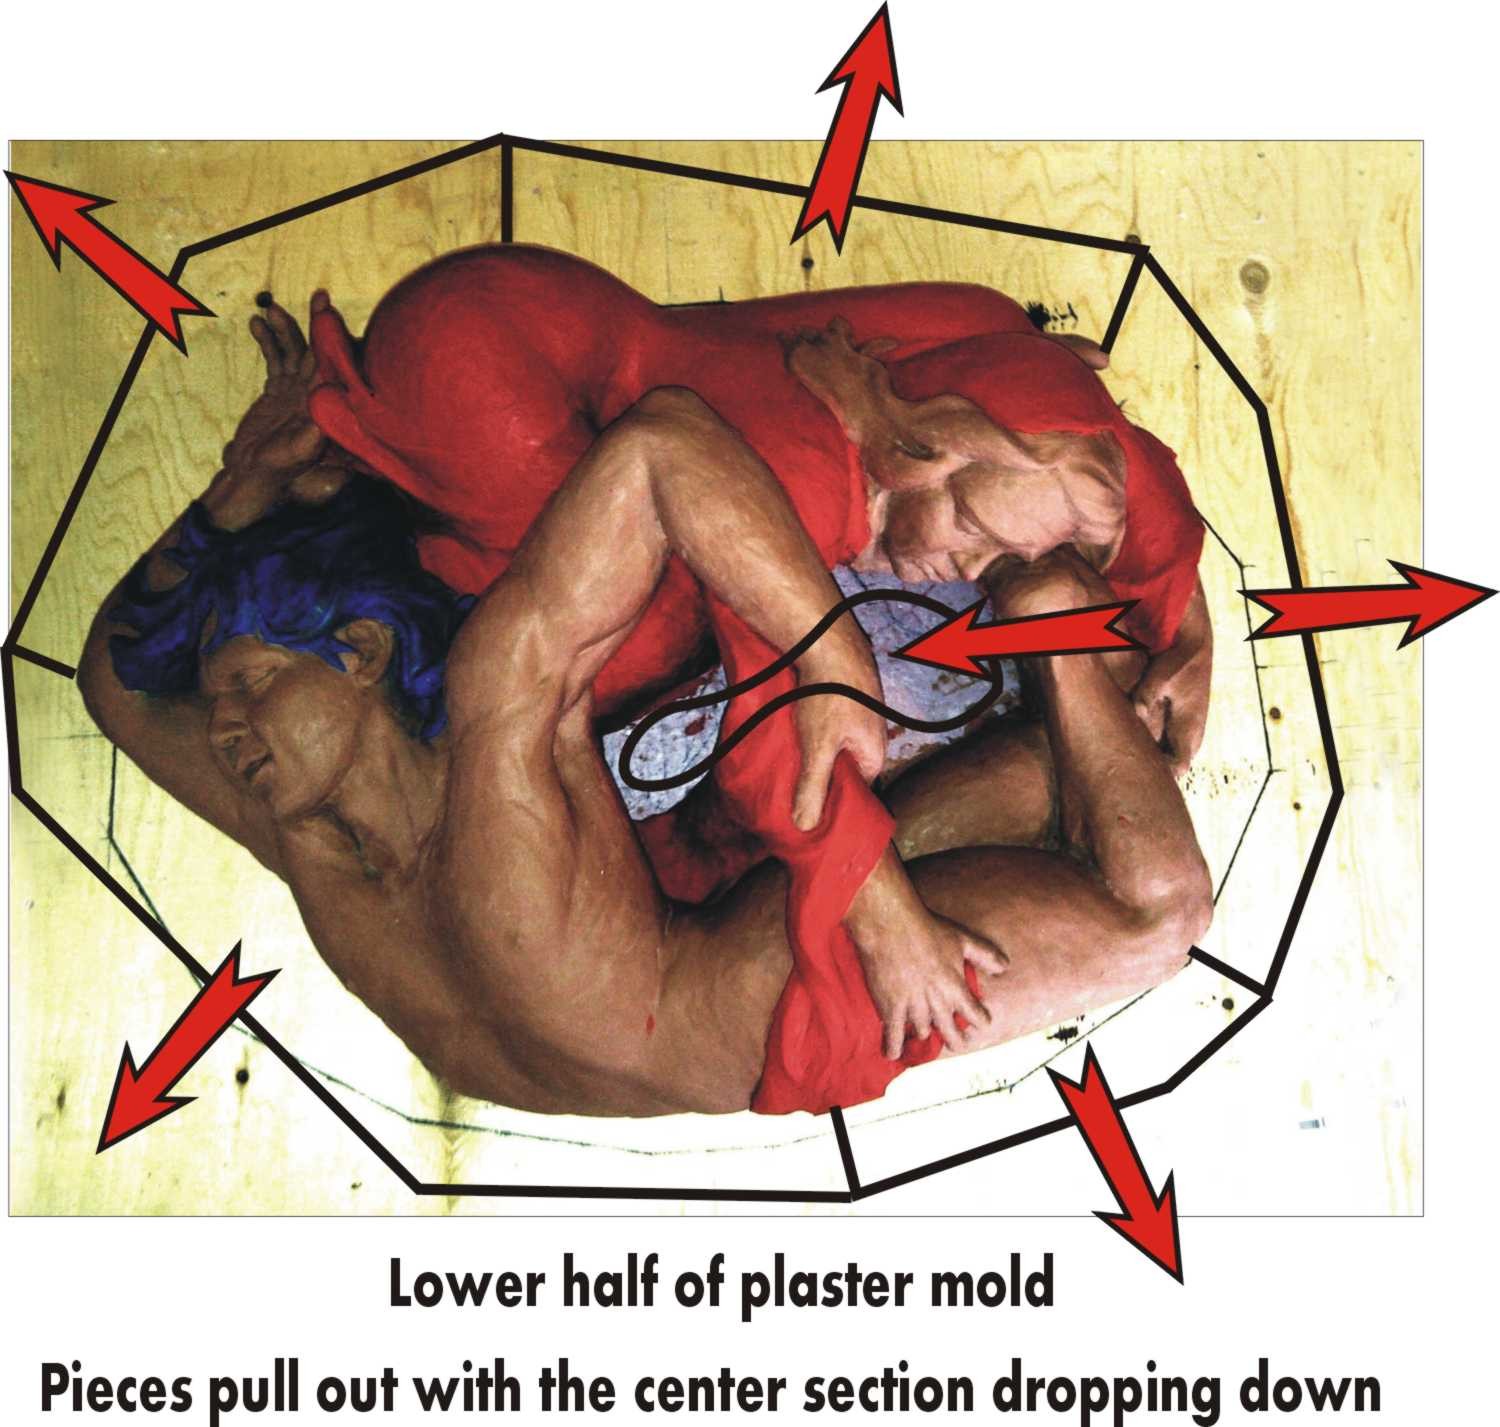
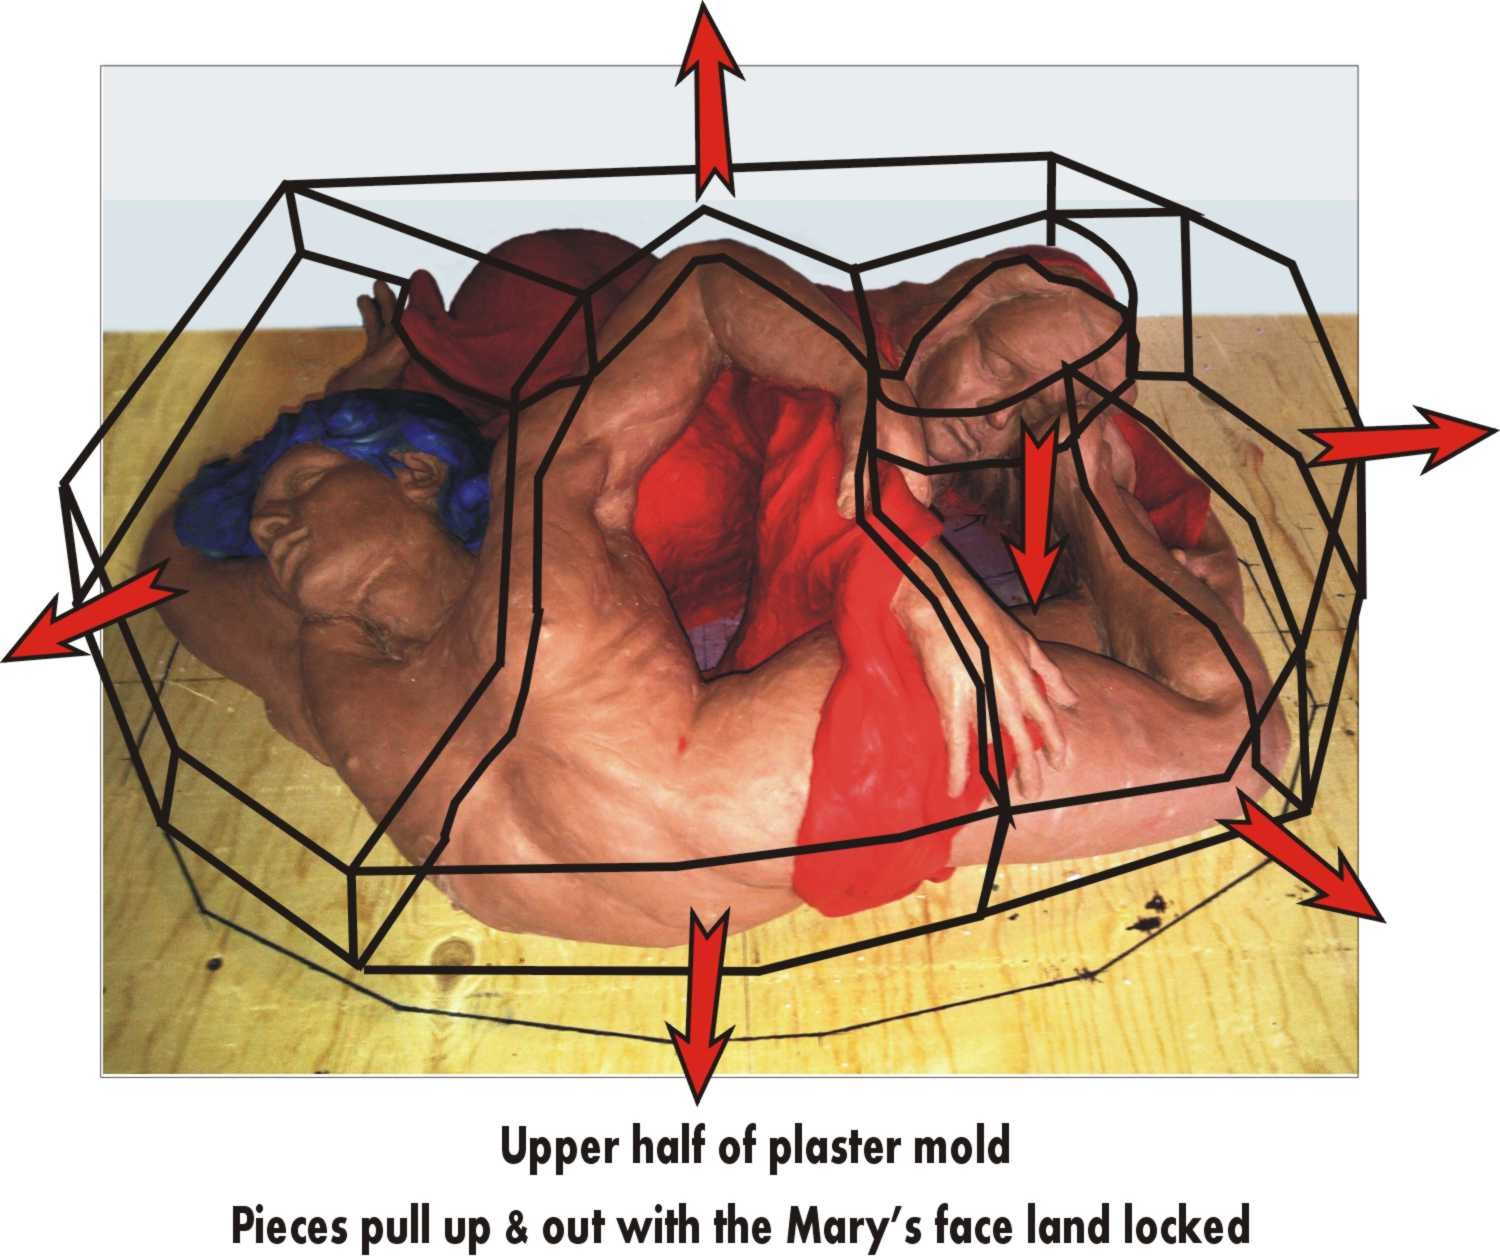
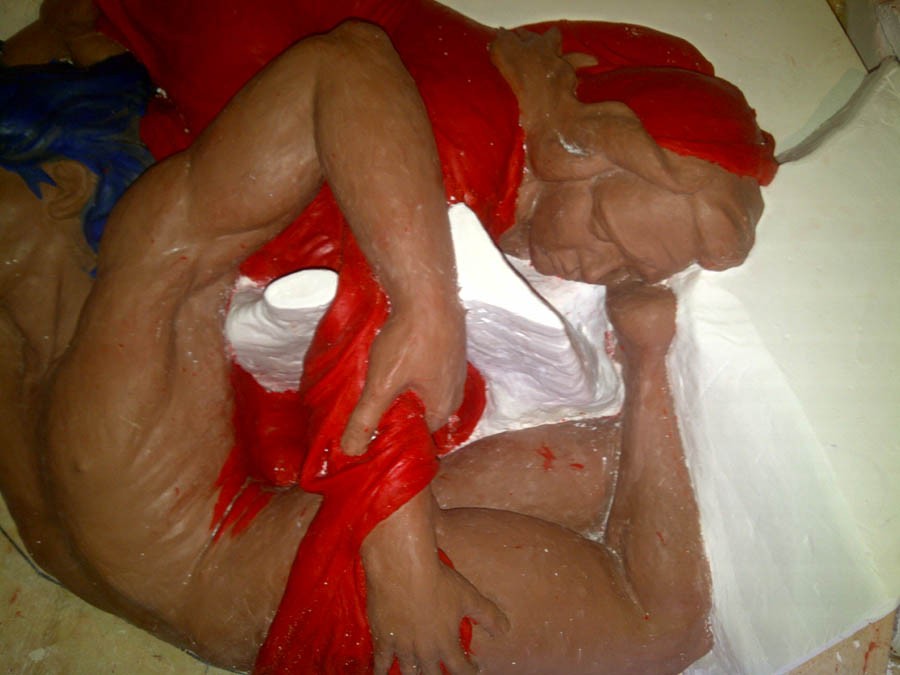
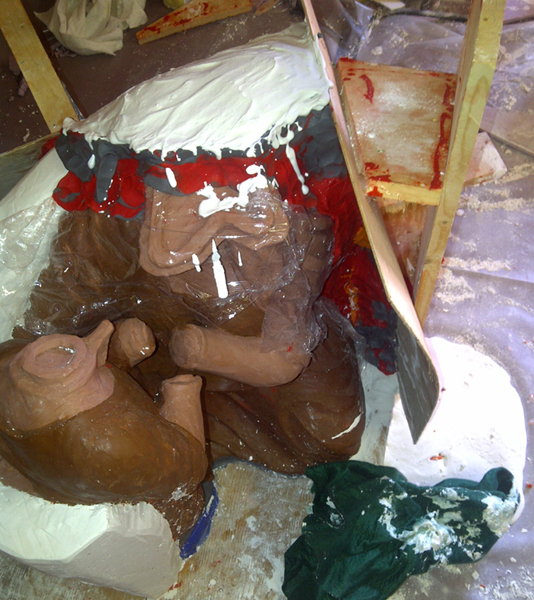
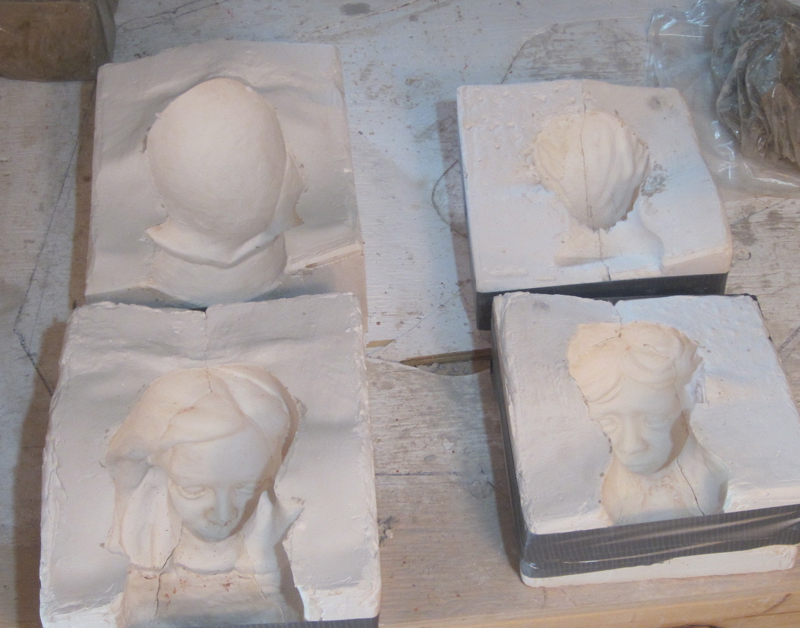
The mold will need to pull directly off of the statue, and so there can not be any undercuts. If the plaster cast is tucked behind a fold or curve of the Maquette, this portion will be shaved off as the piece is pulled away. Or worse, the piece will be locked in and unable to be released.
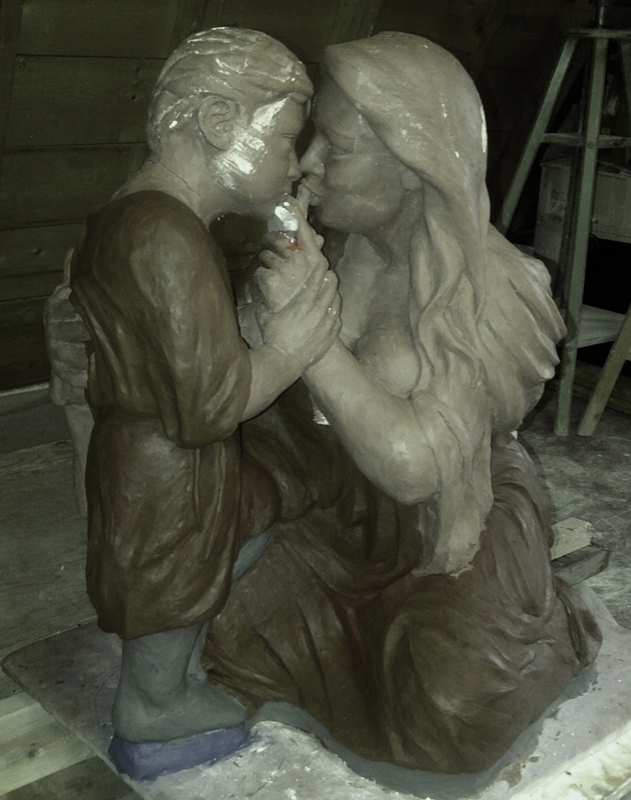
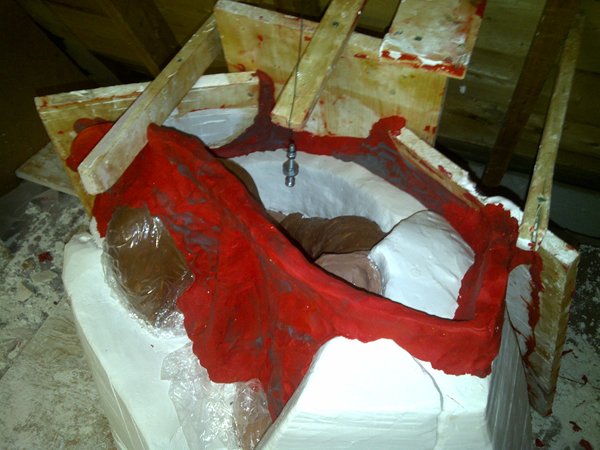
Mary’s face, for instance, is resting on Jesus’ foot and is tucked behind her arm and his hand. In order for the plaster mold to be able to be pulled off and away from her face, there will need to be room for the piece to move out several inches. In effect, I will need to have additional plaster sections of this puzzle to drop down or slide away to allow space for the face segment to move off.


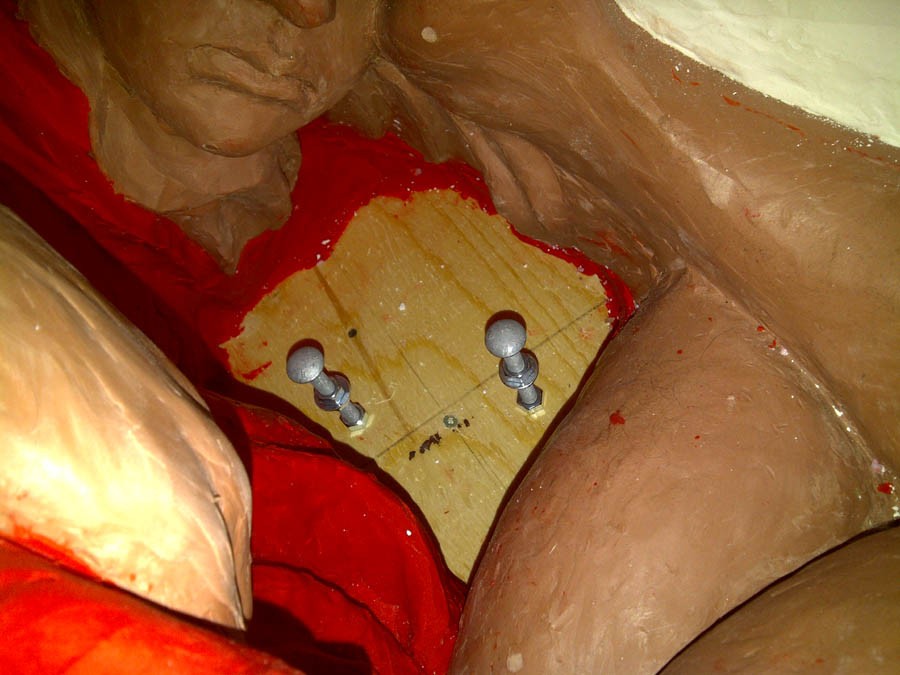
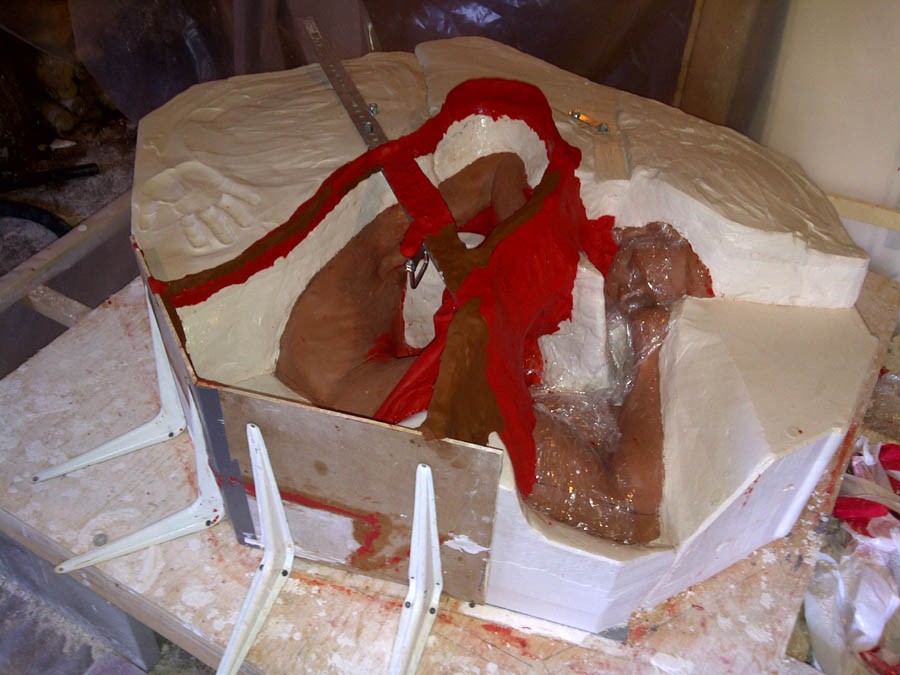
As you will see in upcoming chapters, the final mold will be inverted and then stuffed with clay. Half a ton will need to spin and role without moving or sliding, and so I will need to plan the location of bolts (see tools of the trade) that will be locked within the plaster and will attach to an electric pulley; all needed to help hold and lift the pieces.
This planning stage is straightforward, but critical. Plan in advance the location of the pieces, and ensure you have all the tools and supplies needed. Once you start adding water to plaster, it will be too late.
Plaster is one of the oldest man made building materials, after fired Clay. Dating back almost 10,000 years, it was first used in Jordan and then expanded throughout all ancient cultures; from Egypt to China.
Michelangelo was very familiar with this medium, used to create his brilliant fresco the Last Judgment, and the ceiling in the Sistine Chapel.
As an artist, I can't help but feel awe inspired as I continue to use this material following in the footsteps of a thousand generations.
Before getting started pouring the mold for the maquette, make sure you gather all supplies in advance and have them ready at hand. (see Tools of the Trade)
You will naturally pour one section at a time. Each piece will have a defined border that you will mark with an indelible pen or scribe with a knife.
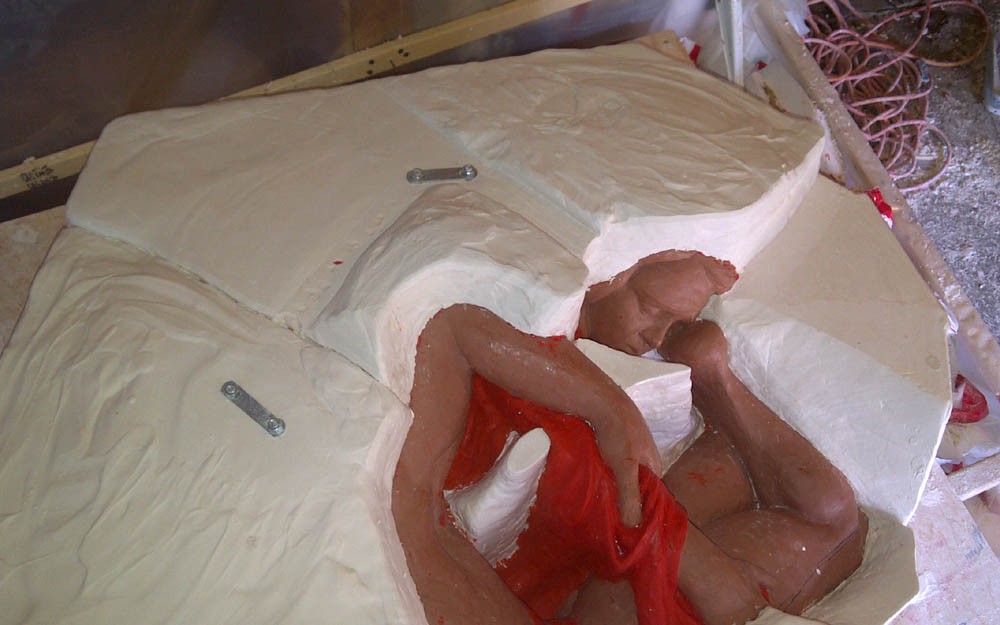
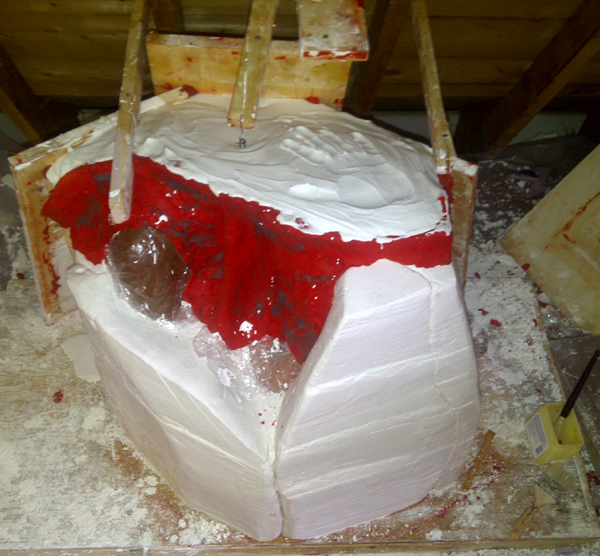
Look down a straight edge to see if there are any “undercut areas” this can now be filled in with plasticine. Remember that if your plaster form wraps behind your Maquette, then later, as you separate the mold, the clay behind this undercut will be gouged or clawed away. Do your best, but remember that clay is forgiving and you can repair mistakes later on in the process. As this will be a very heavy piece, I have planned for bolts to be cast within the plaster. This way, later I will be able to attach a winch to help lift the weight.
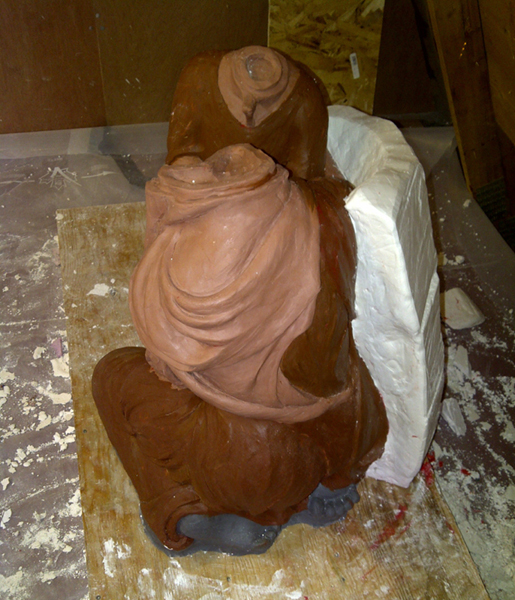
Your wood forms, having been pre-cut, will be fastened to the workspace deck using shelf brackets and “Robertson” screws.
Warm your plasticine in a used electric skillet and then run this paste into the edges between forms and the deck of your work area.
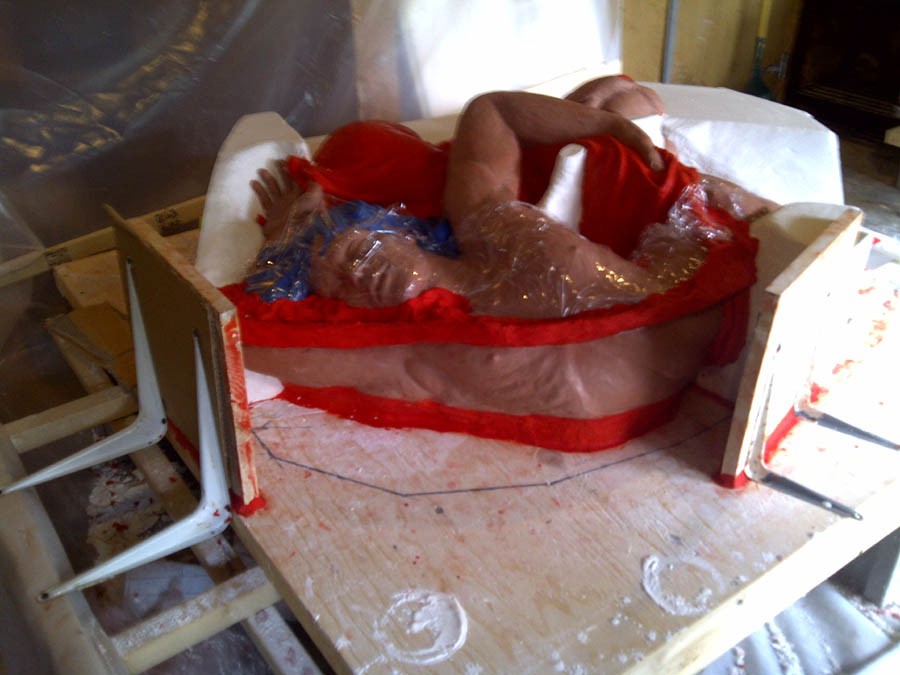
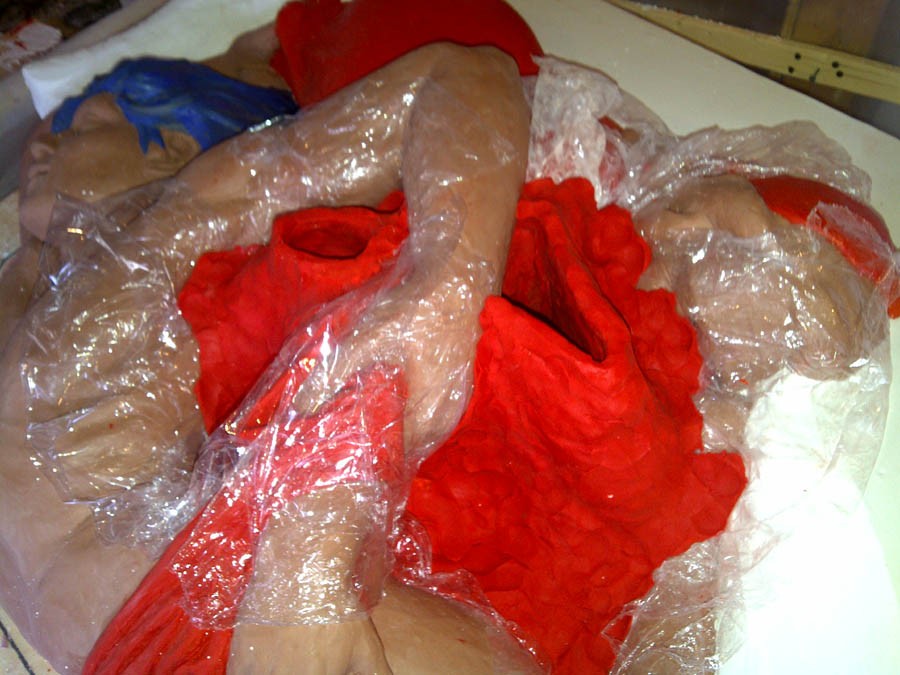
To avoid a mess, spills and sticking, protect the adjacent area with plastic wrap. Soft plasticine will be used to follow the contours of your statue and provide a watertight seal against the wood form. (just make sure that the plasticine and your Maquette are separated by the plastic wrap or they will stick together)
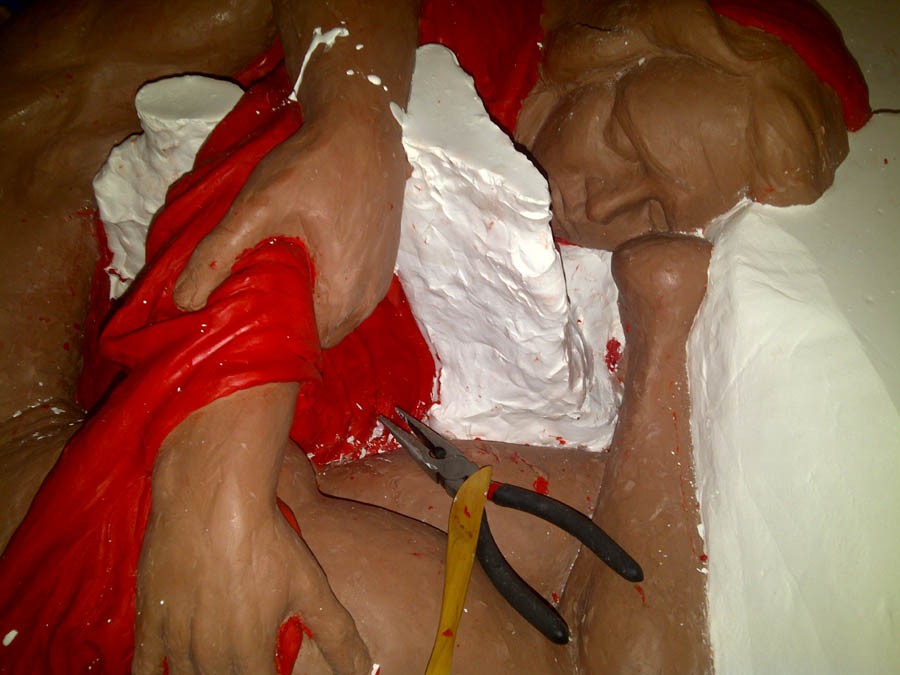
Coat all exposed previous sections of plaster with brushed on Vaseline. This will ensure that pieces will separate once finished. (without Vaseline, this 12 piece mold would end up as one solid block of plaster.) Plaster will not stick to modeling clay, or plasticine, but bonds permanently to itself.
As you become familiar with the weight of liquid plaster, you will adjust the thickness and strength of your forms… When I started I had several “Blow Outs” and there is nothing worse than a gallon of plaster slipping out over your statue and onto the floor. So always construct your form as strong as possible.
Now you're ready to mix and pour. (remember.. you must use a mask and eye protection)
If you click on this link, you should be able to download a PDF with all the mixing details. But, don’t bother, art is all about hands and eyeballs.
From my experience, the best mixture is 73 parts water, to 100 parts ‘No 1’ Plaster…
So, to make life easy, mark two equal sized buckets - Fill the first with 5 measured litres of water (mark the shadow line “5 Plaster”) - and then Fill the second bucket with 3.65 litres of water (mark the shadow line “3.65 Water”)
A third larger 10 litre bucket will be used to mix. Sift the plaster into the water letting the water naturally absorb the powder. When done correctly, you should see an island slowly submerge into the milky water. Once all the plaster has been added and is under water, wait a minute, and then mix with your hand feeling for any lumps. Within approximately 5 minutes of gently stirring, the water will resemble milky coffee cream and will be ready to pour.
Remember to only mix as much as you can pour in 5 minutes or less. So it is important to have an idea of how much plaster is needed.
Calculating your volume is easy… length x height x width… great, if your sculpture is a cube, but not for the Pieta… so I normally have two or three pre-measured unmixed loads ready to quickly combine and add.
The plaster will cure in a hour or less, depending on water and air temperature. However, it will become impossible to work with quickly, in a matter of minutes… If you need more time, then use cold water. But 20 degrees celcius will yield the best results.
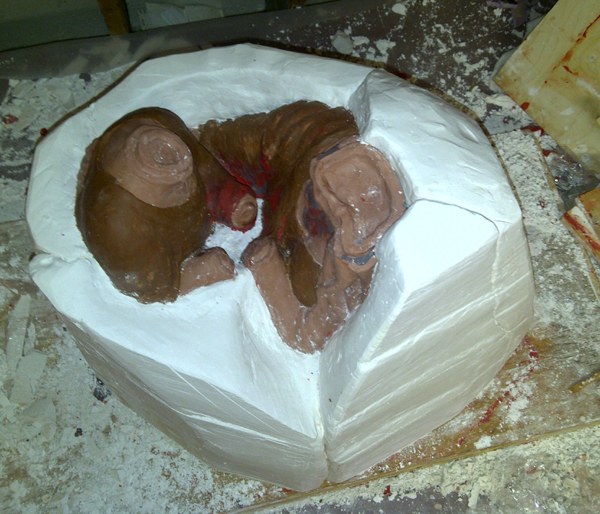
As plaster cures, it will heat, once the temperature has cooled, it will be ready to have the forms removed and cleaned. This is the best time to smooth out the surface, easily done with wooden carving tools. Once the irregular surface has been worked, then let the section dry overnight before repeating the process on the next piece.

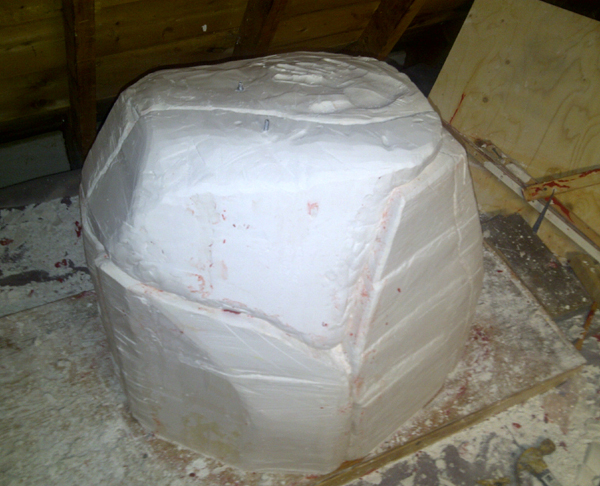
Once done, (several weeks later), you will have a large multi-piece plaster block. This will need to dry in a well ventilated room for at least two more weeks or until dry to the touch. If the block feels cooler than the ambient air, it is still wet. If you prematurely try to open the mold while it is still damp, it may crack or crumble.
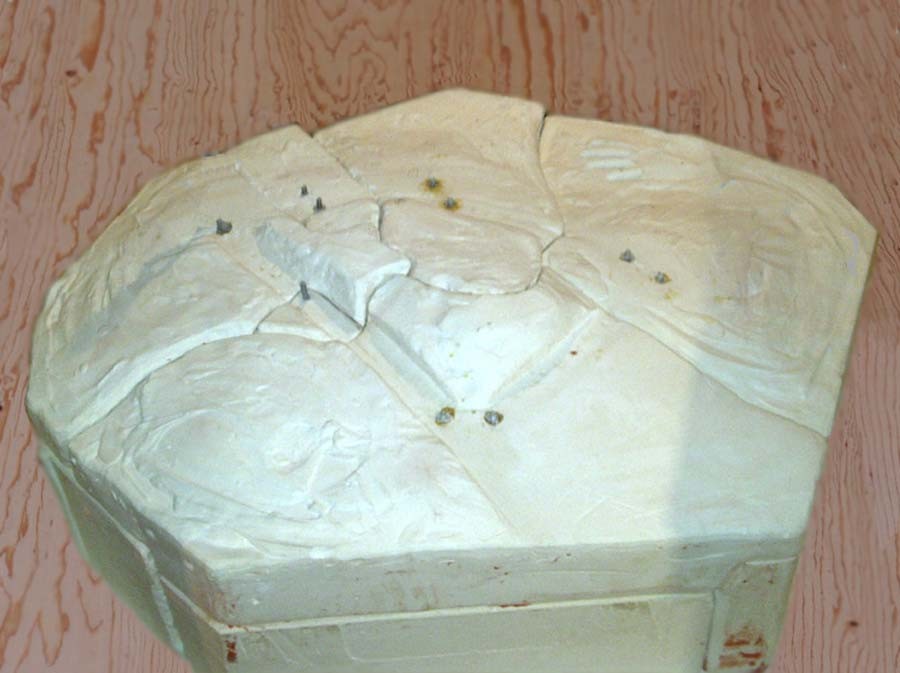
My Pieta required over a month to dry
Committing to the Plaster Process
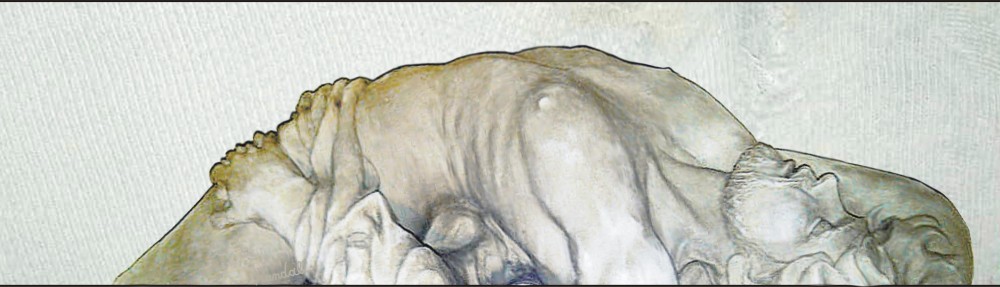
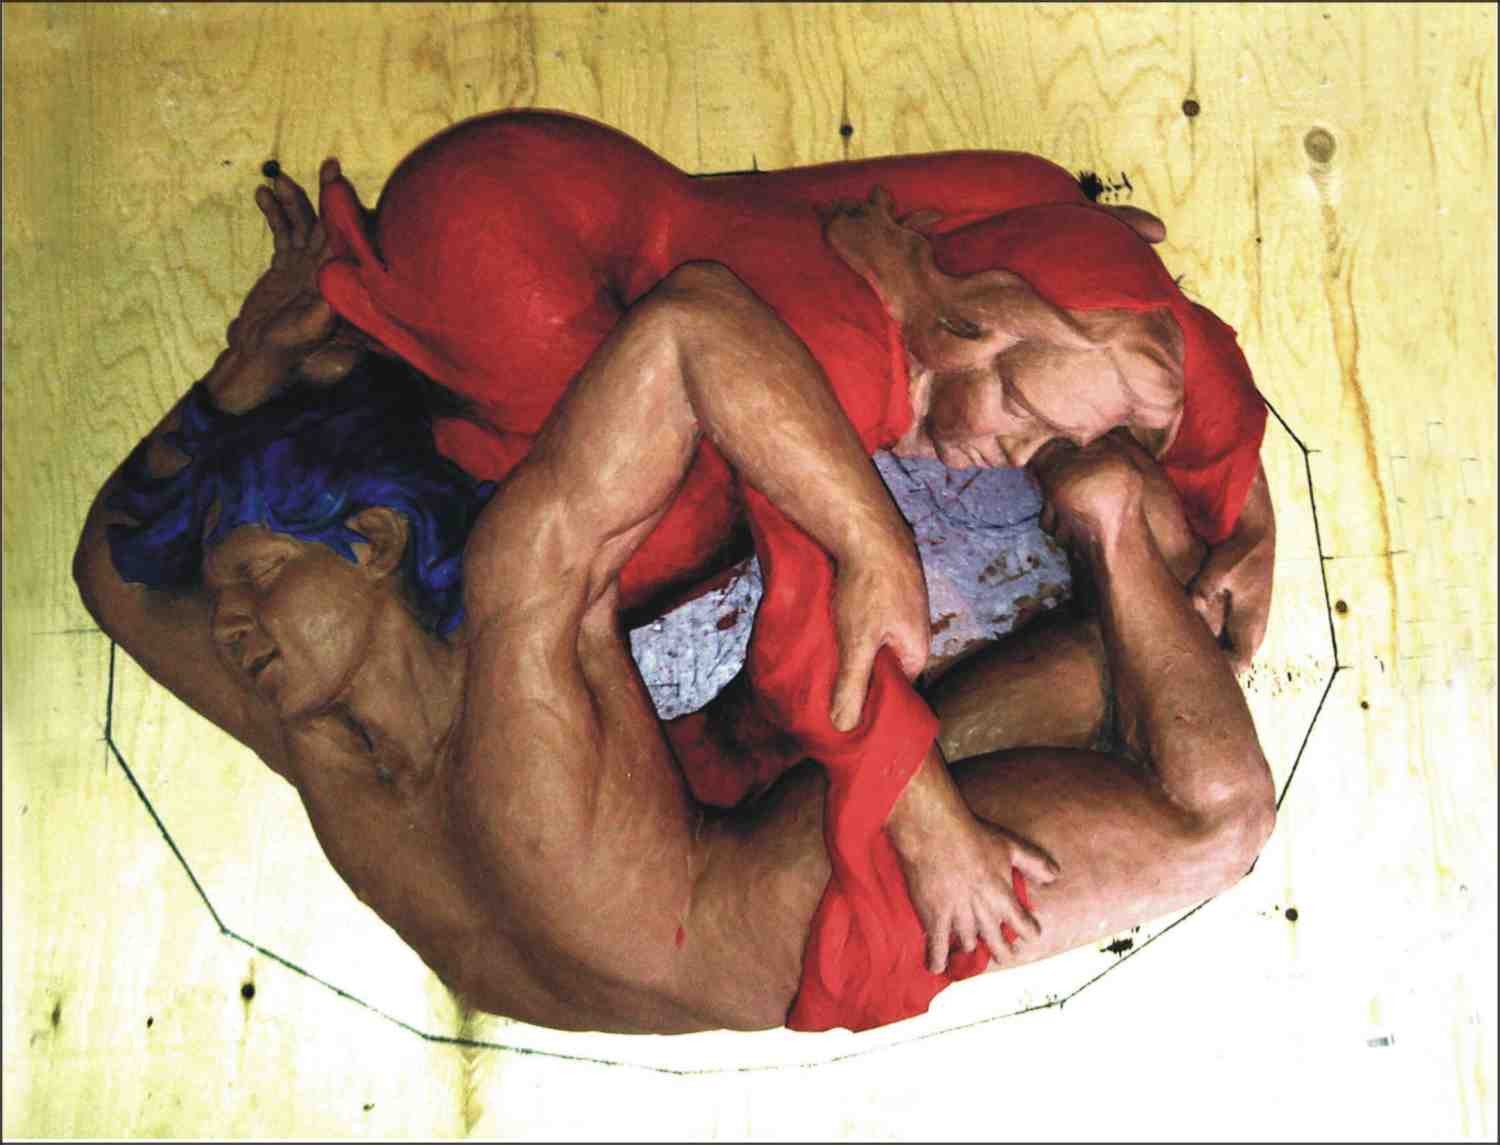
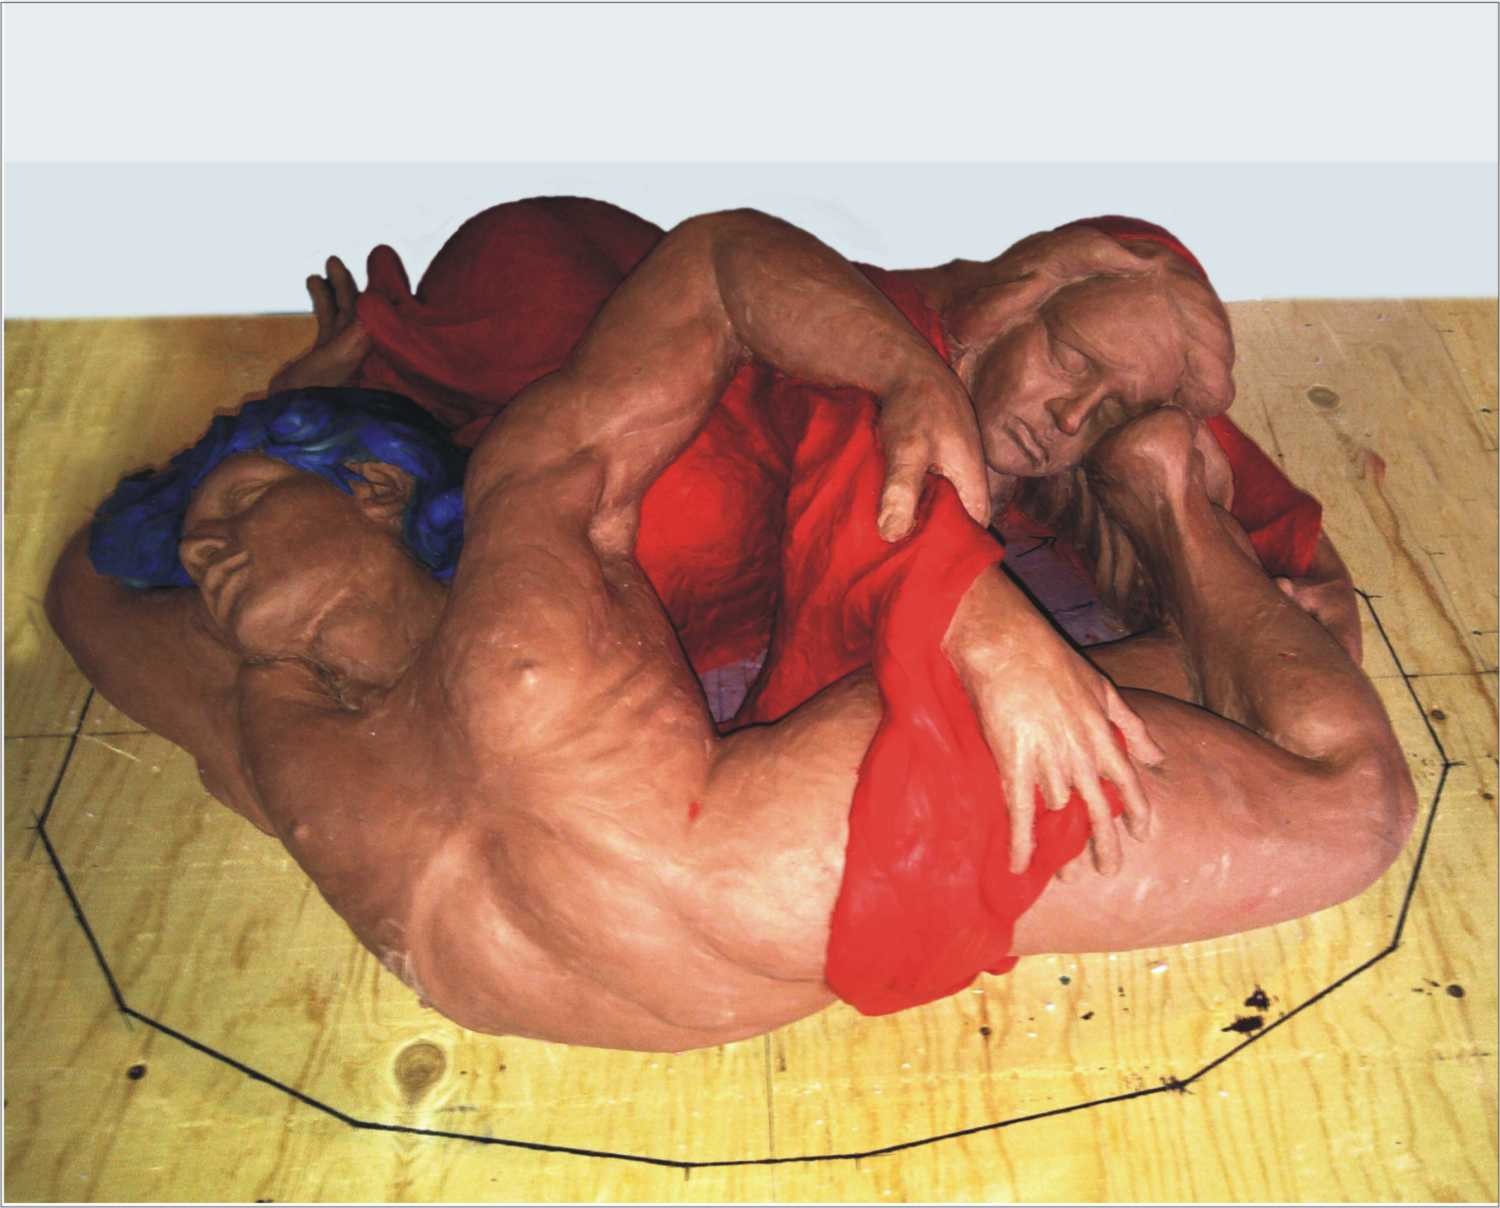
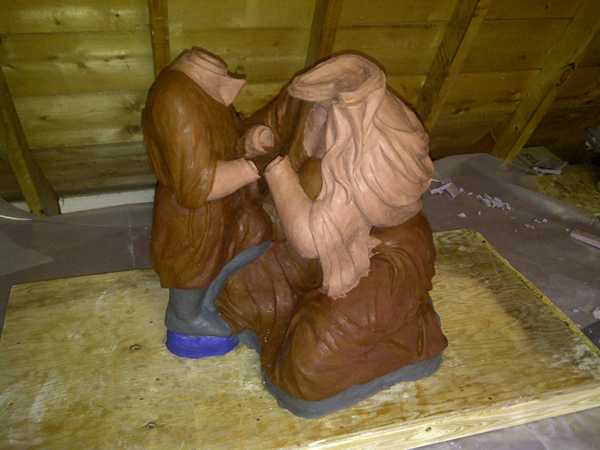
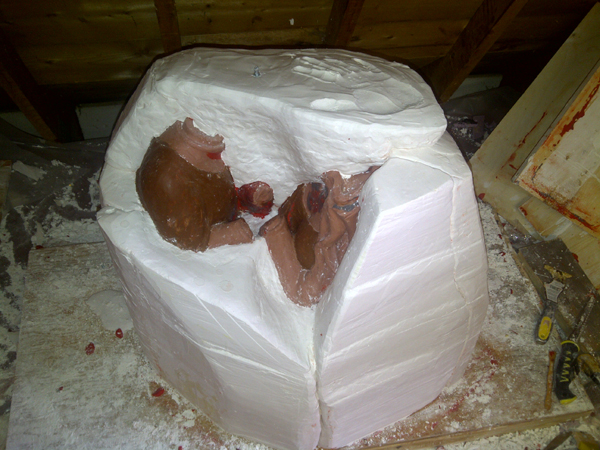
I had posted earlier that Michaelangelo loved the Pieta Allegory. And so do I. With my second Pieta Amare, the plaster process will prove very challenging as both Mother and Son are facing each other with their hands clasped together and sandwiched between them. For this project, I will need to work separately on the body, face and hands. Then reassemble the pair after the clay has been cast.

With a design as complicated as Amare, there is the temptation to skip the plaster completely and not worry about making multiple statues… Michalangelo would only create the Maquette from clay or wax without any thought to preserving his miniature masterpieces. However, he had wealthy patrons who could cover the costs of his work. Michalangelo was not your typical starving artist. For us mere mortals, we have to make a living and generate marketable art. It may come as a shock to some just how expensive art supplies can be. Between the hundred plus pounds of modeling clay, dozens plus bags of plaster, and boxes of natural clay, combined with studio space, building materials and electric kilns and tools, the final clay statue will have a hard cost of well over one thousand dollars. Its no wonder that many skip the making of clay statues and move directly to Marble. After all, The marble block will also be over a thousand, so why double your costs…. Quite an investment. But beyond the cash outlay, there is a more serious investment, and that is your time… so much time. Clay statues can be re-cast and so have a better chance of recouping your cost... in for a penny, in for a pound. And so the Plaster mold is the practical solution to production. For more details on this, jump to the beginning of my chapter on “pouring your plaster mold”

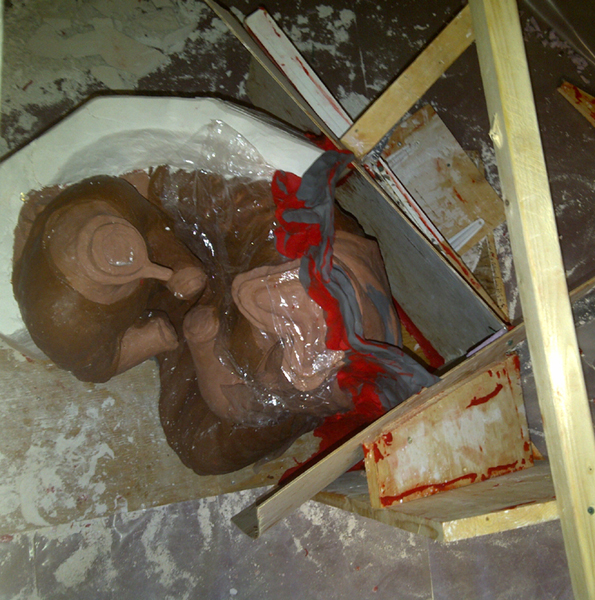
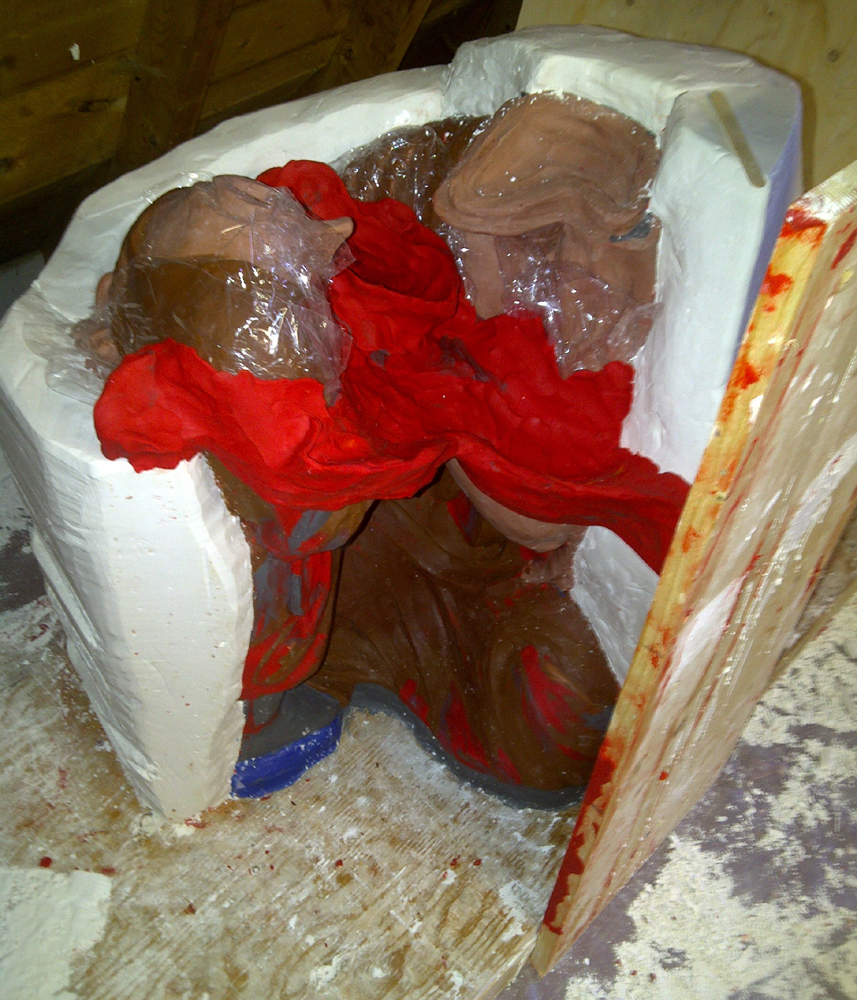
Liquid Plaster is very heavy especially when poured into a tall mold. You would be surprised how quickly the entire contents of your section will spill out under the pressure created by its own weight. All you need is a pin hole and your entire project is lying flat on the floor, a rapidly hardening pancake. When I started I had a relatively clean workspace.

But its hard not to escape at least one blow-out. Always have a cloth ready to apply pressure to the leak when it sprouts. Just like slapping a gauze on a bleeding wound, the cloth will absorb the liquid and eventually will help the hardening plaster stick and hold. However, despite your best efforts, a messy floor is inevitable.


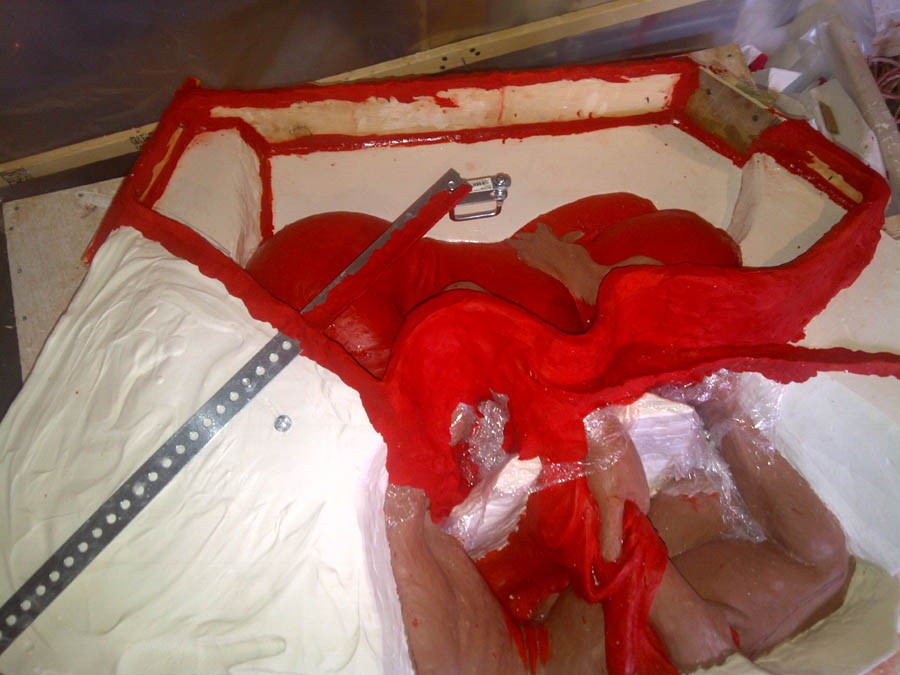
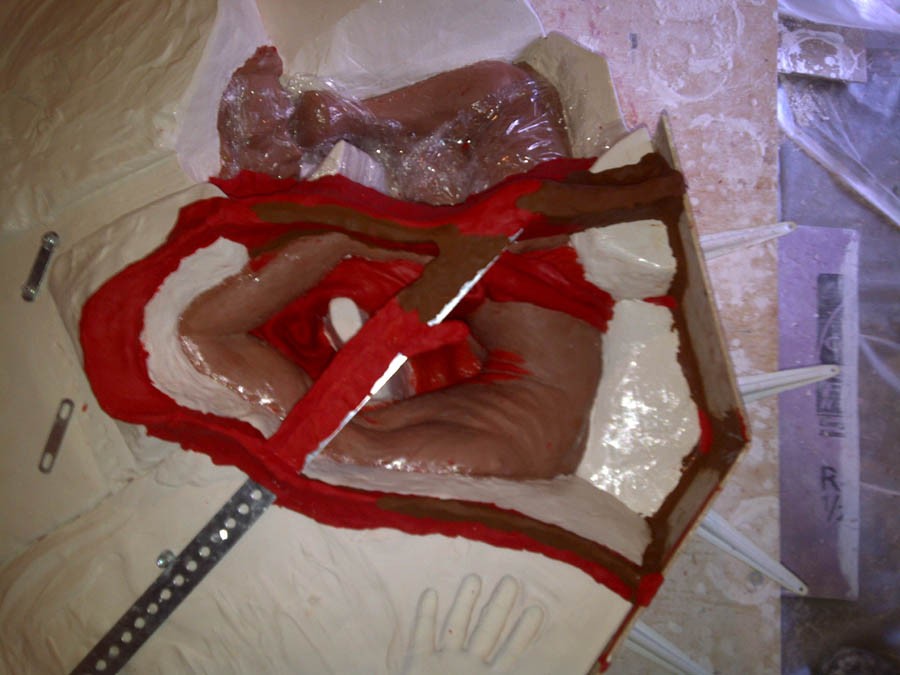
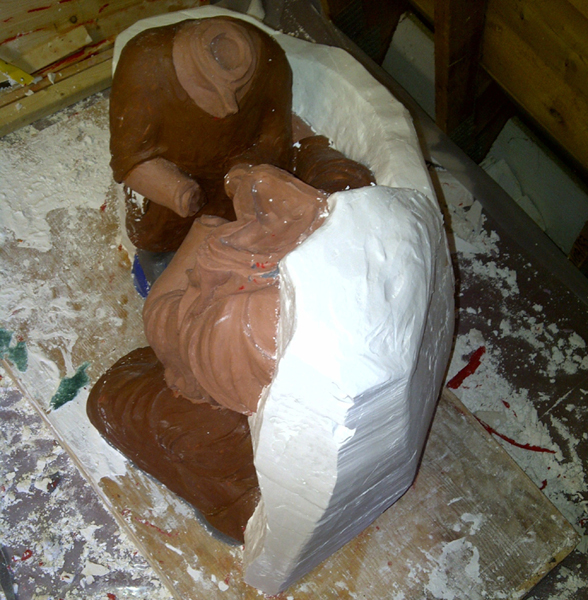
Working around the statue, each section is poured into the next with vaseline ensuring a clean separation. Plasticine is an inexpensive and very pliable medium to build up walls and seal gaps between boards. As each section has been designed to slip away from its neighbour without being locked by undercuts, each has a unique and irregular shape… plasticine really helps with modelling these sections.
Be cautious with over relying on the plasticine wall… if it gives way , it’ll give in a big way. Unlike wood planks screwed together tightly… this kids stuff has a tendency to lift up and blow out as one piece. So build your wall like it’s the Hoover Dam.

Rely as much as possible on wood framing to hold back the flood… The planks can provide a supporting structure around the plasticin adding compression and holding back the pressure.


In the end, Pieta Amere required 18 separate pieces to complete the mold. At best, you can expect to pour one section per day, so in reality, you should plan to invest a full month to the making of your plaster mold. Each piece is heavy with water, and so with the dehumidifier running, and gentle heat I have to patiently wait for the mold to dry.
[whohit]tocathedralpouringplaster[/whohit]

Pingback: Eve of a Dream Plaster to Fired Clay | Pieta carved in marble