Eve of a Dream Plaster to Fired Clay

Randall Eve of Discovery randy bezeau thumb
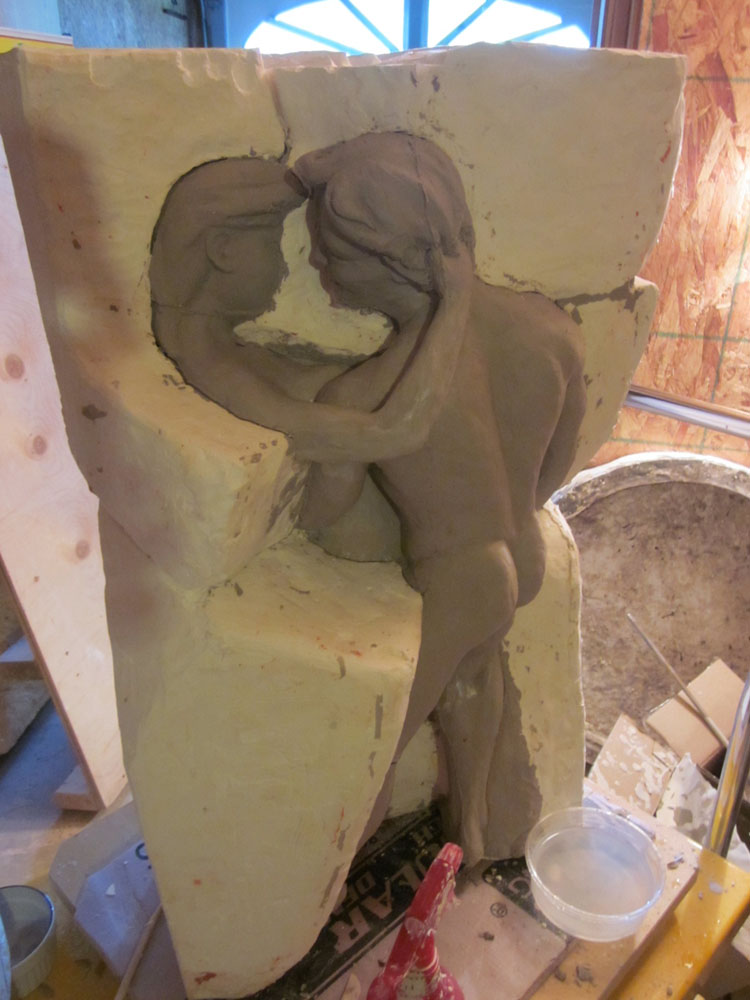
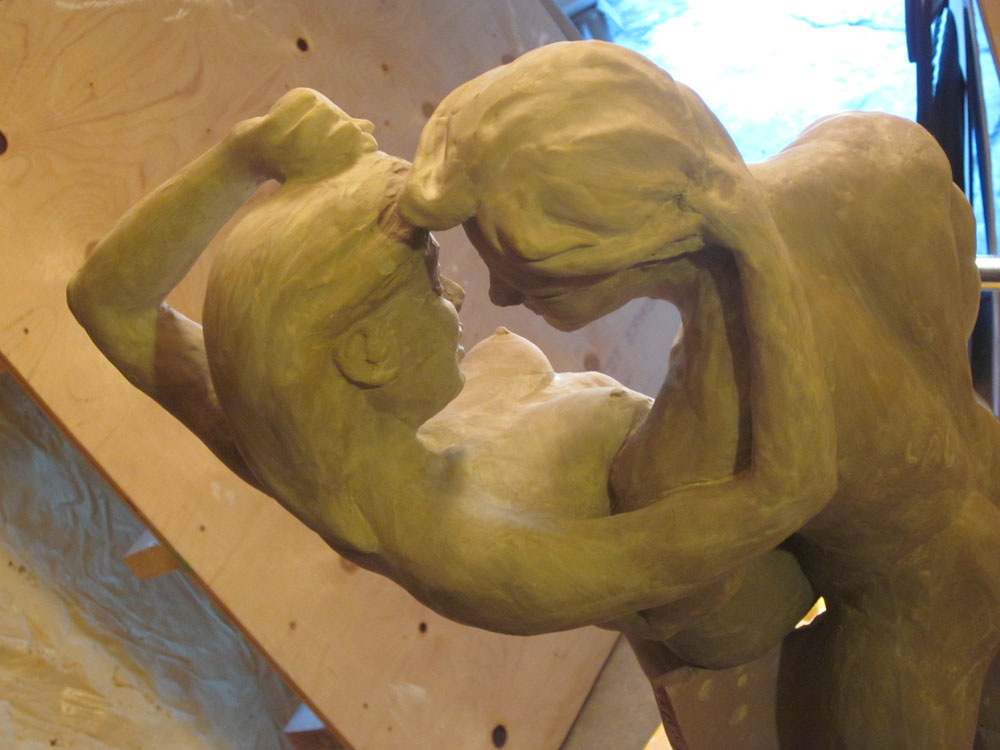
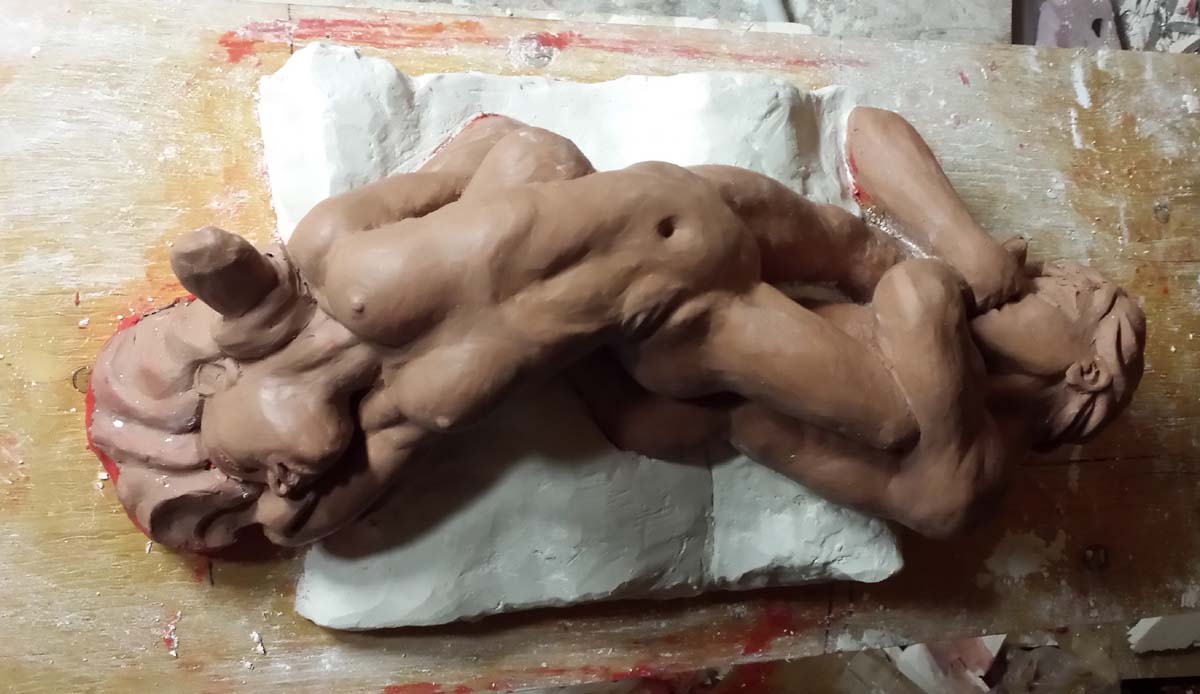
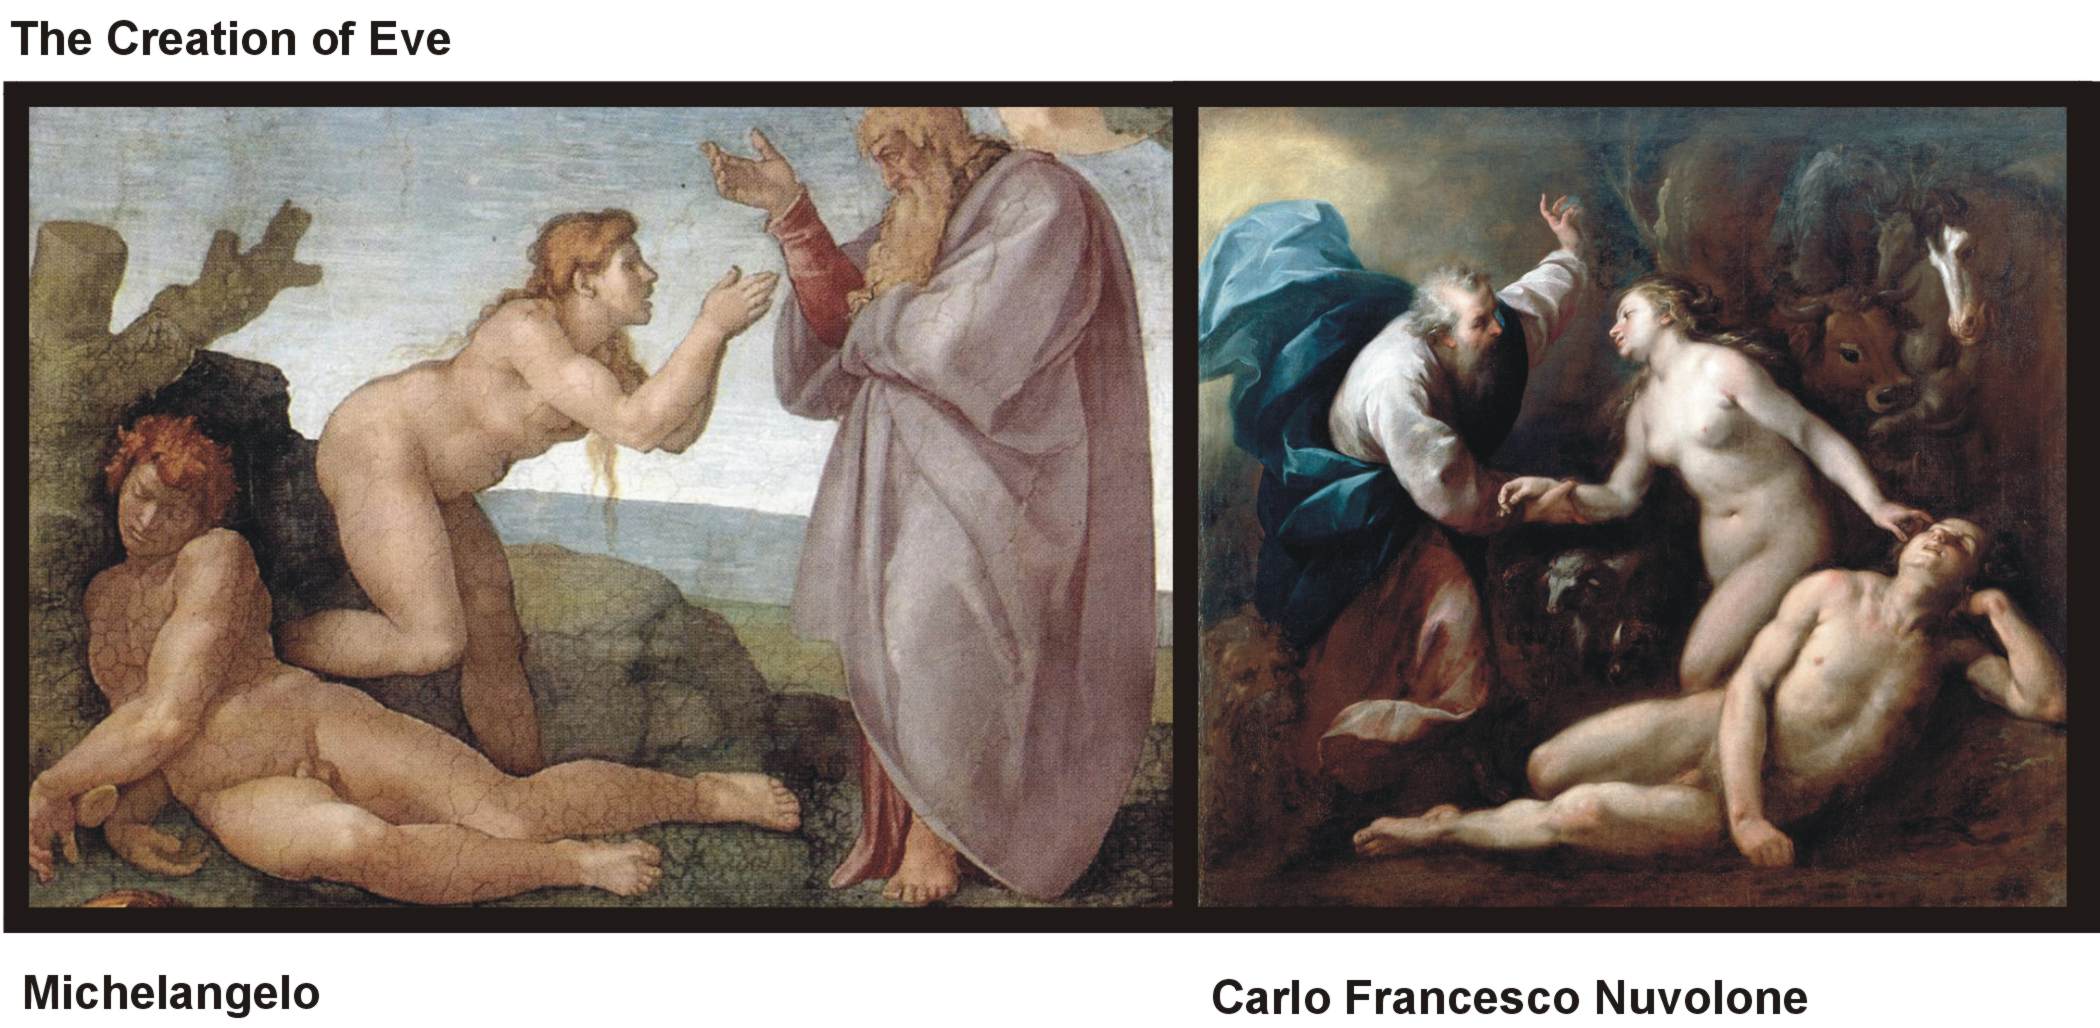
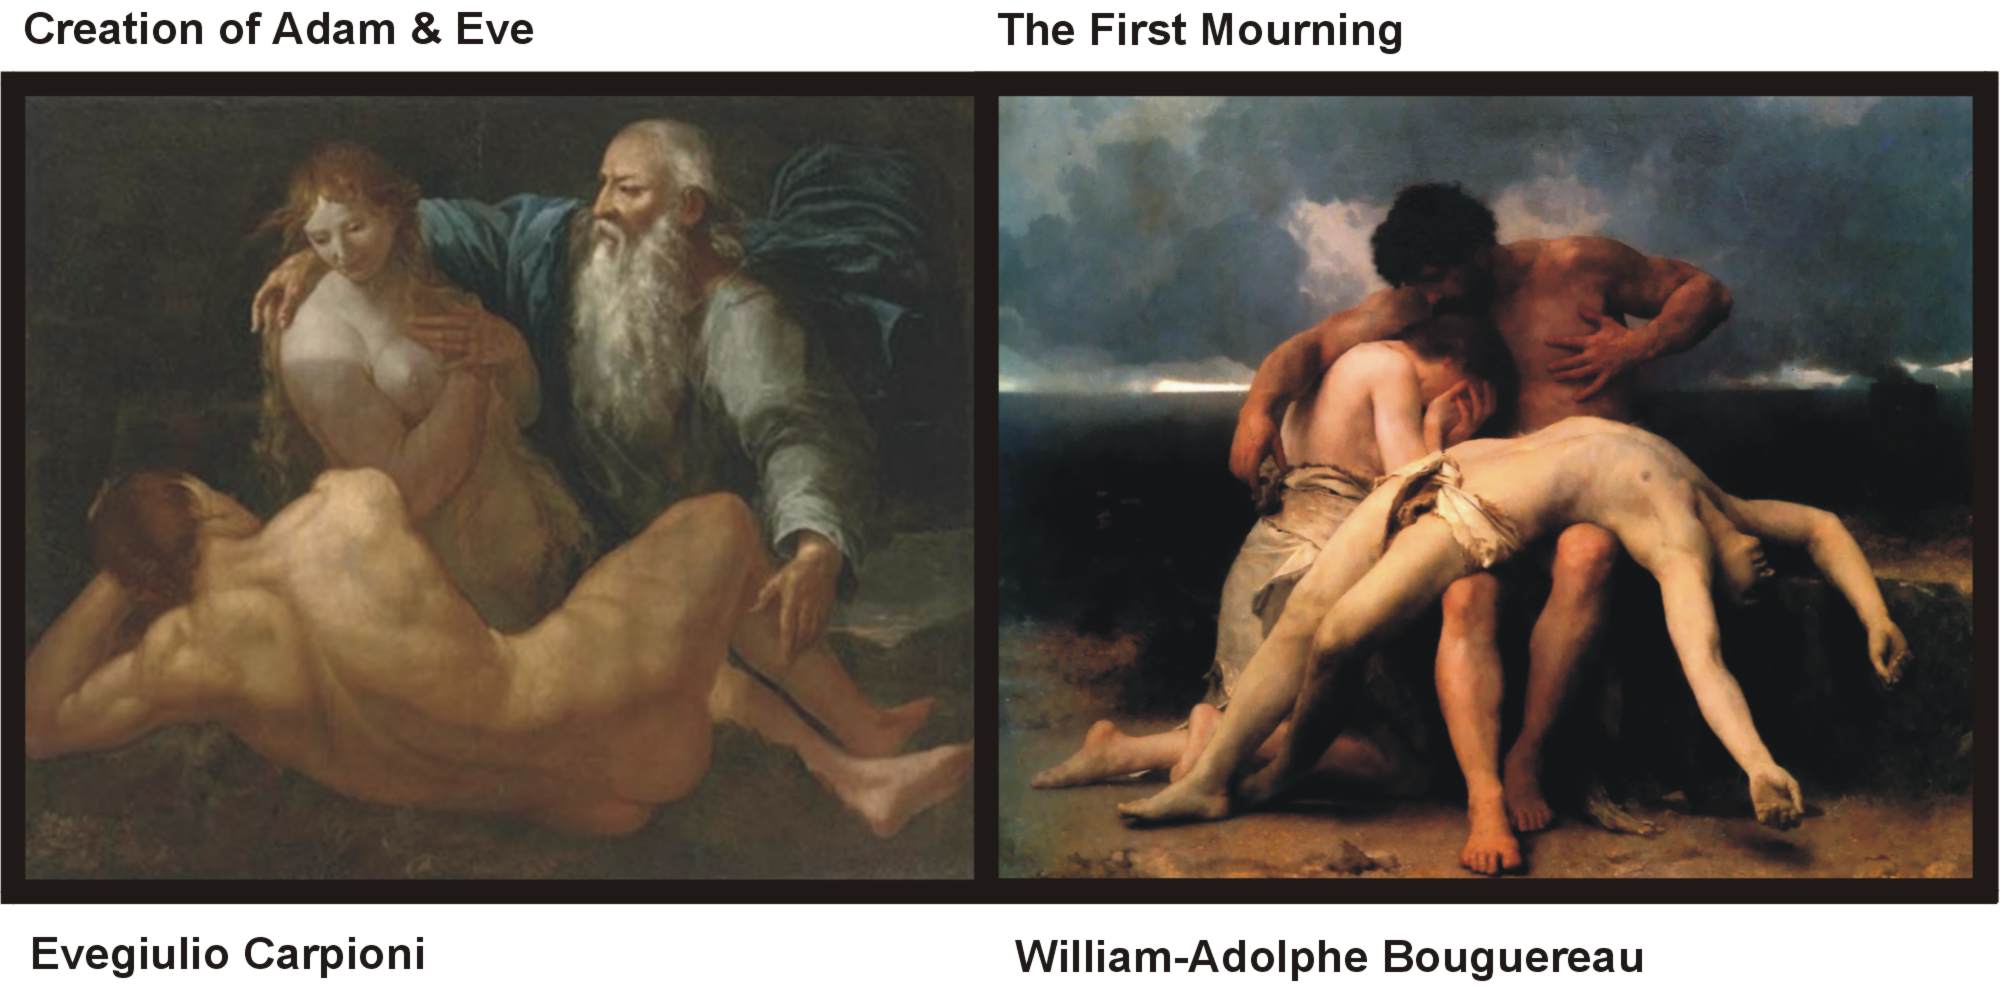
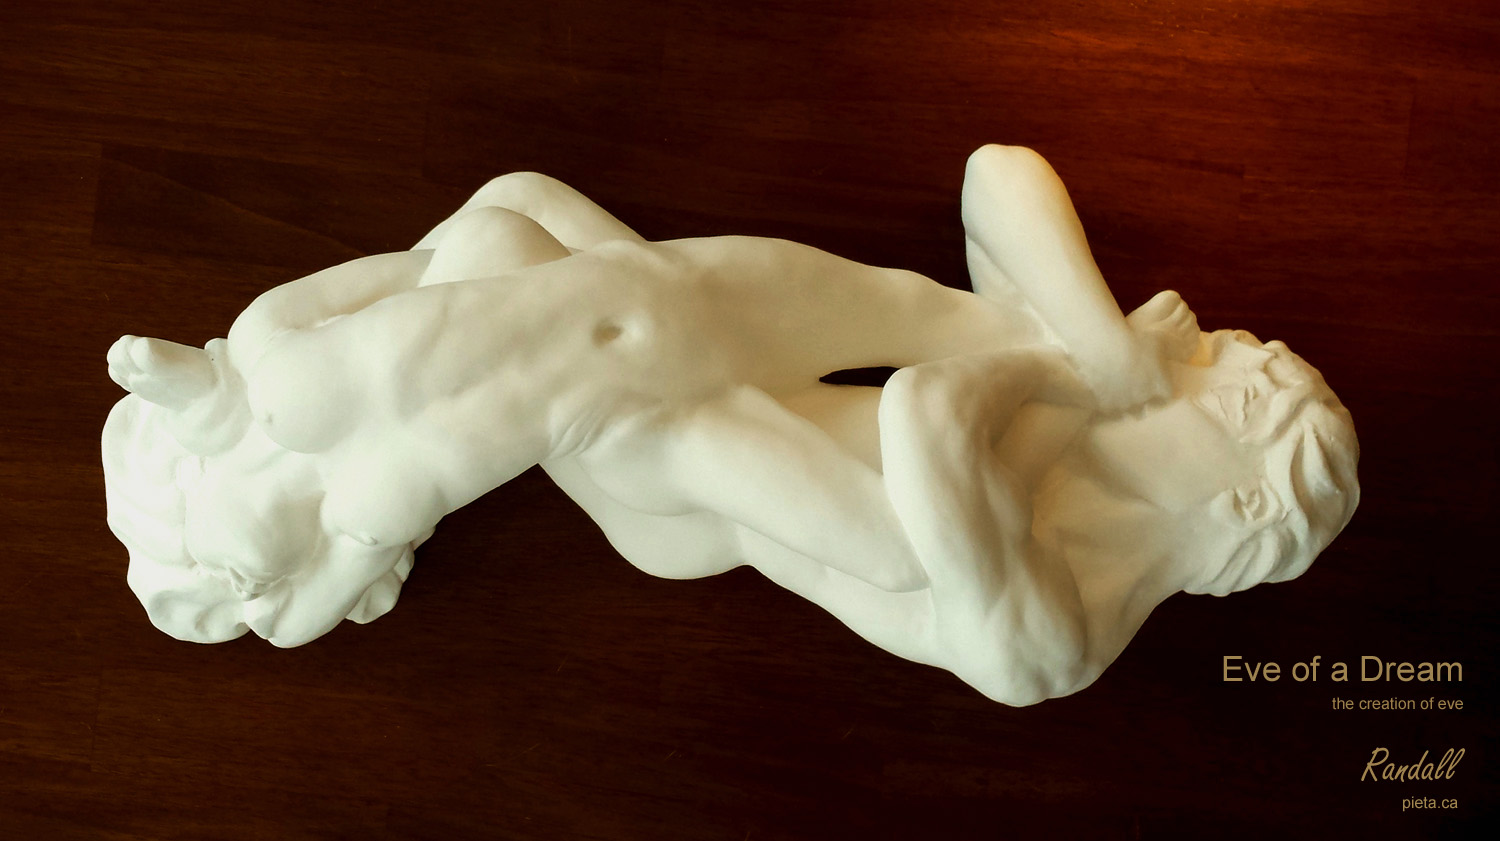
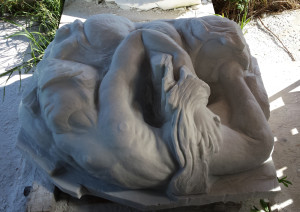
There is much effort and planning between the conceptional start of any project and its finish.  When all is said and done, a completed statue looks so natural, and fluid that the degree of difficulty is lost and forgotten..  With Eve of Dream, the mixing of Adam and Eve’s bodies had to appear as smooth and natural as sleep comes to a babe.  The early morning ease that we all have felt when waking.

The Creation of Eve maquette randall a
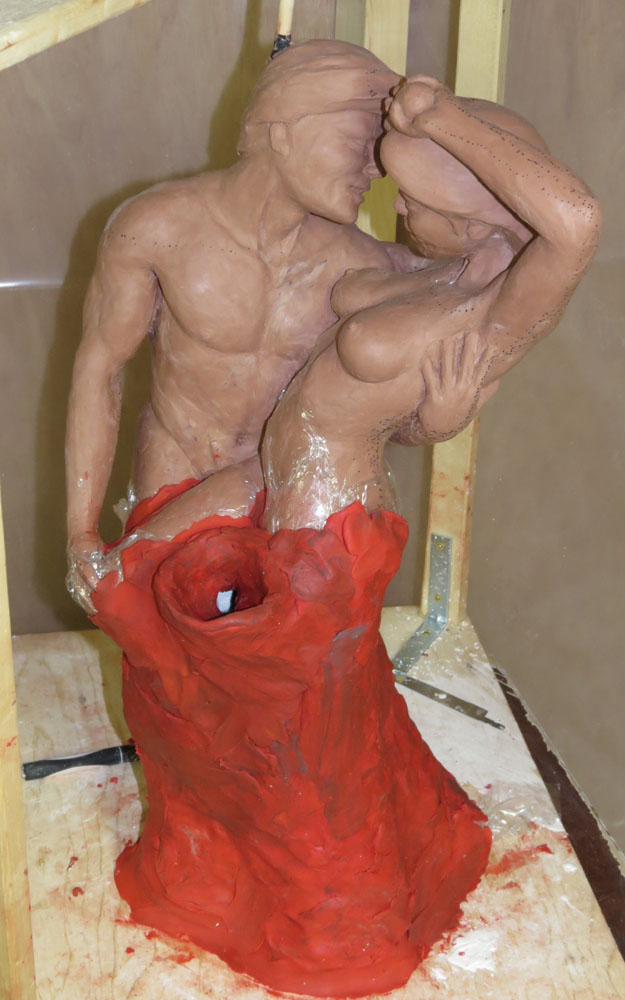
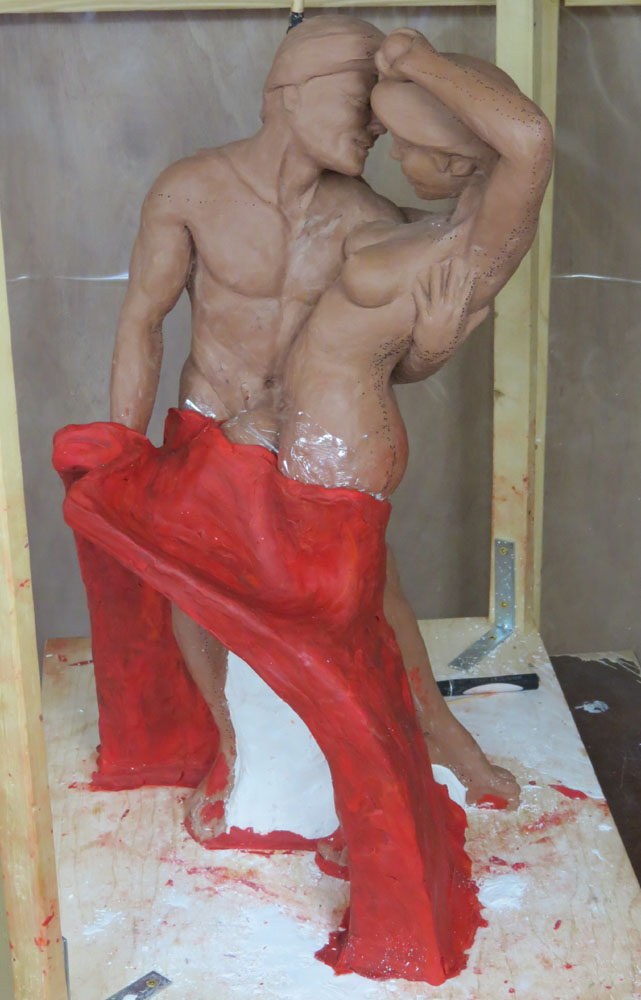
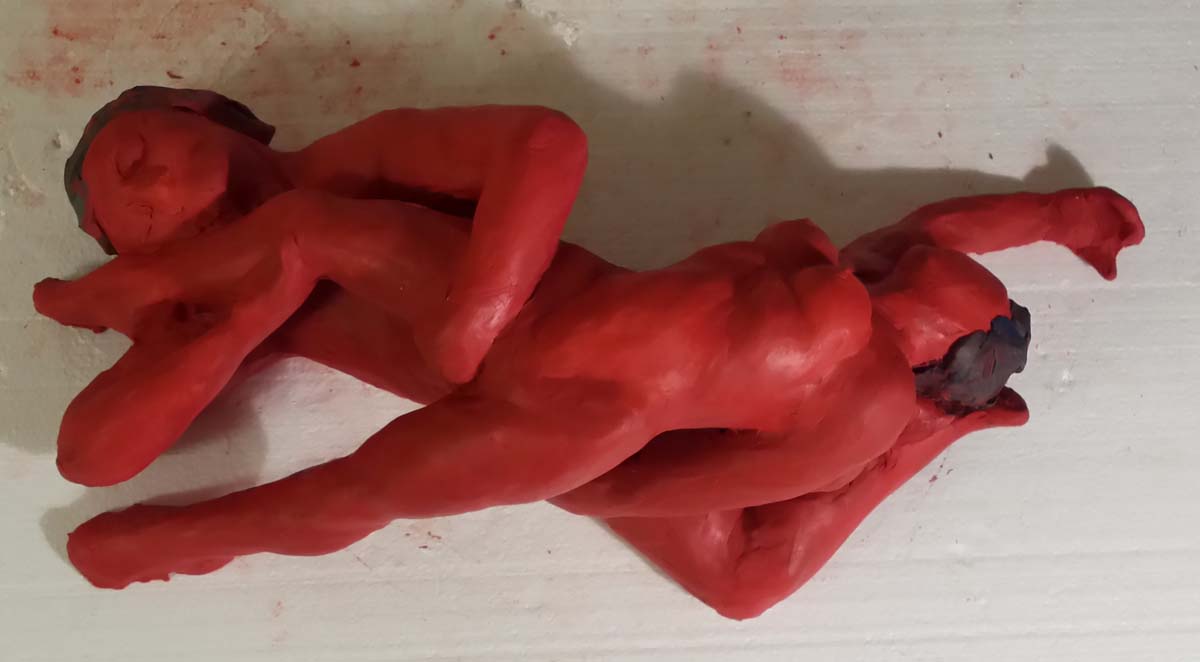
But the creation of art is never as easy as it looks. And so soft plasticine is the best medium to mould when trying to tease out the form.   This step usually only takes an hour or so,  and can quickly confirm if what you have imagined is pleasing to the eye.  Much better to start with a simple shape before investing months ahead on a design that doesn’t fit.               Click on the images below to view 

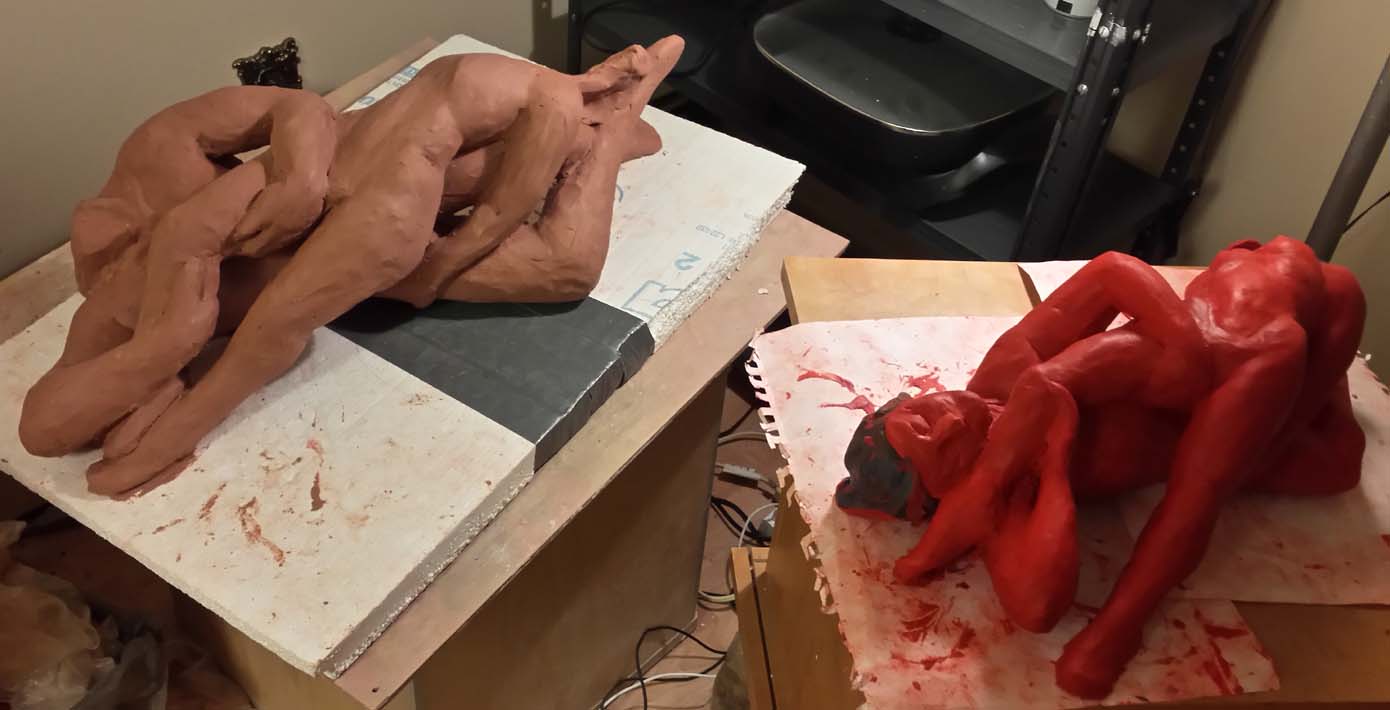
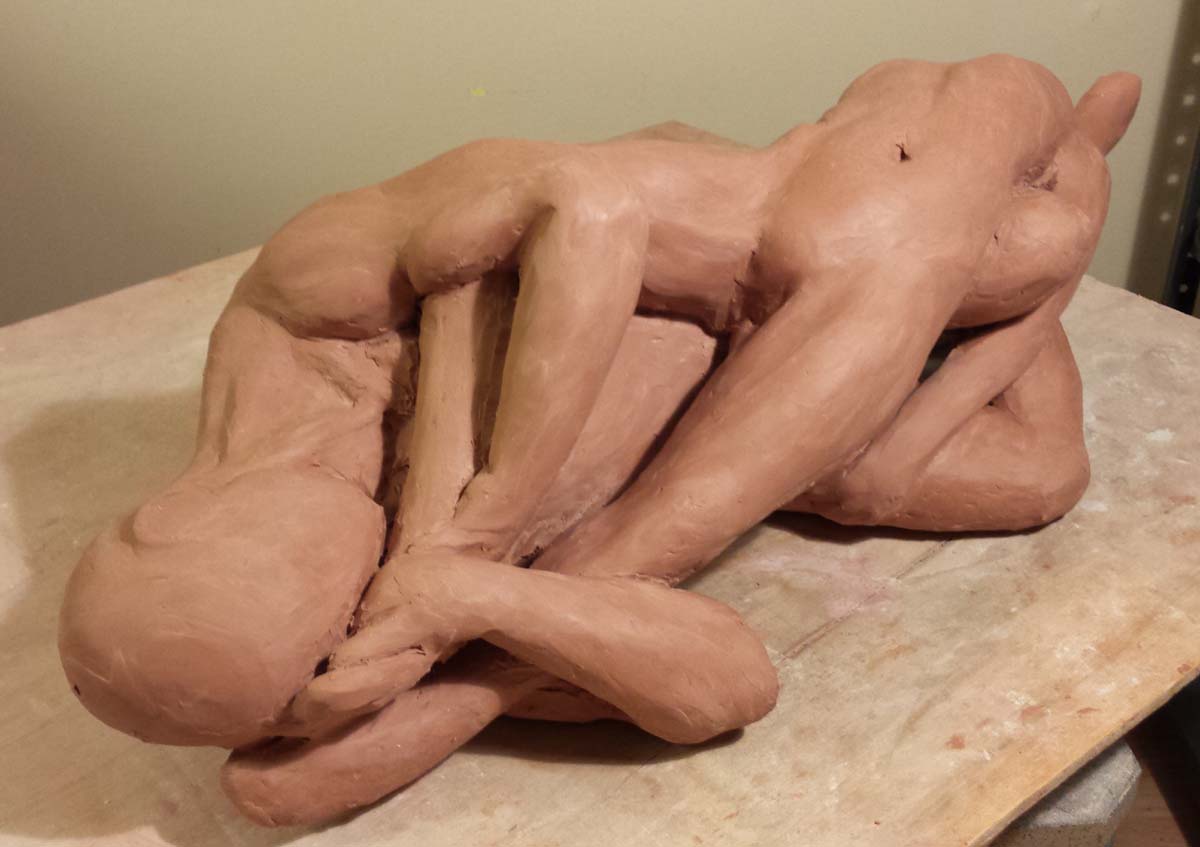
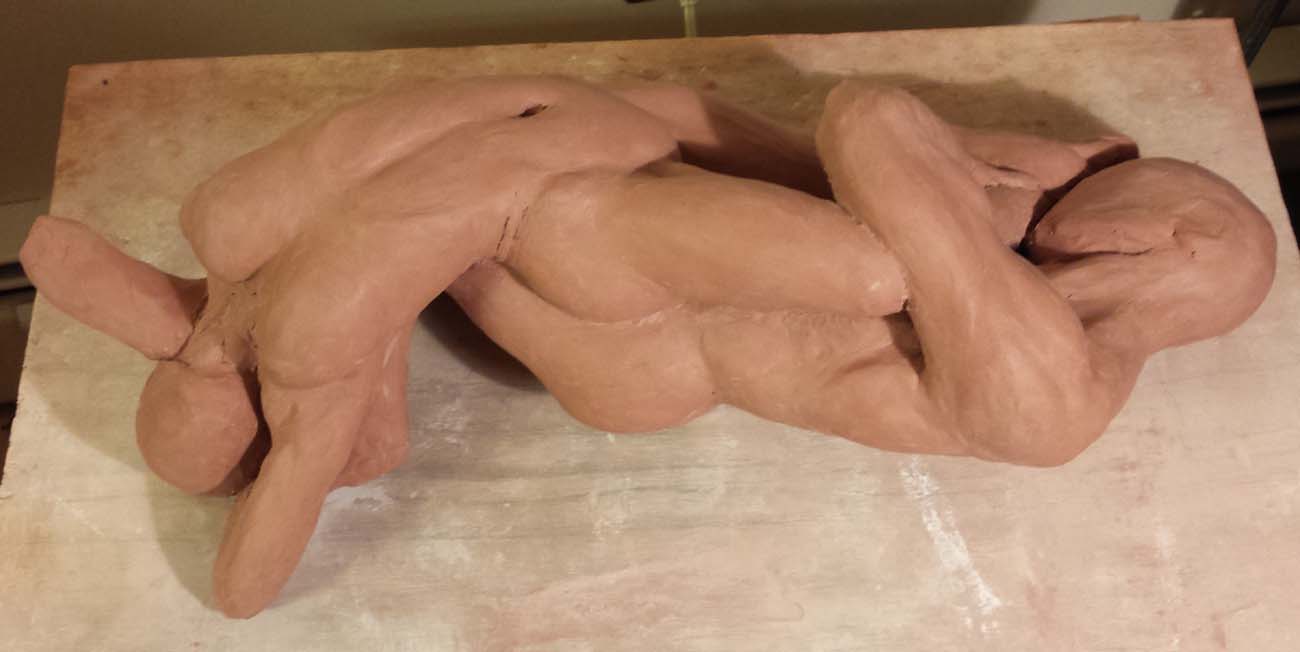
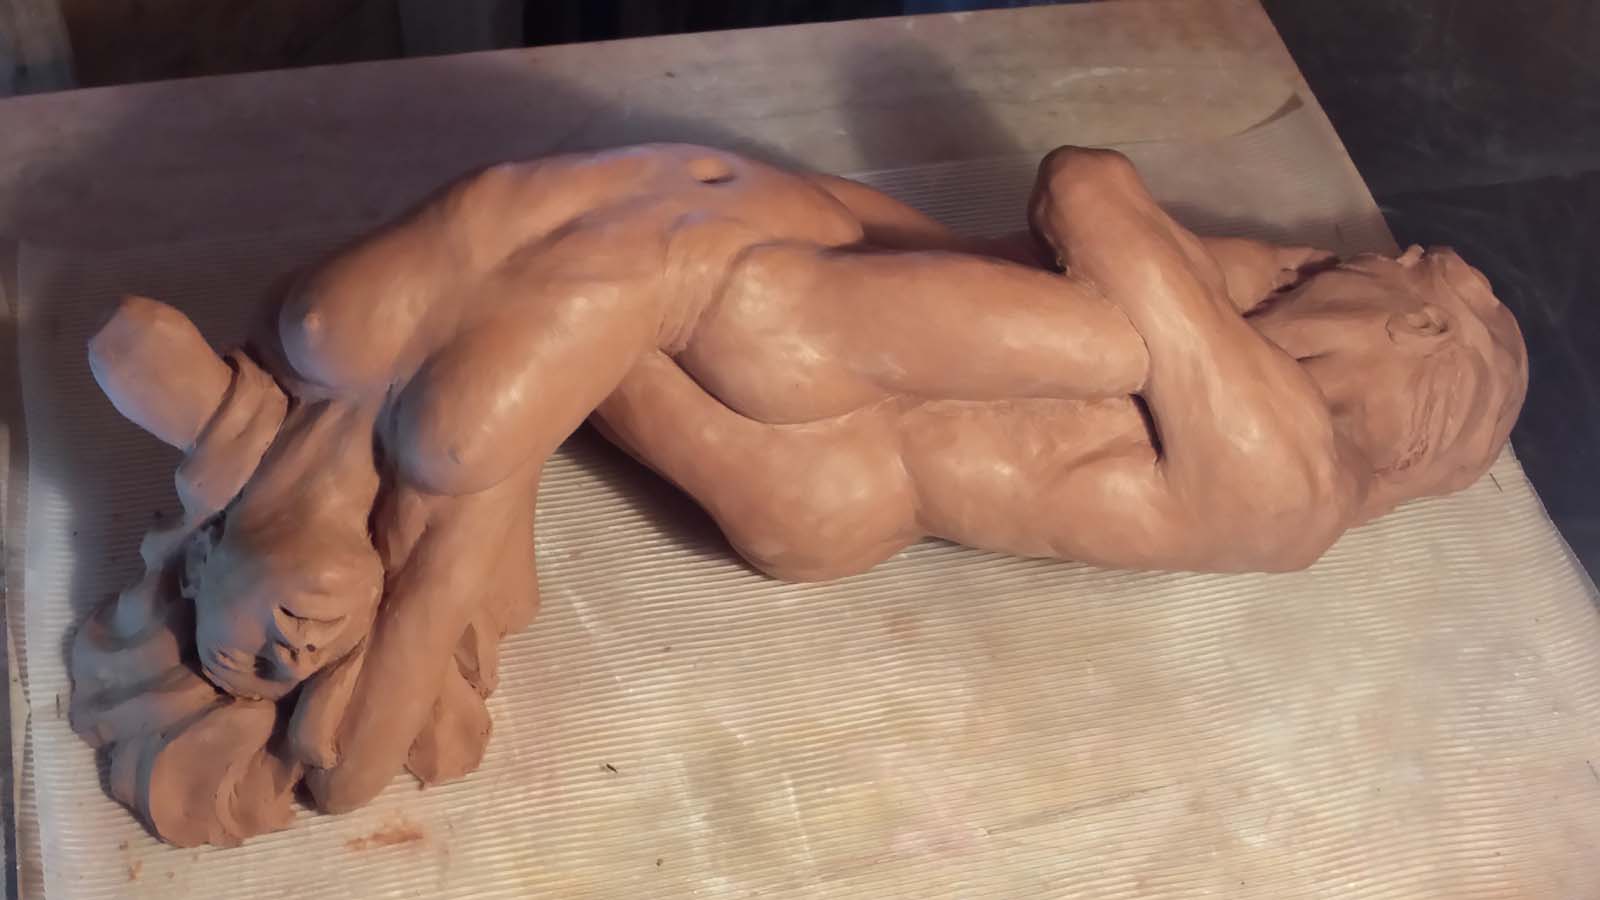
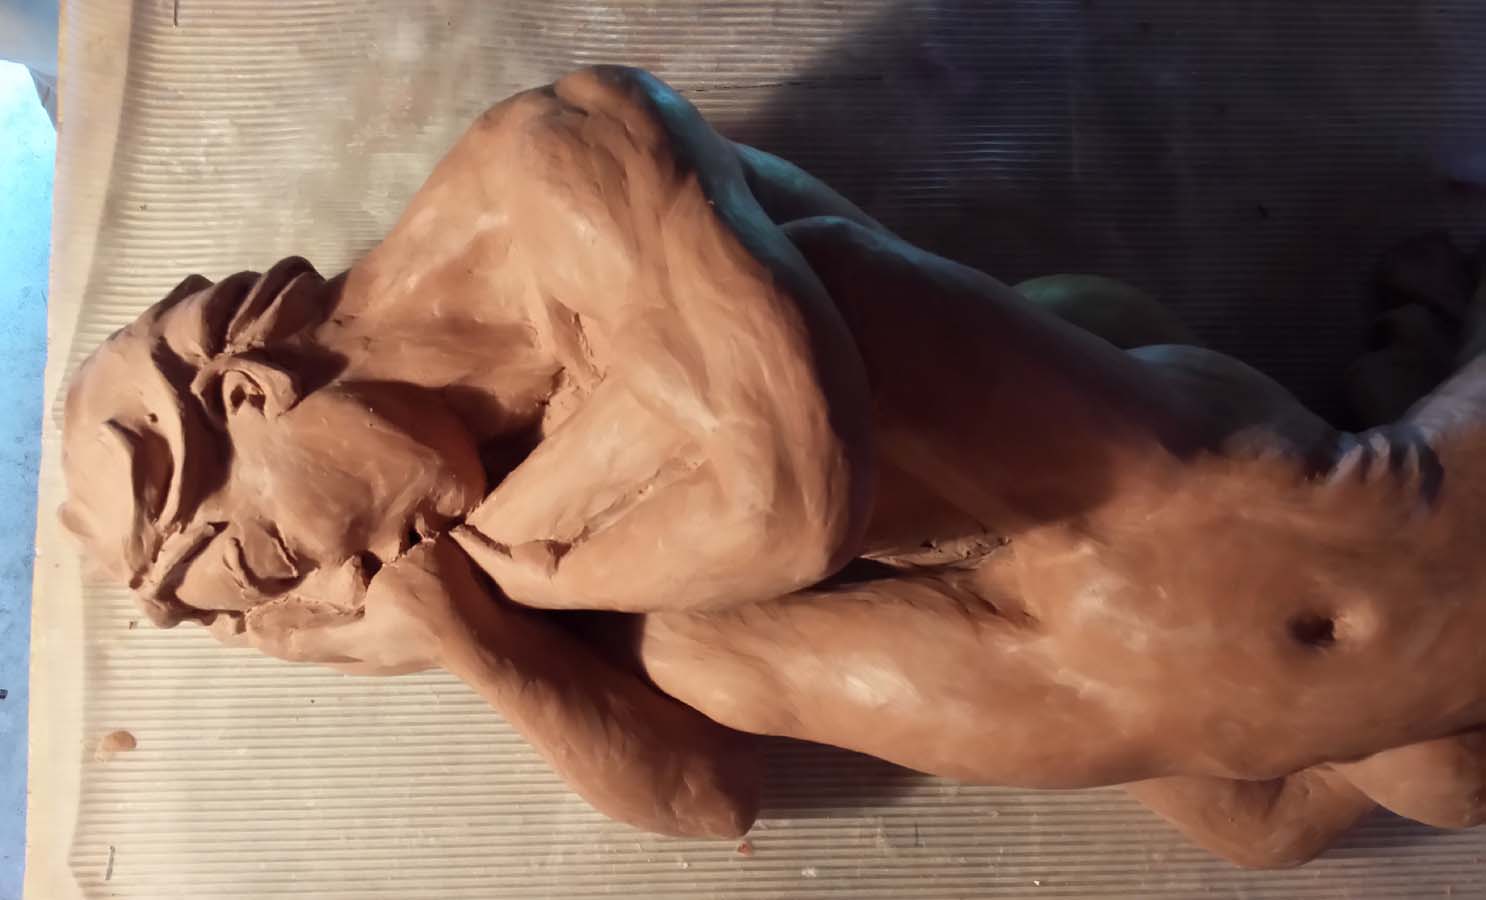
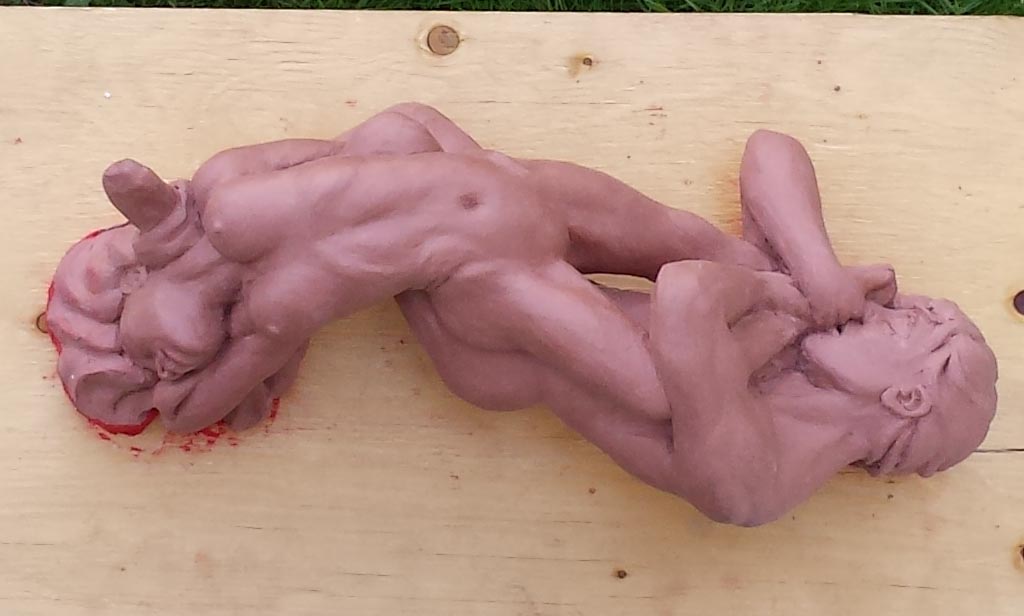
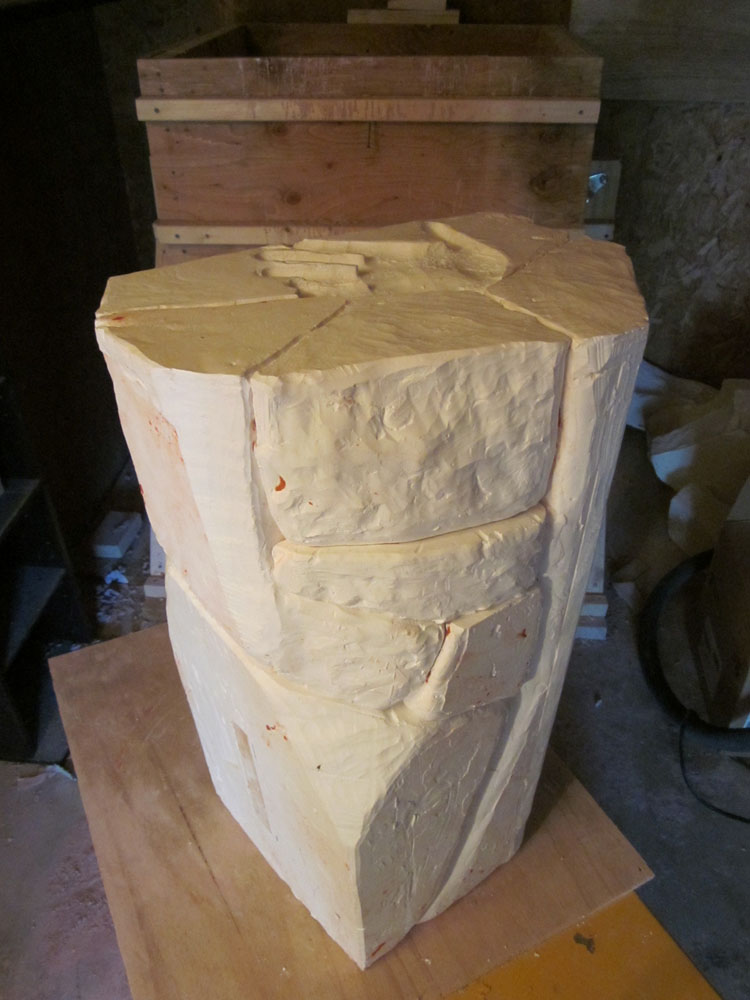
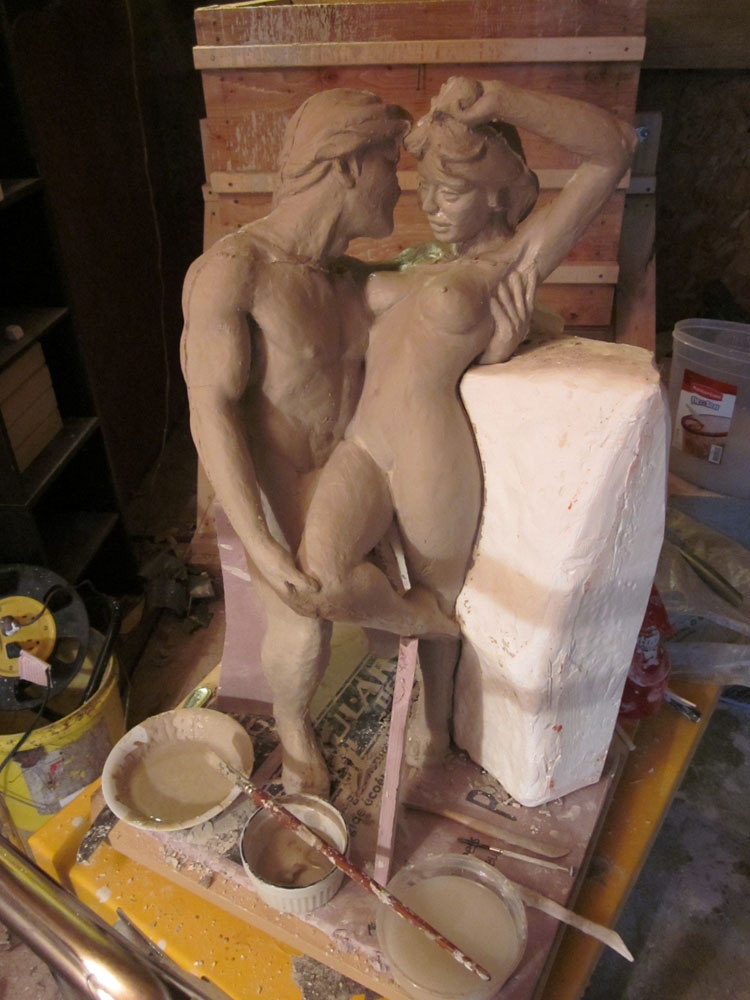
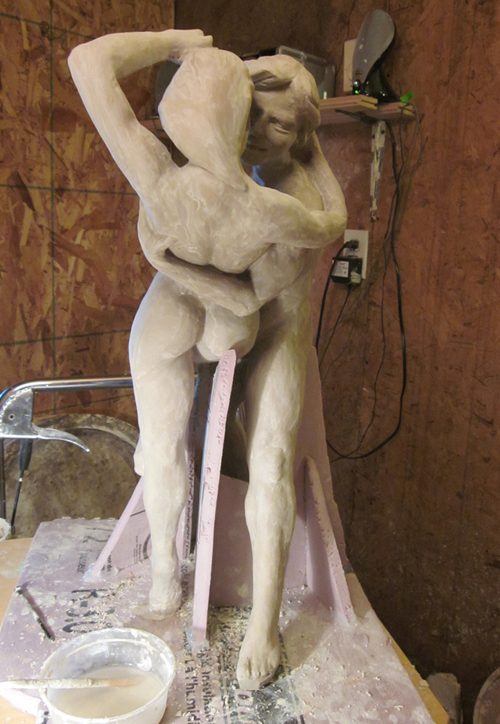
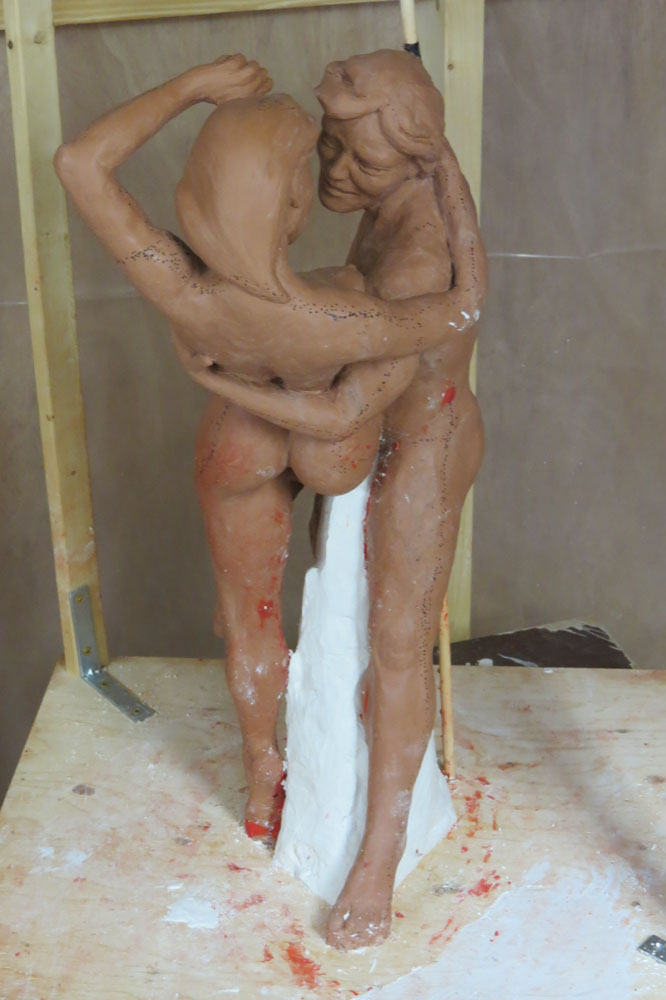
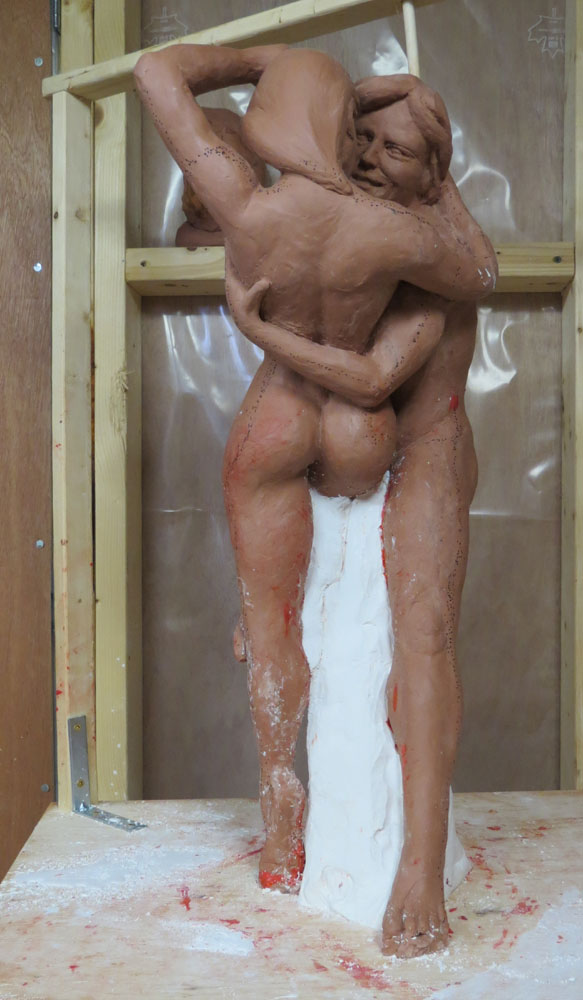
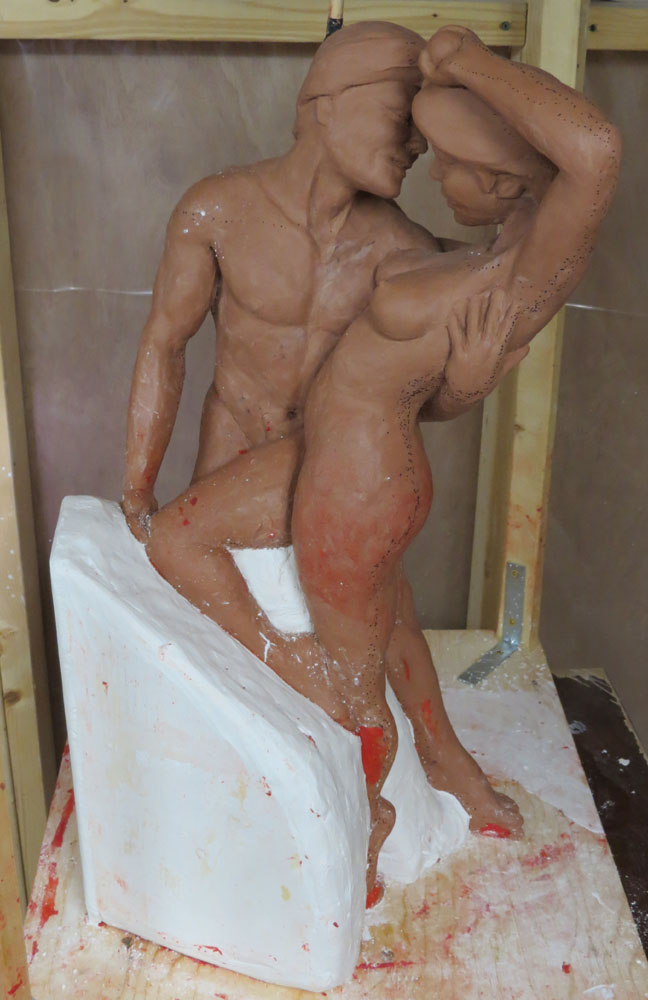
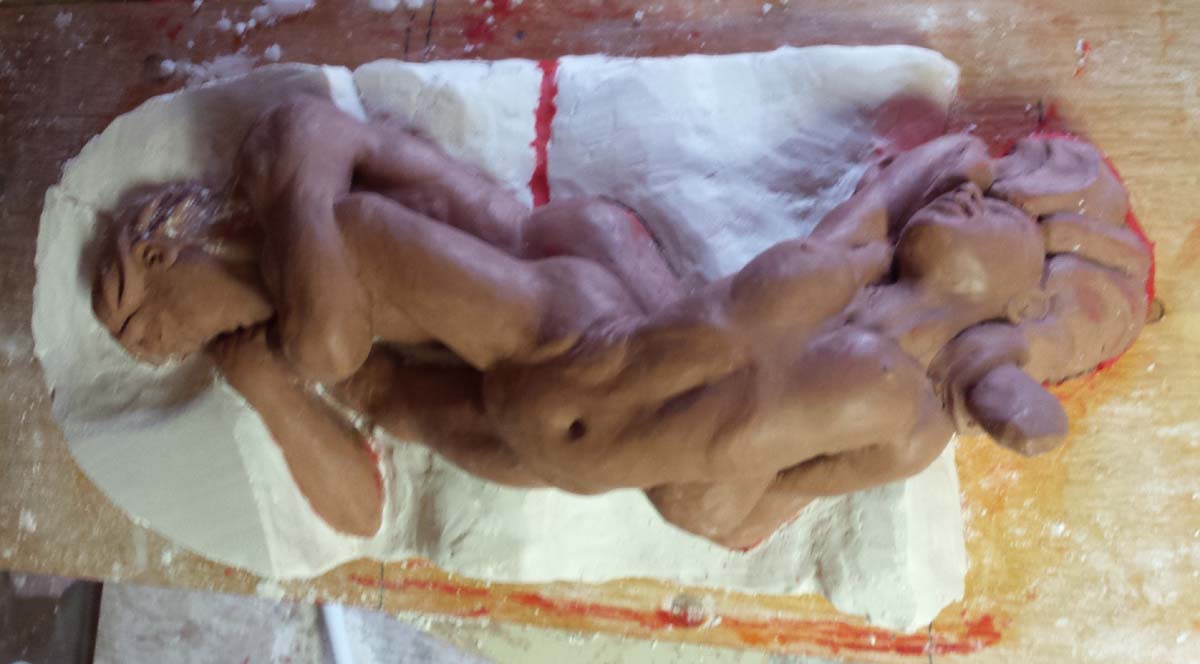
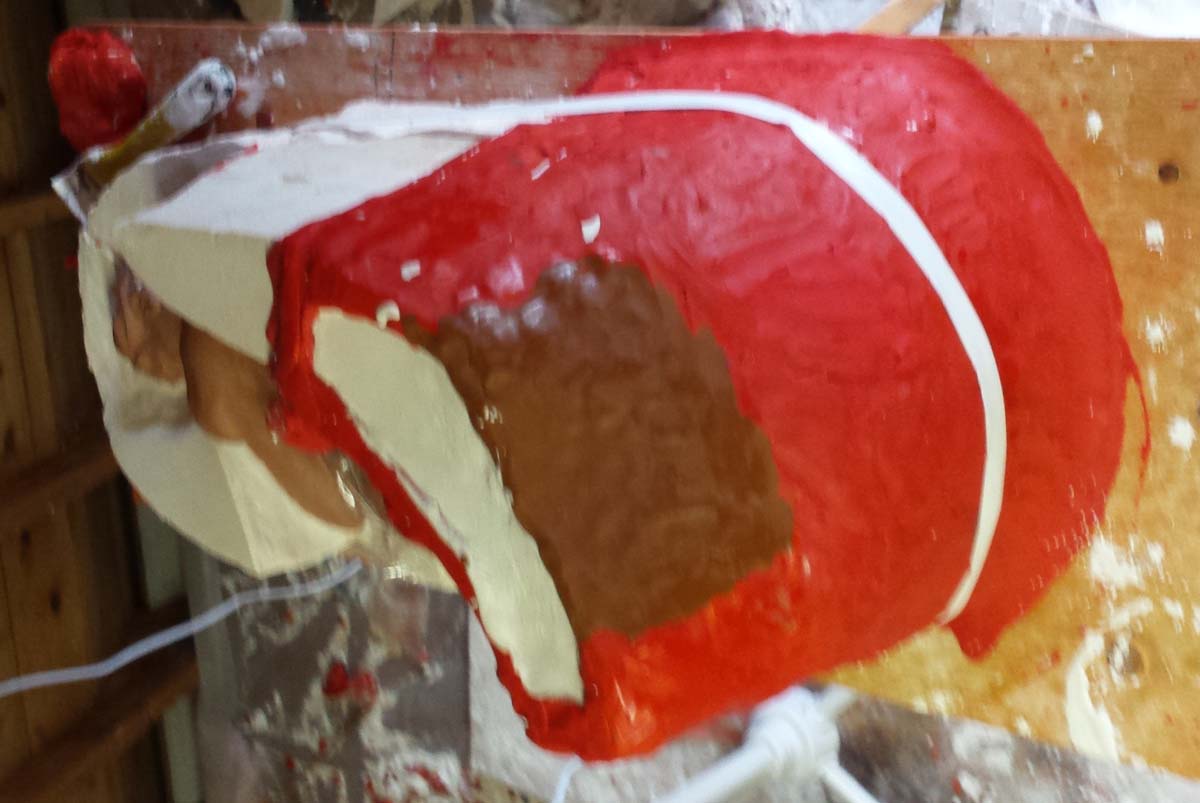
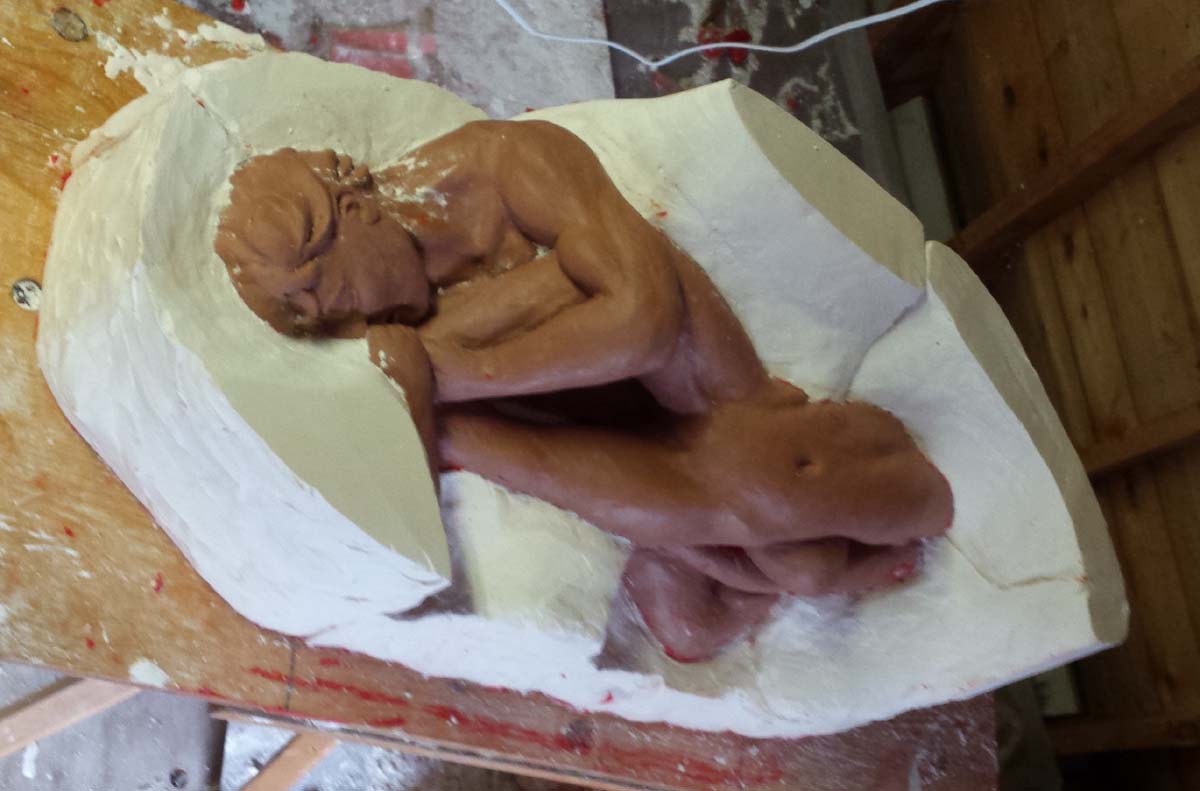
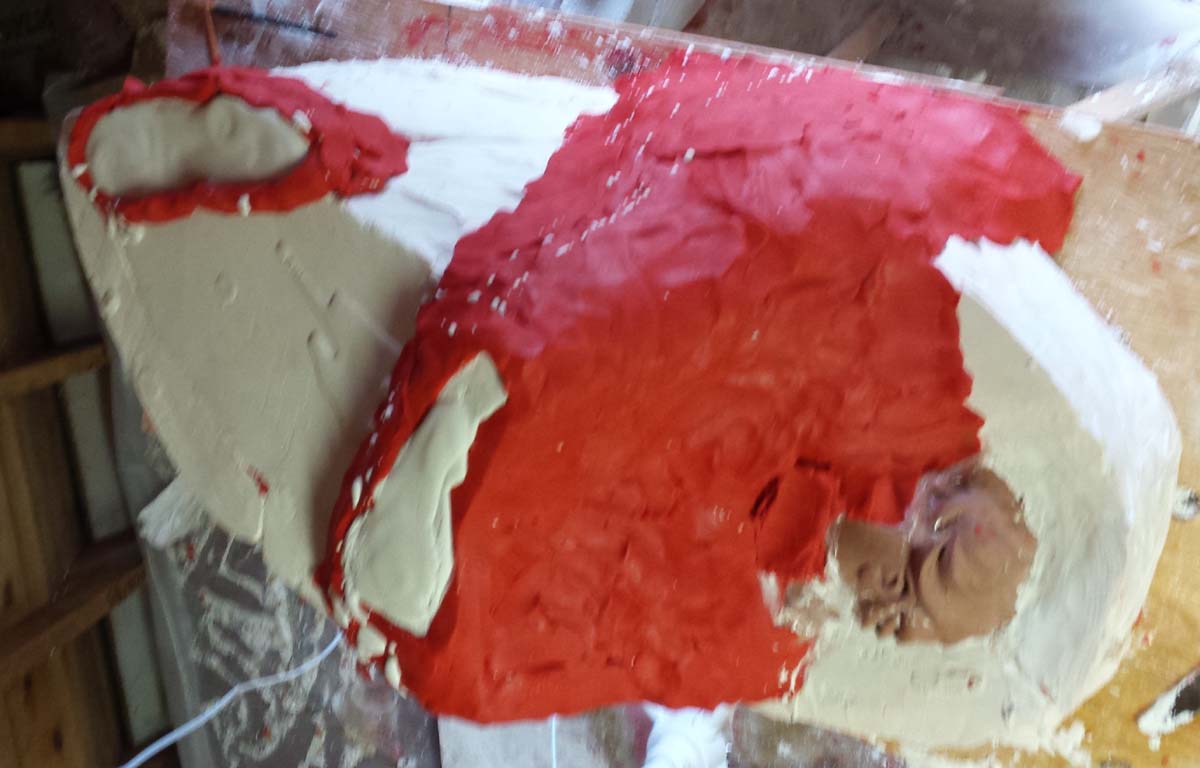
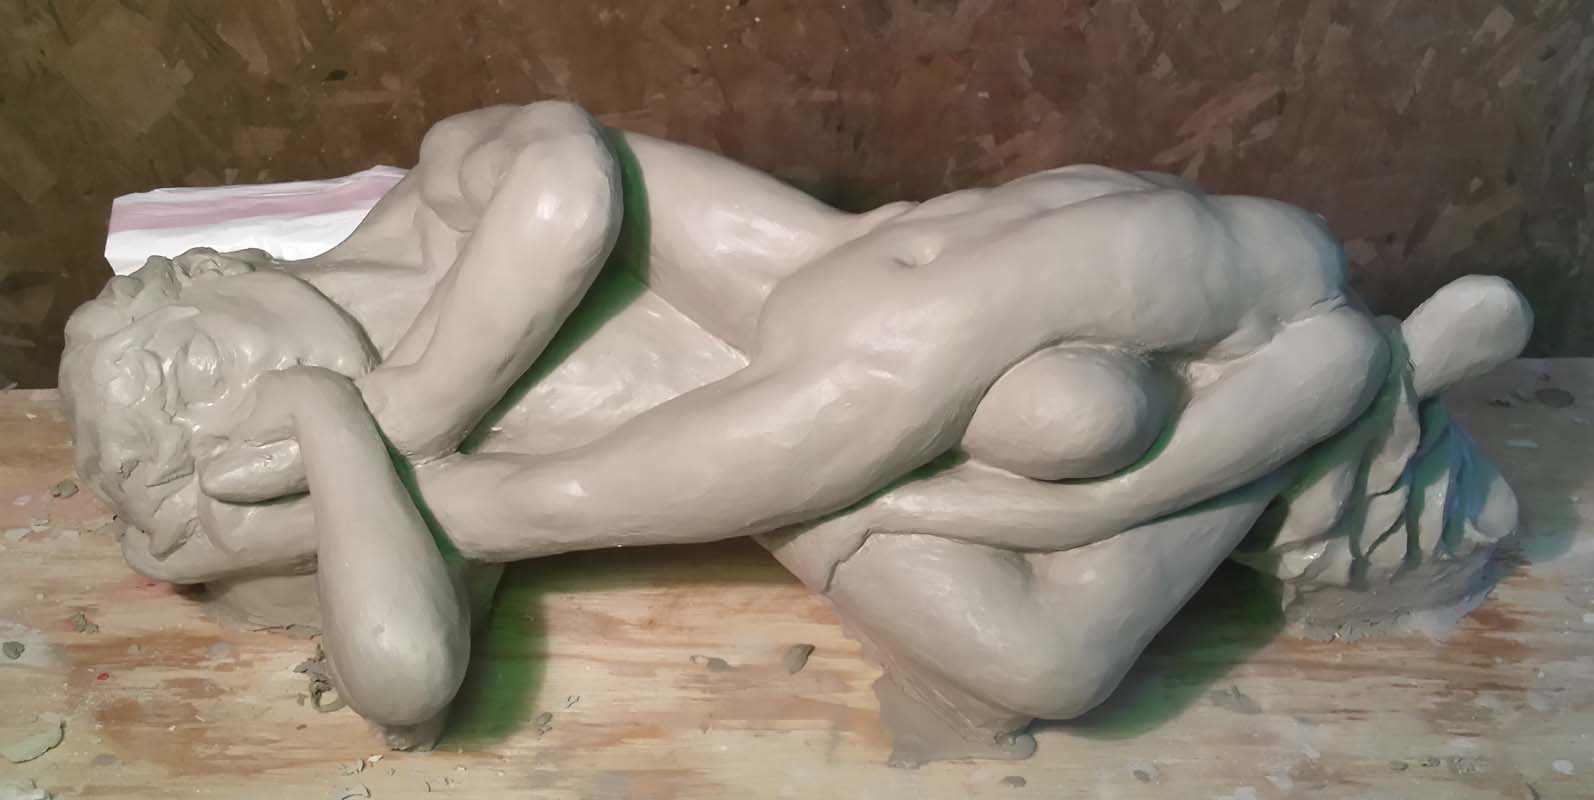
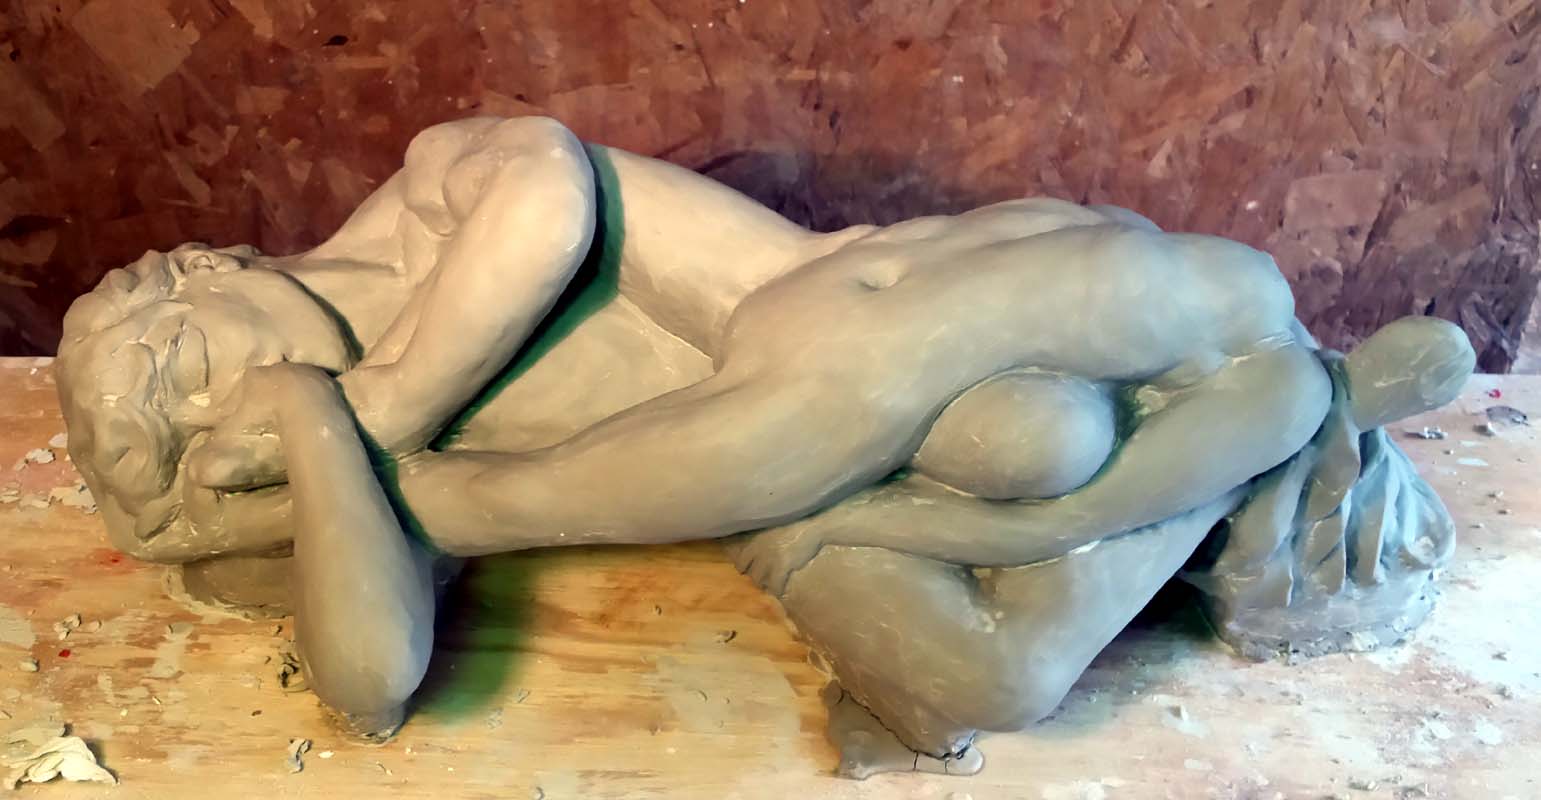
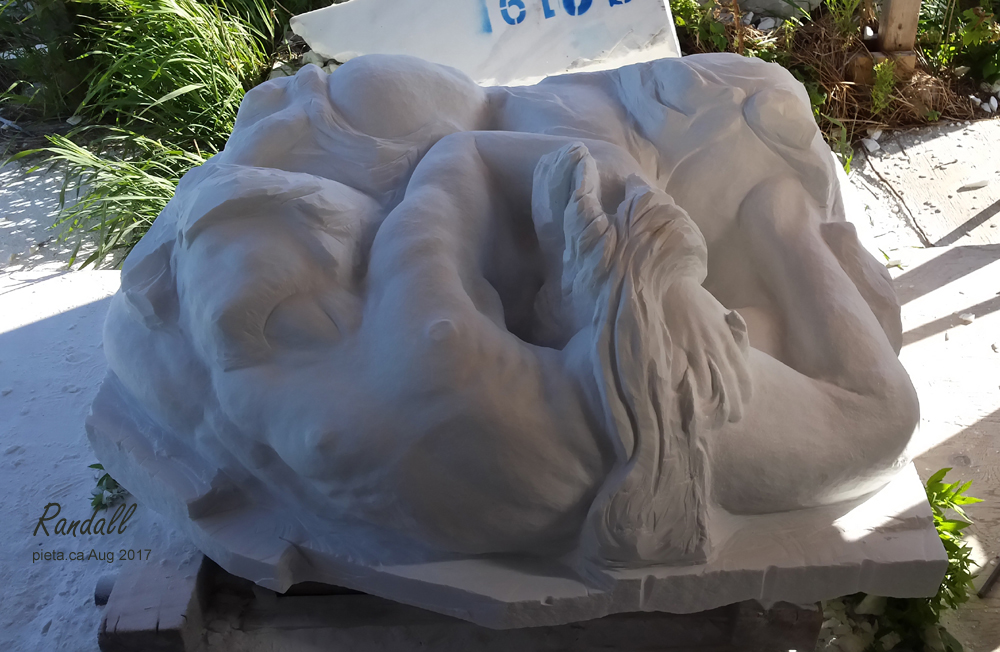
Using the plasticine model (red) as a template, a second stronger and larger maquette can be fashioned.  First the main positioning of limbs is perfected, with head and muscle definitions applied last.  By rotating the statue, you can insure individual expressions flow into the whole.  You’ll know your finished when the statue looks natural from all angles.

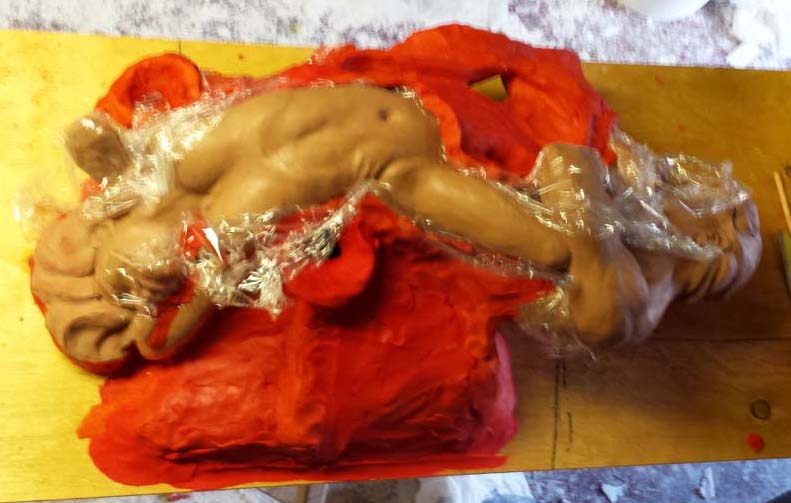
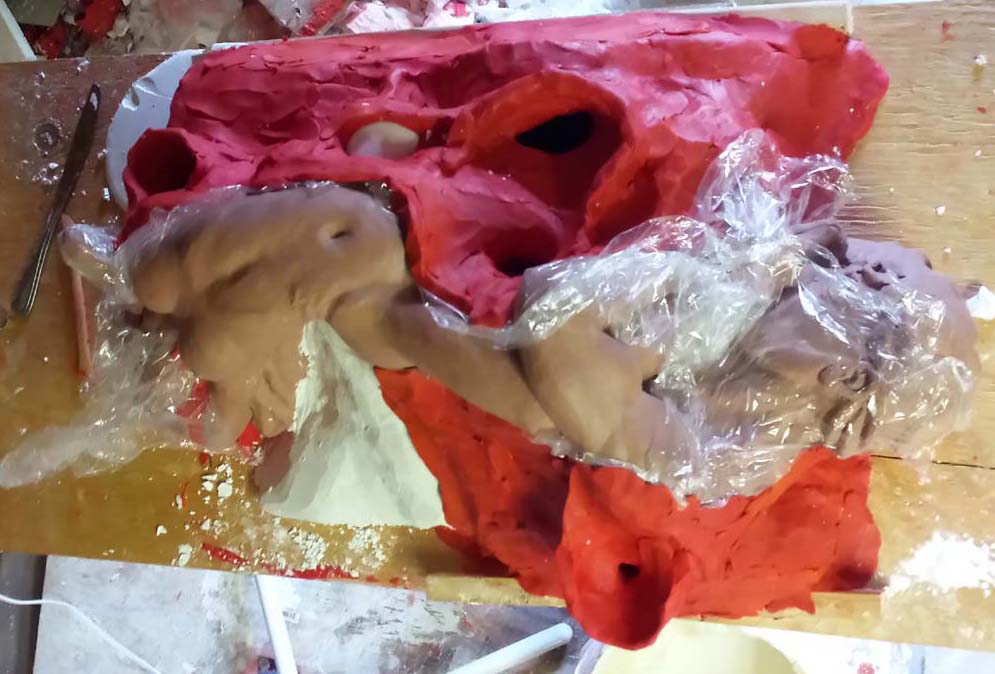
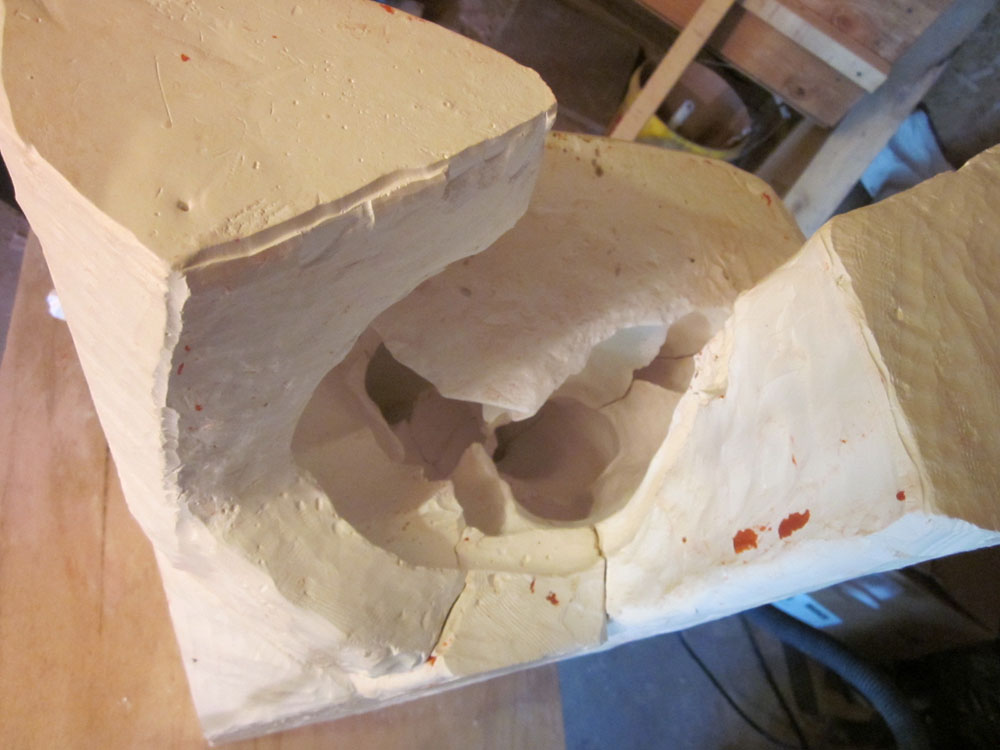
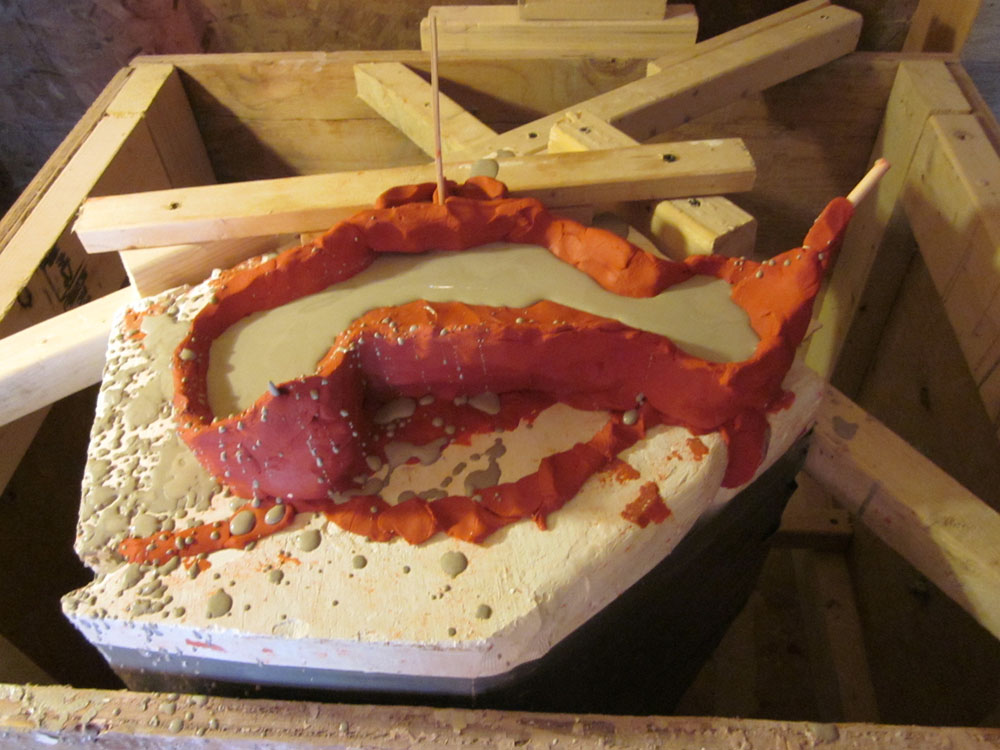
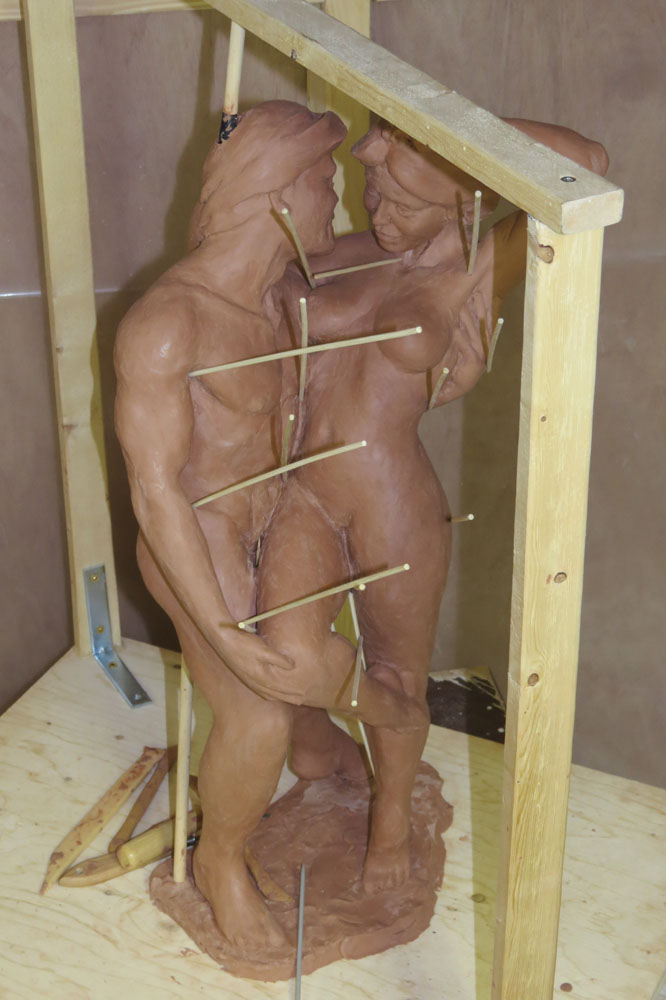
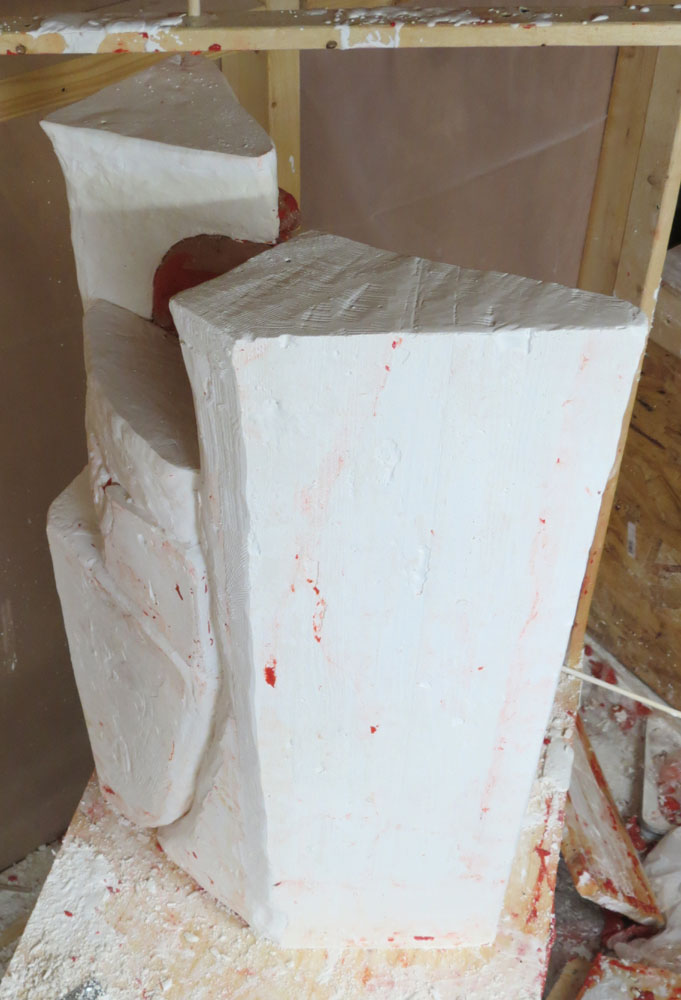
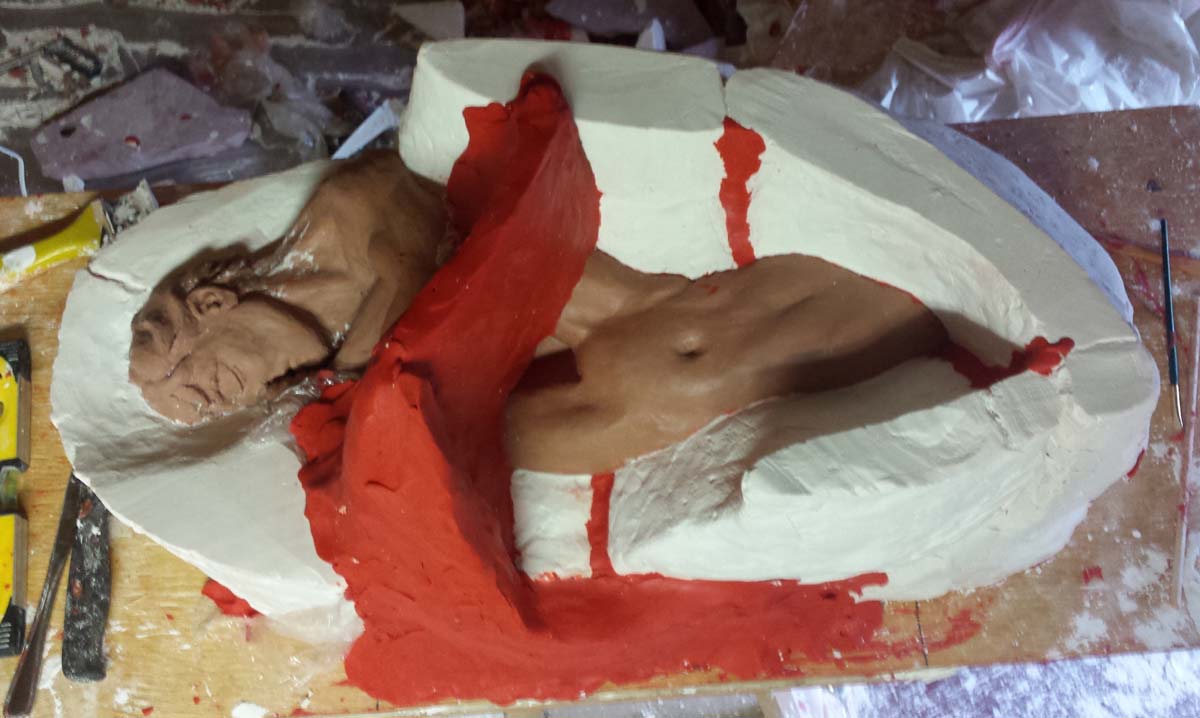
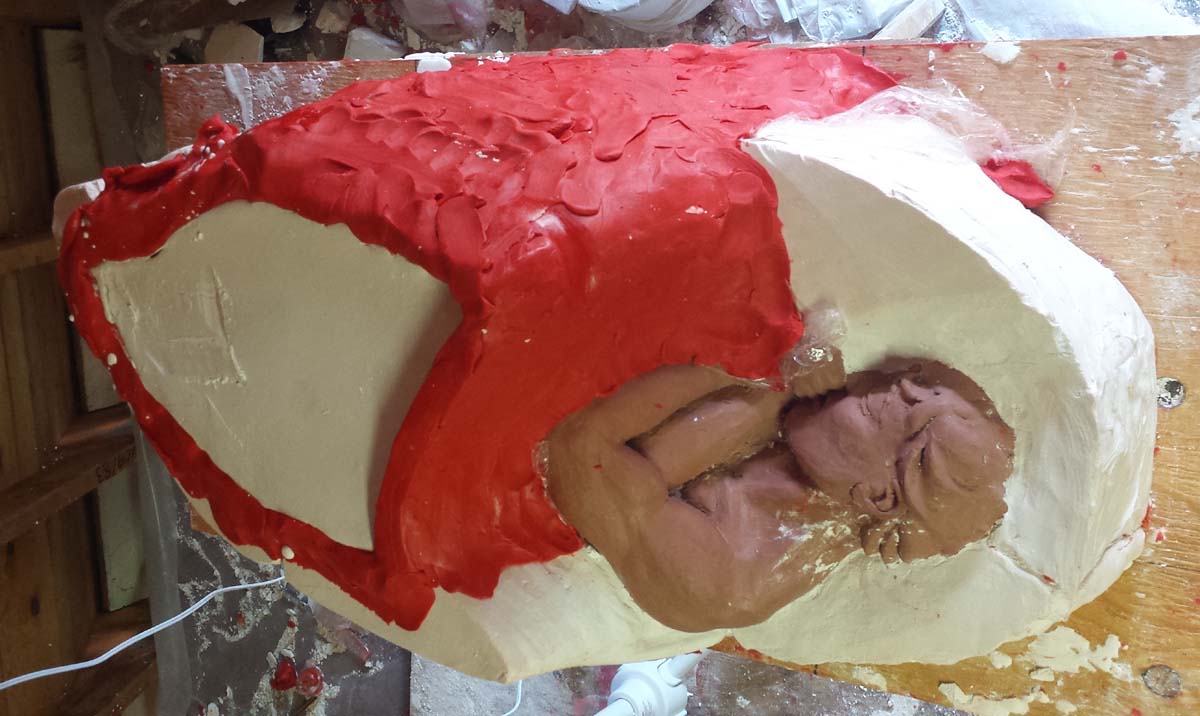
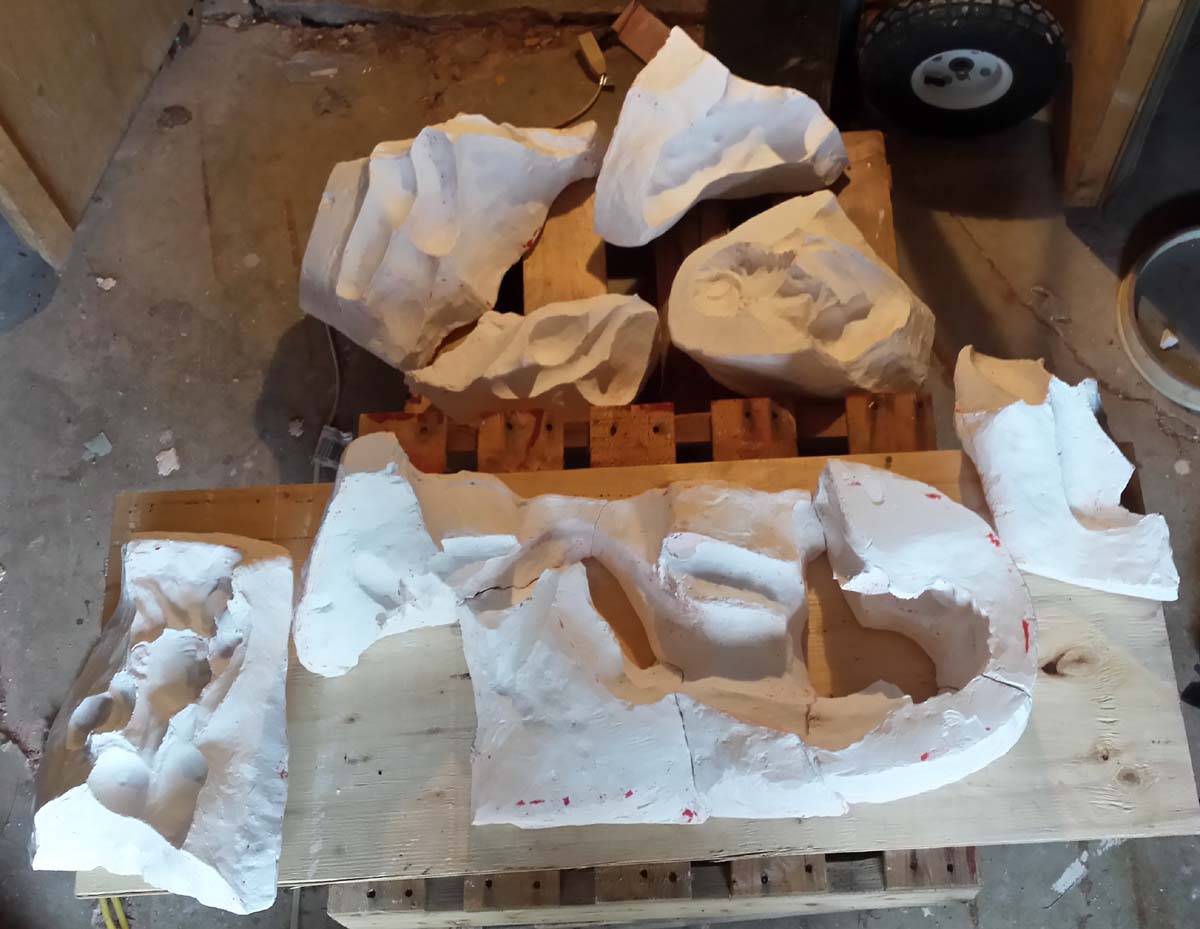
Similar to my other works, this is going to be a complicated plaster mould.  Using kids clay, cellophane and wood forms, the plaster is slowly build up and around section by section. Simply trust your eye, as you look into the statue from the angle of each cast piece.  Ensure there will be no undercuts.  Each section will need to pull away cleanly.

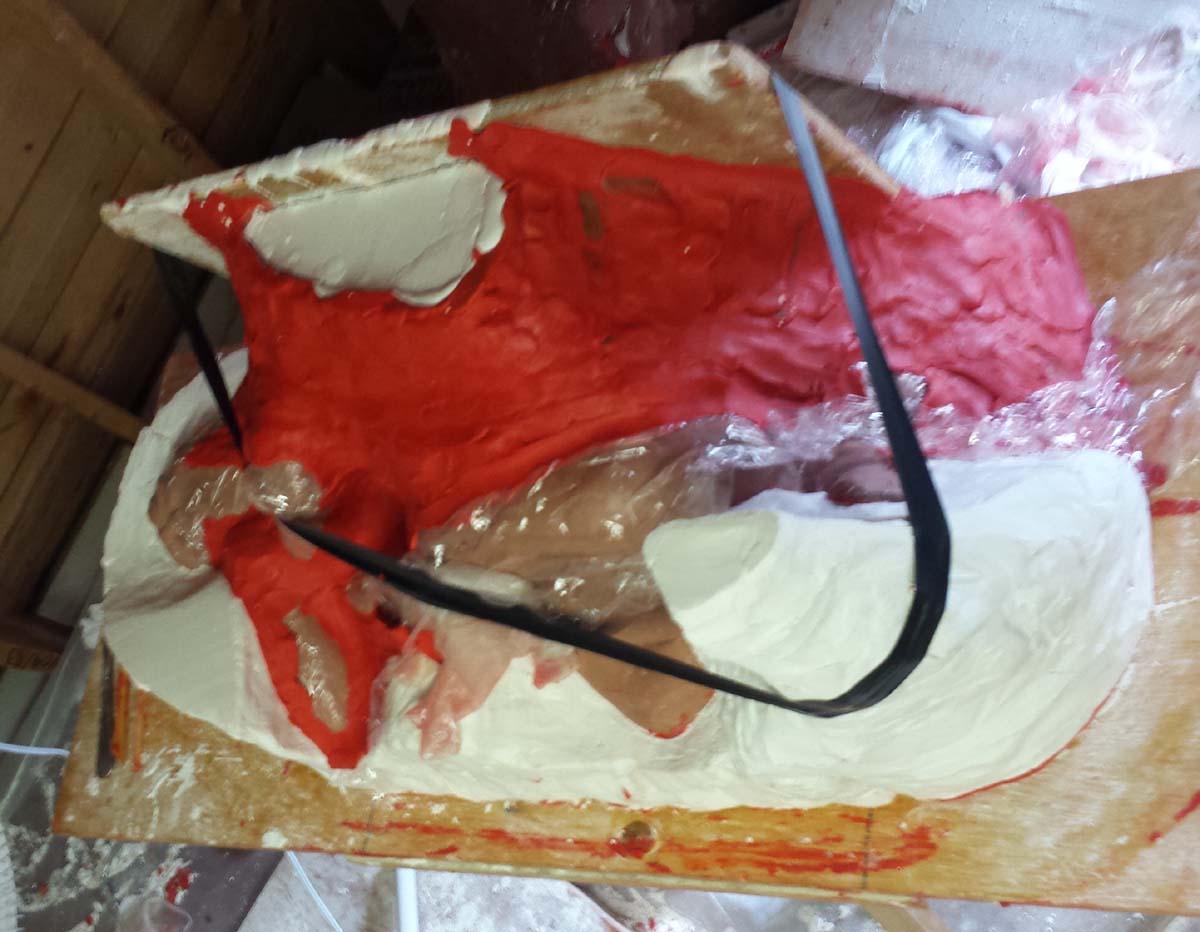
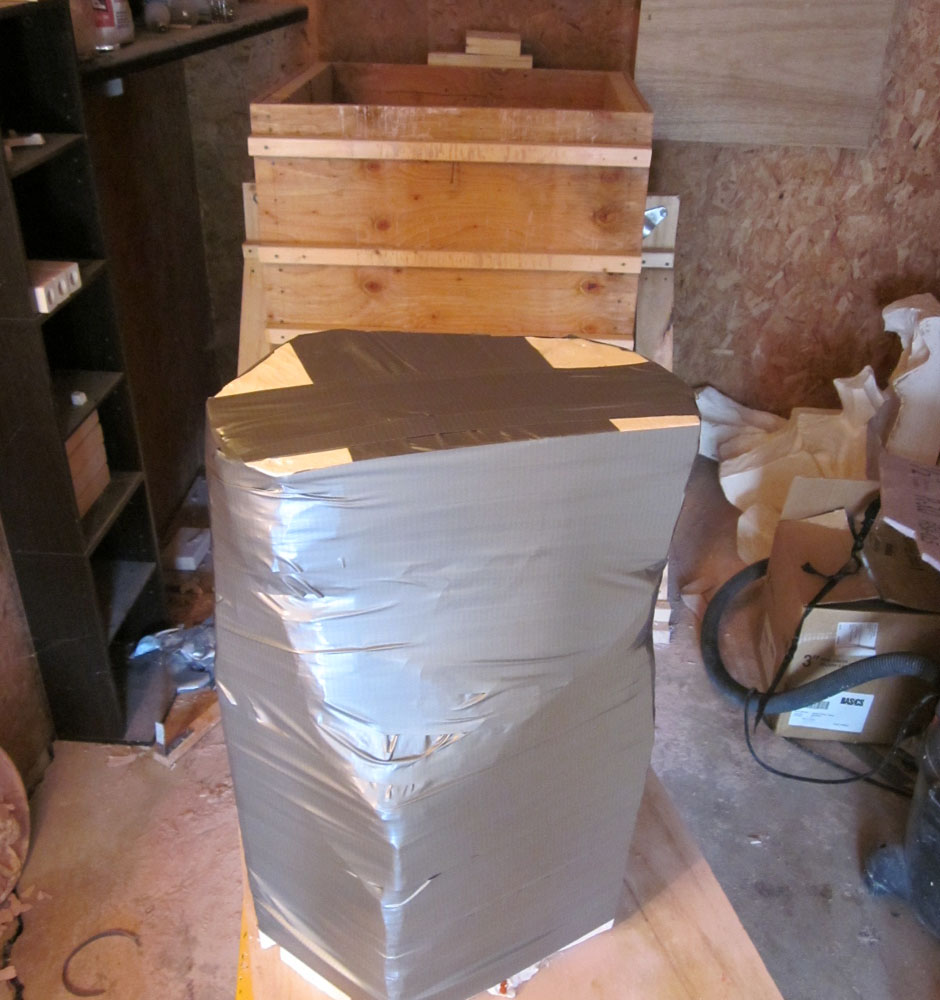
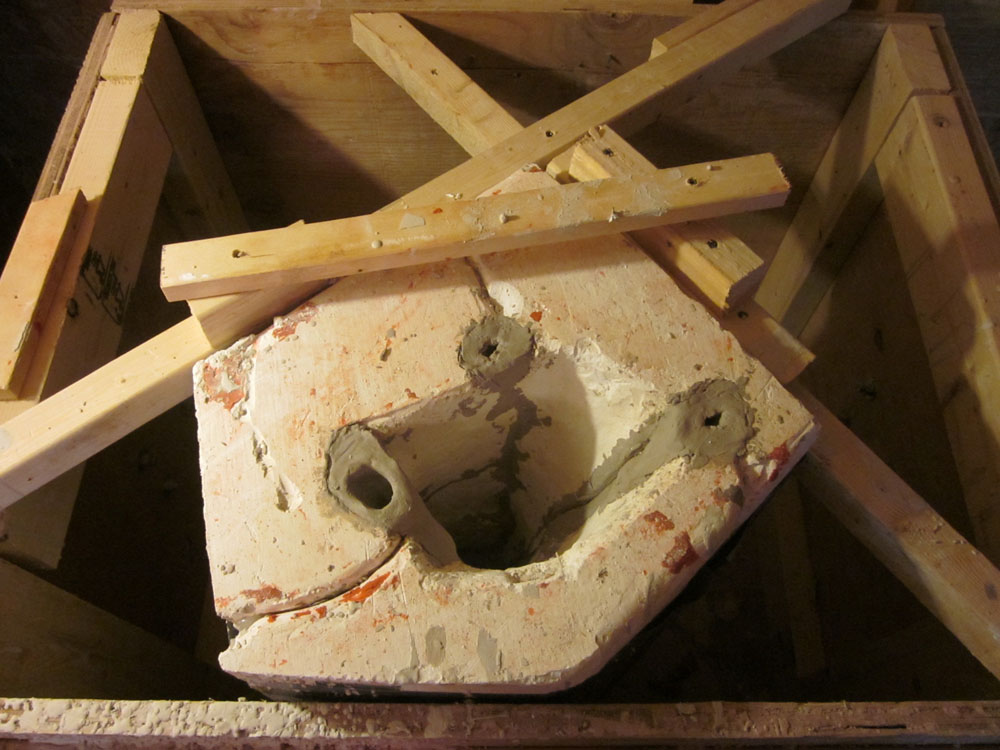
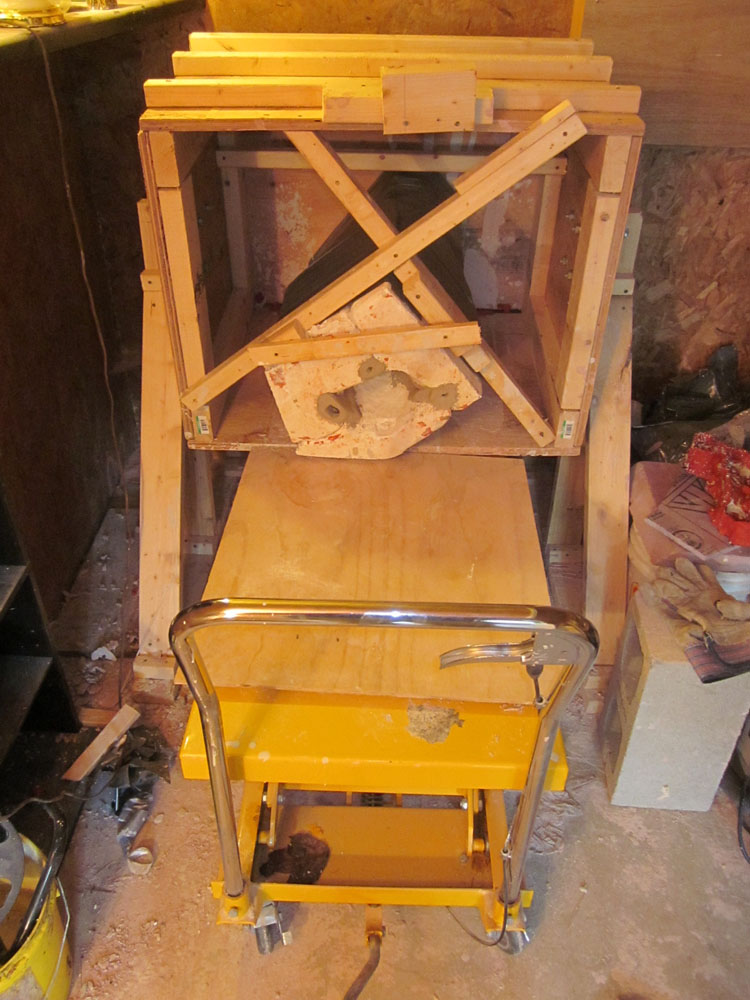
For more on the Plaster Casting Process, from mixing plaster to planning each piece to building unique forms, just click to read my detailed Pieta Spero blog.  If you look closely, Eve of a Dream required 11 sections to complete.  Drying the plaster will take at a month.

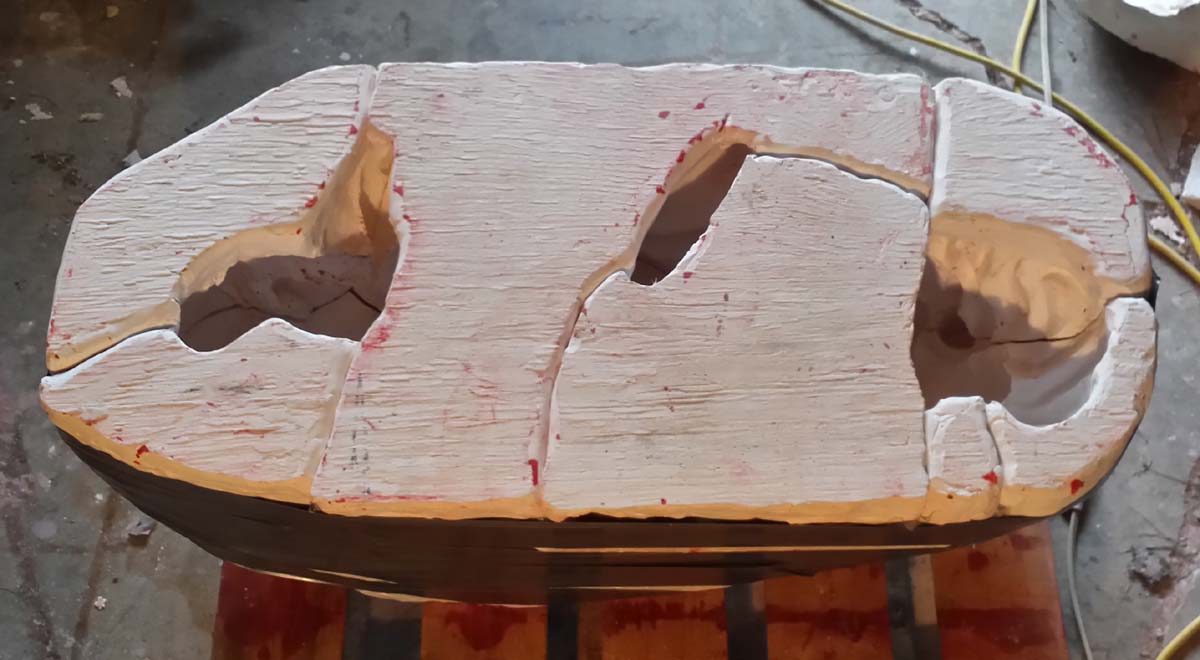
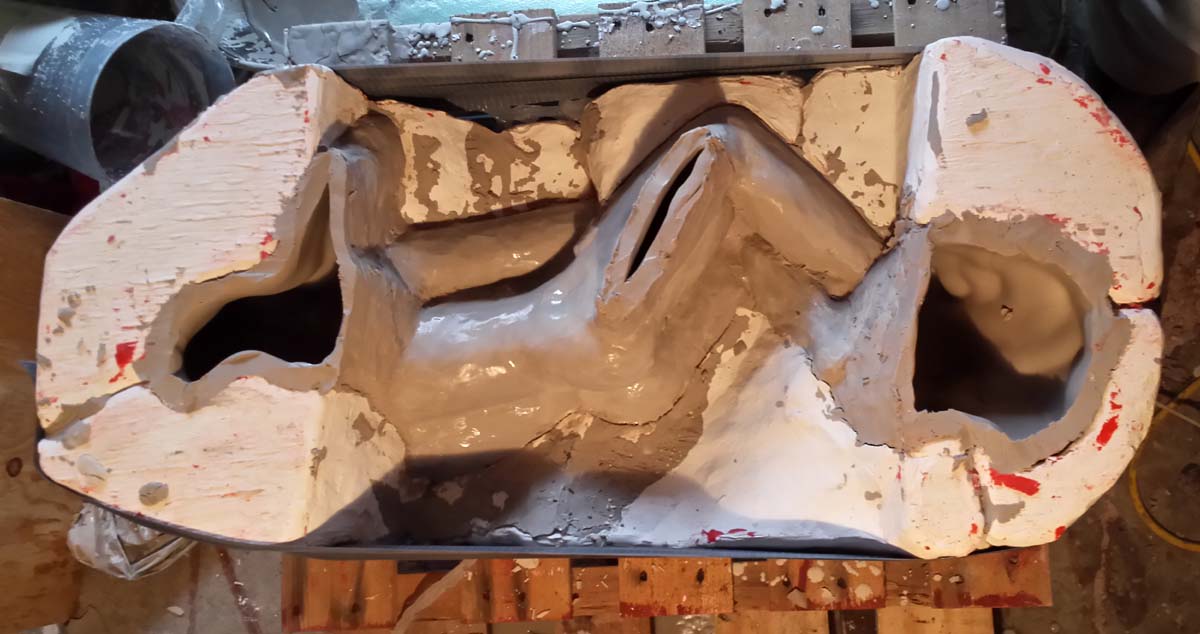
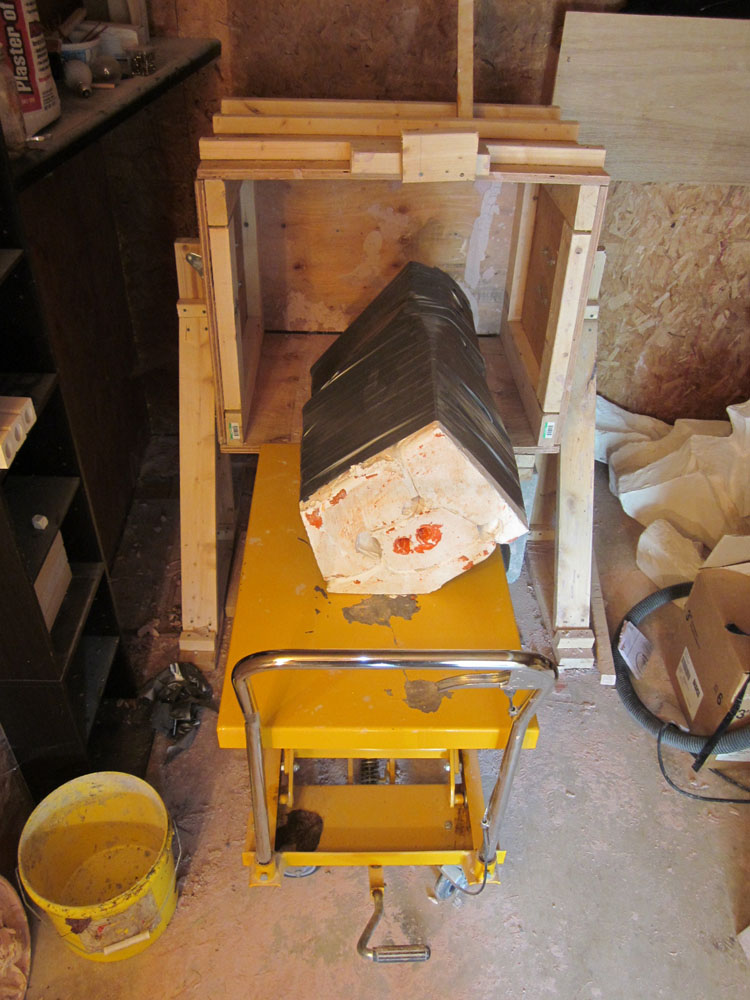
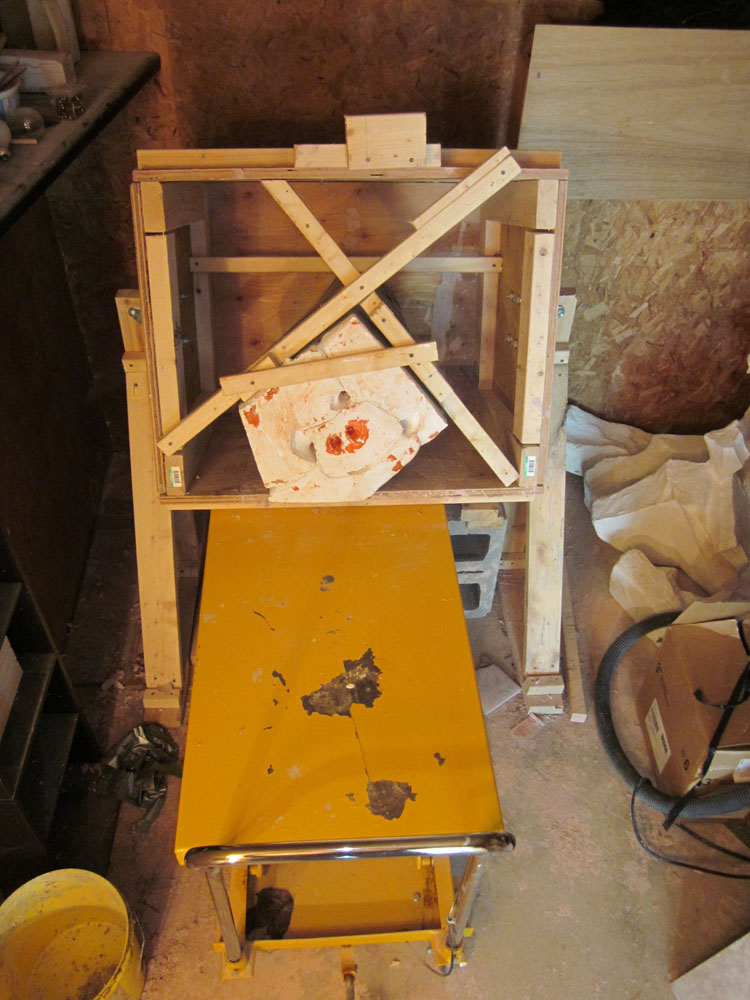
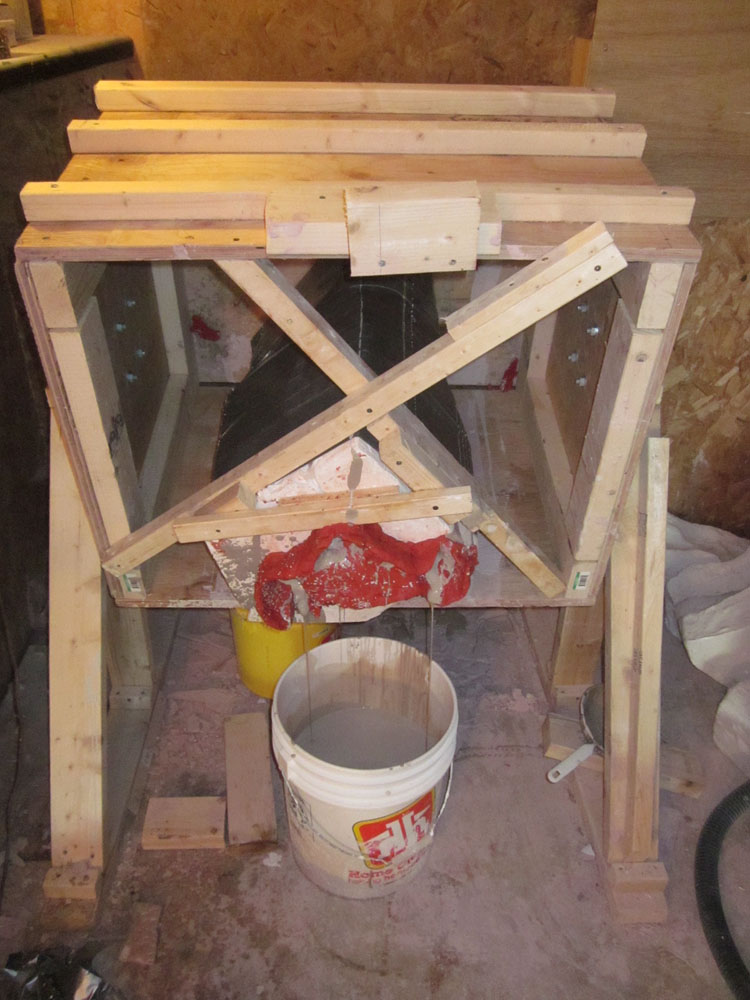
Once the sections have been assembled, siliconed, and taped it is ready for clay slip to be poured.  I left the liquid clay to set in the mould for eight hours to ensure the walls were nice and thick.  Then the excess is drained out with the final whole assembly being left to harden a bit, overnight.

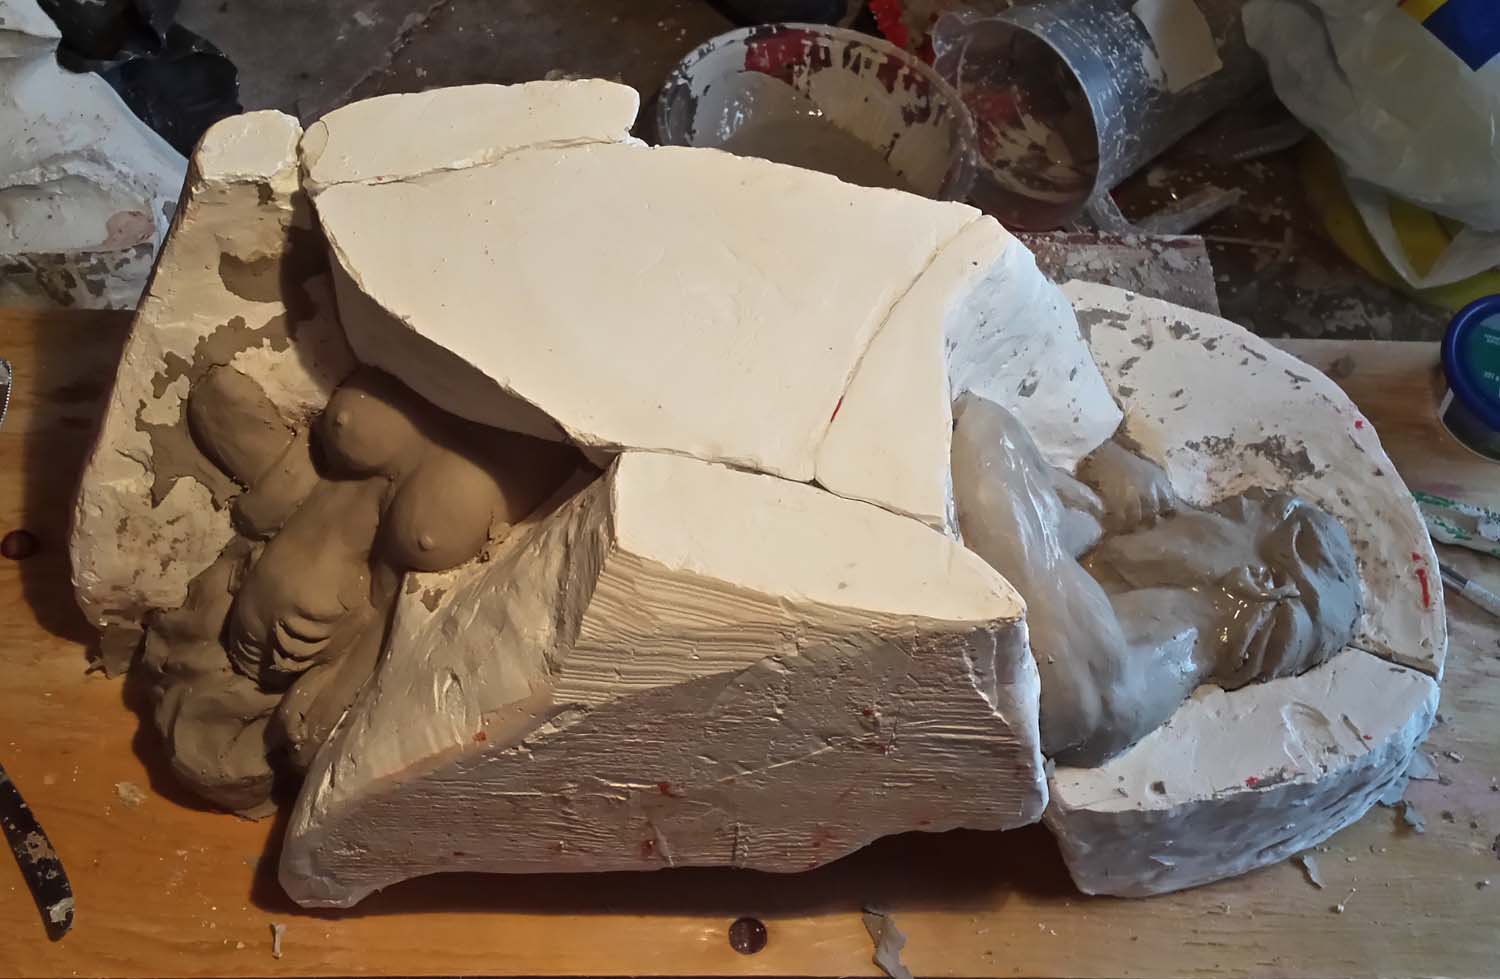
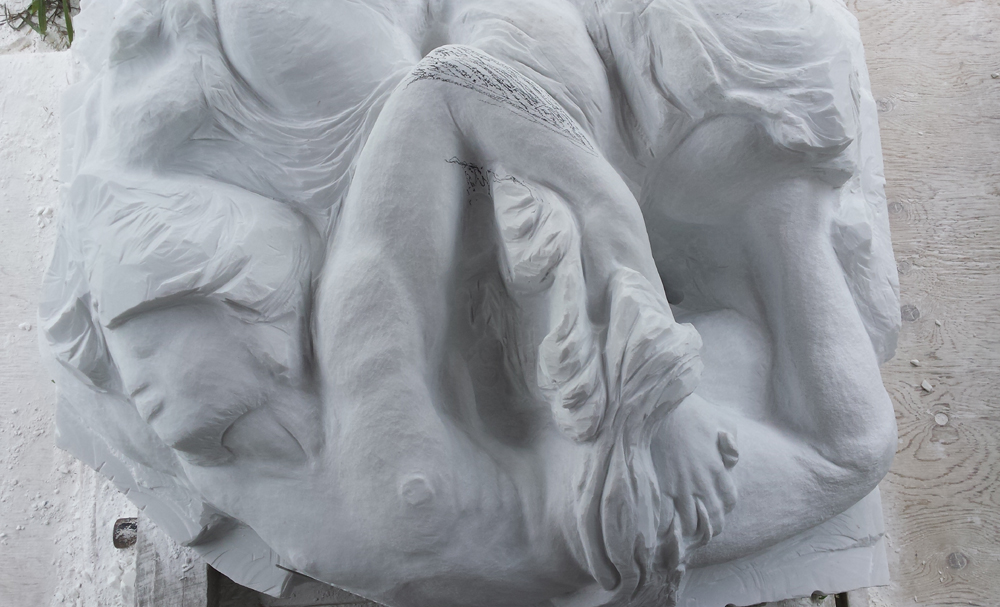
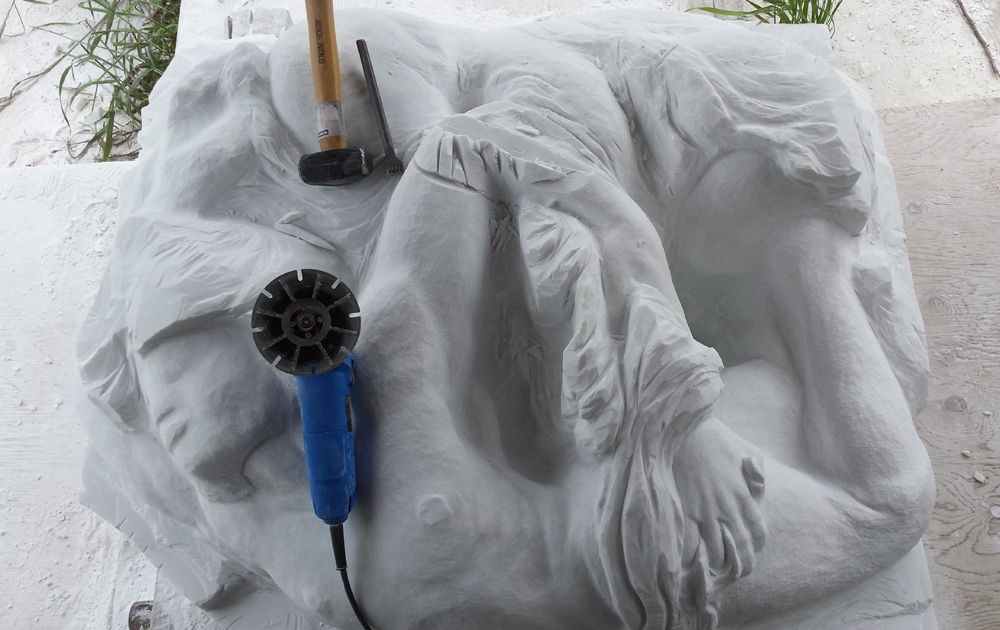
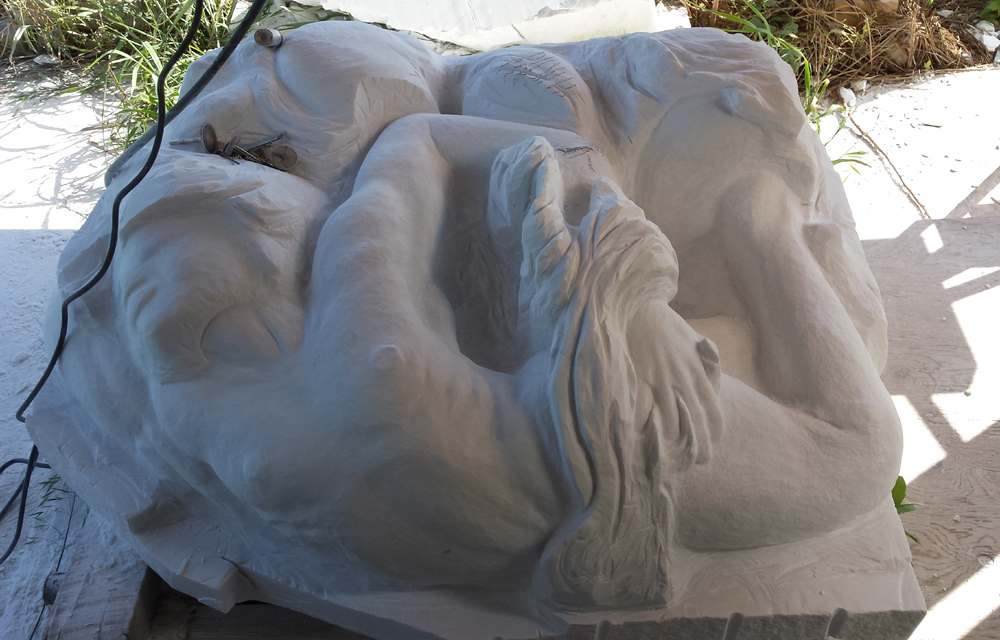
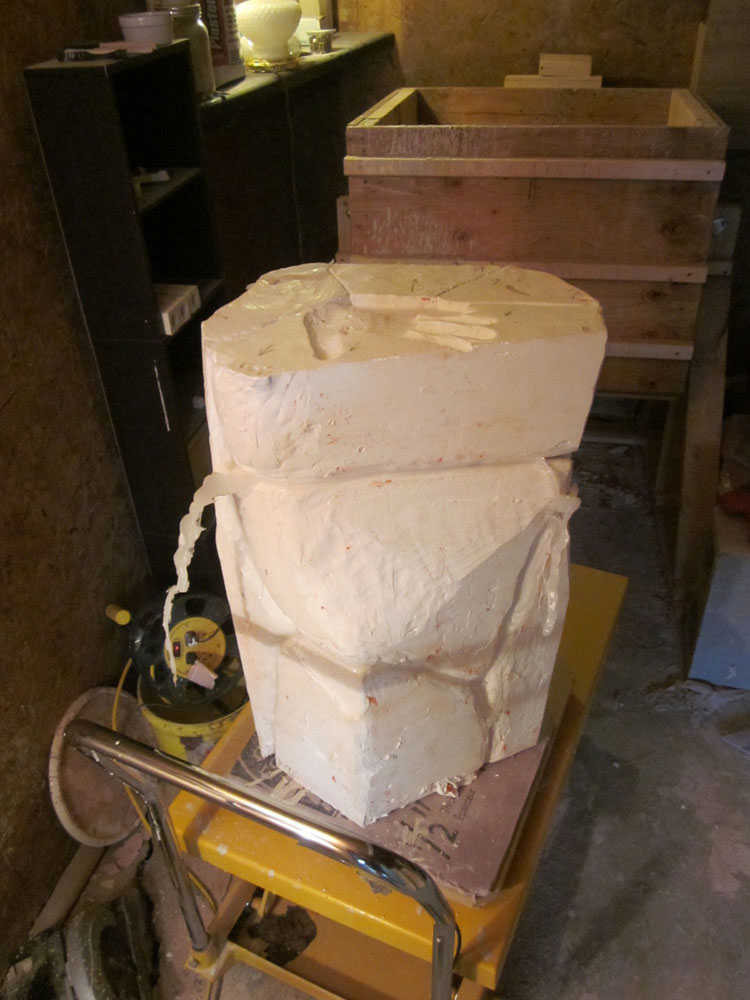
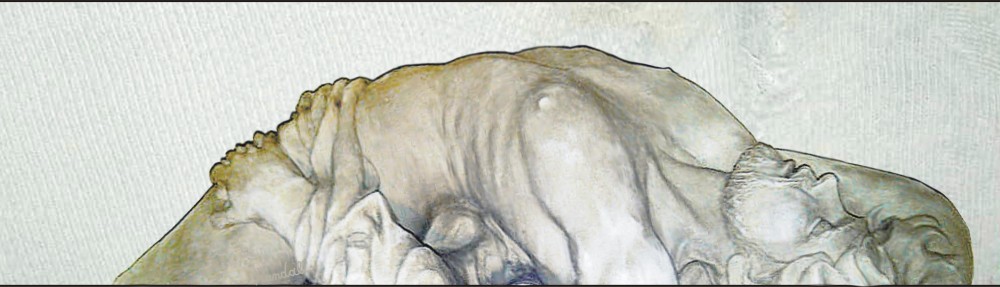
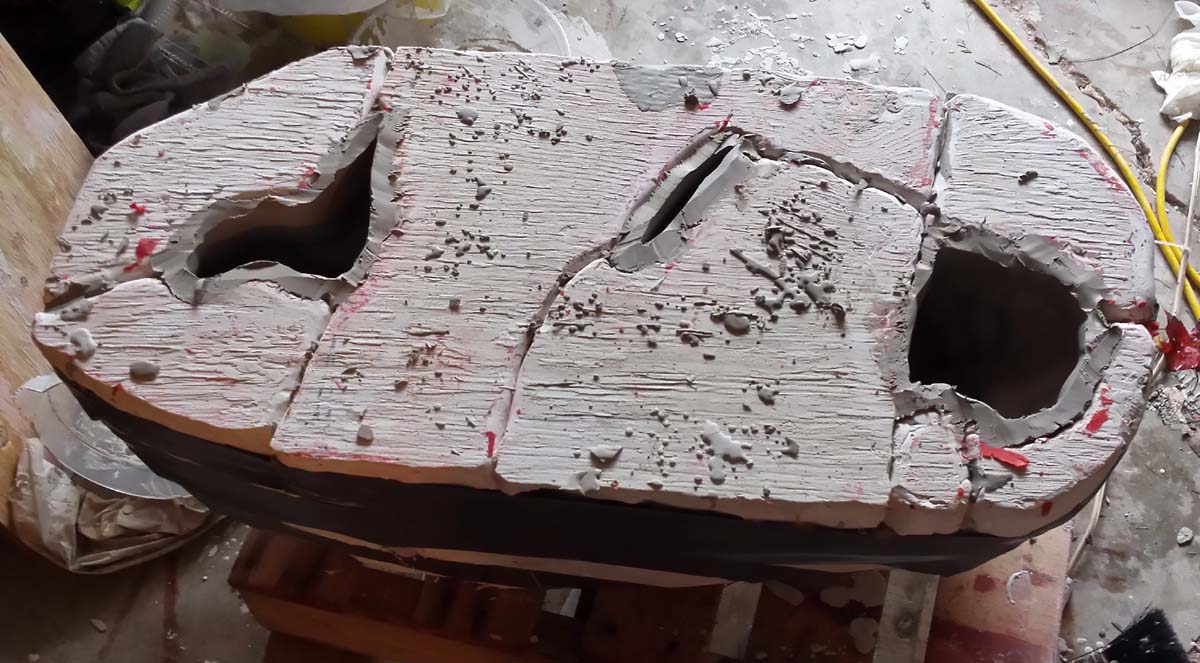
One section is remove at a time, with cleaning and repairing being done with each removal.  Finally, once dry, sanding and water brushing smooths the finish and completes the piece.  Eve of a Dream is now ready for the Kiln.  Once the statue is bisqued in the fire I will continue with the final touches that were too delicate to refine when the clay was still green.  Truly, a labour of love.

Eve of a Dream

Randall Eve of Discovery randy bezeau thumbImagine living alone on an island with only the coconuts and iguanas to keep you company. It wouldn’t take very long before you conjured up an imaginary friend… should we call him Wilson? People need company, and more importantly, we can only be human in the company of others. Like a tree falling in the forest, we need ears to hear, or there is no sound. Love is funny that way… if you don’t work it, you don’t have it. We need each other.

The Creation of Eve Michelangelo Carlo Francesco NovoloneWe all need someone to walk side by side or life becomes pretty bleak. In Genesis Adam first pines for and then dreams of a partner to share life with. Eve is pulled from his side (traditionally translated as rib) The two of them now can face life together.

Carlo Francesco and Michlangelo’s Creation of Eve is the standard interpretation of this story. However I prefer Carpioni’s synthesis of Adam and Eve in their being created with less of a focus on timing. Bouguereau First Mourning really drives home the importants of partnership in living through the hardships of life. Eve and Adam are devastated by the death of Abel and cling to each other for support.

Adam and Eve Evegiulio Carpioni William Adolph Bouguereau

Randall Eve of a Dream the creation of eve randy bezeau topAnd so it is with Eve of a Dream. Drawing inspiration from these masters, I’ve folding all their messages into one statue. Eve is the answer to Adam’s dreams and she will face along with her partner all of life future highs and lows. Side by side.

Randall The Rib Randy Bezeau

Problem with Perspective

Randall Bezeau Randy Pieta Aug 2017Finally, there is light at the end of the tunnel. My Pieta is starting to resemble something closer to what I’ve been imagining. After blocking, then rounding; now sculpting begins to bring out the creative flow. Still there is much more work ahead. Sculpting marble requires patients and time.

To get to this stage of smoothing and rounding requires constant review of my various maquettes.  Comparing how the stone varies from these smaller clay representations. The artistic approach for me is a methodical process of looking for what does not belong, and then removing it.

A constant series of hatch lines marking areas that need to be addressed,  as I work around the entire piece. From hip to hand, shoulder to arm.  All the while ensuring each is smoothly carved into its adjacent piece.  All this takes time….  And if your not careful, you can lose track of where your actually going; you can lose your perspective.

Randall Bezeau marble sculpting Pieta 7 17 f
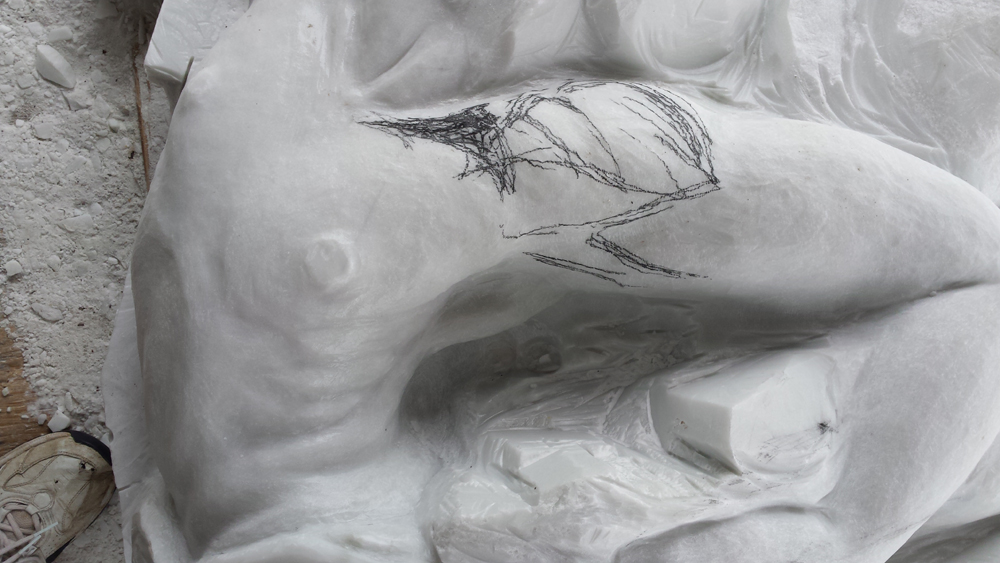
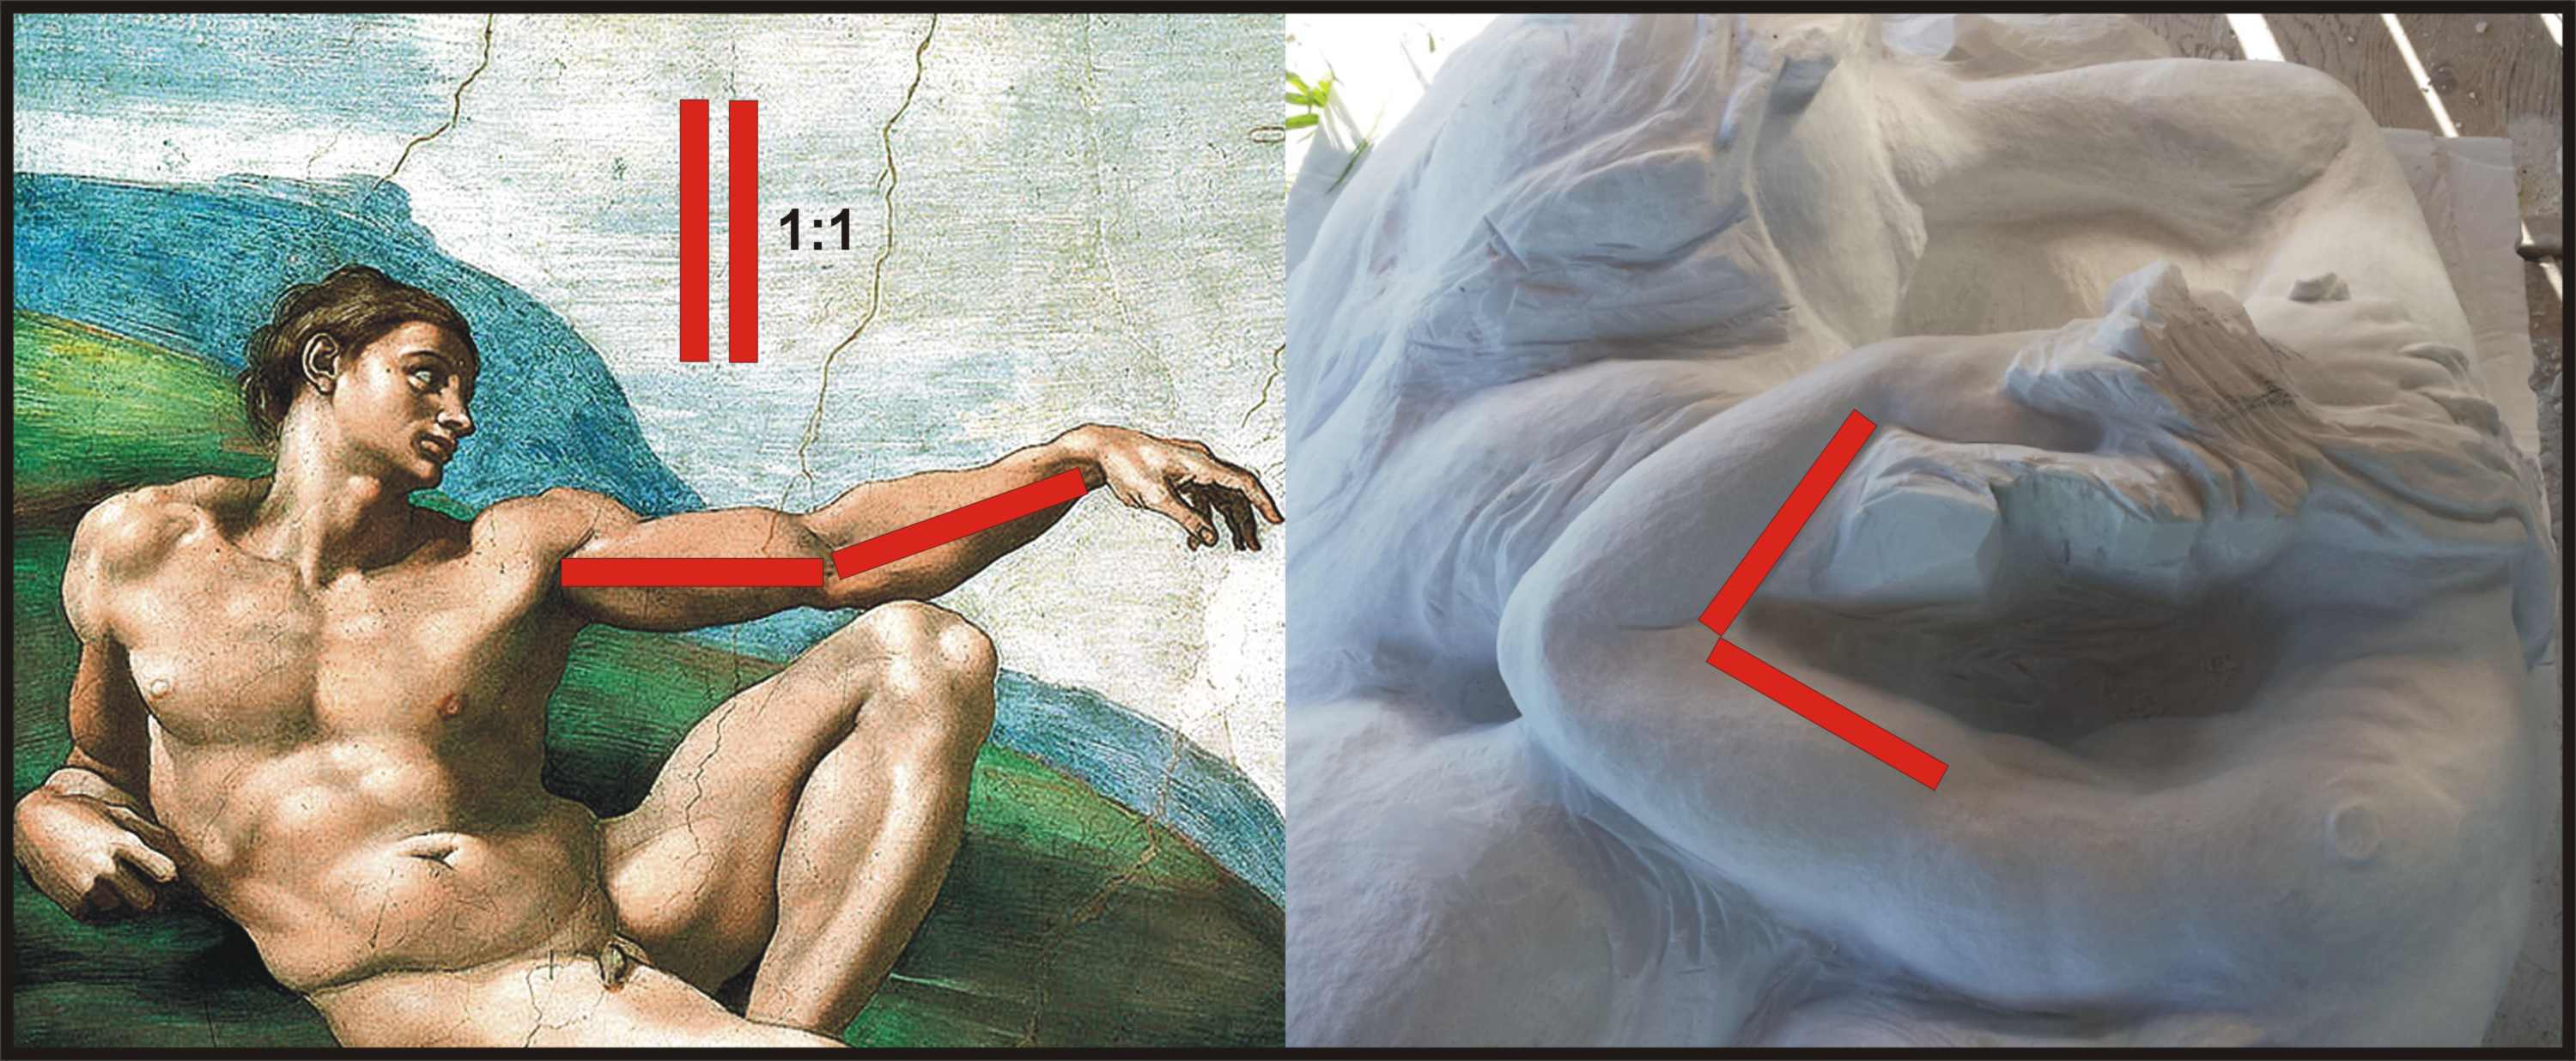
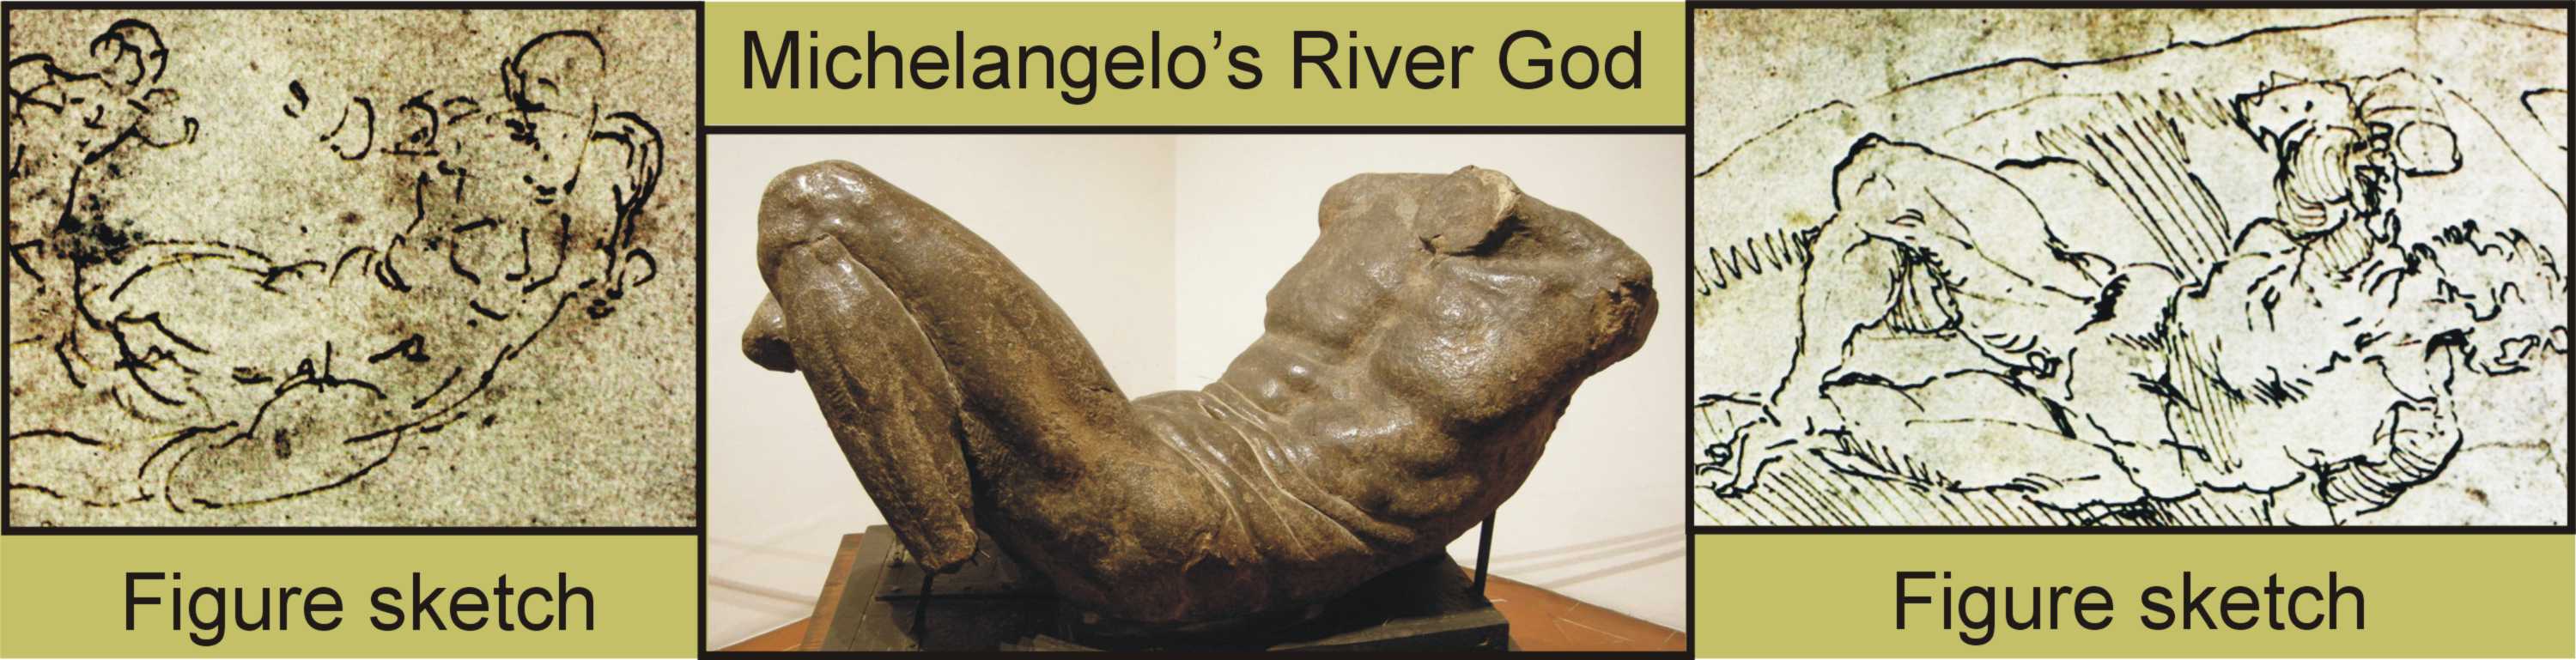
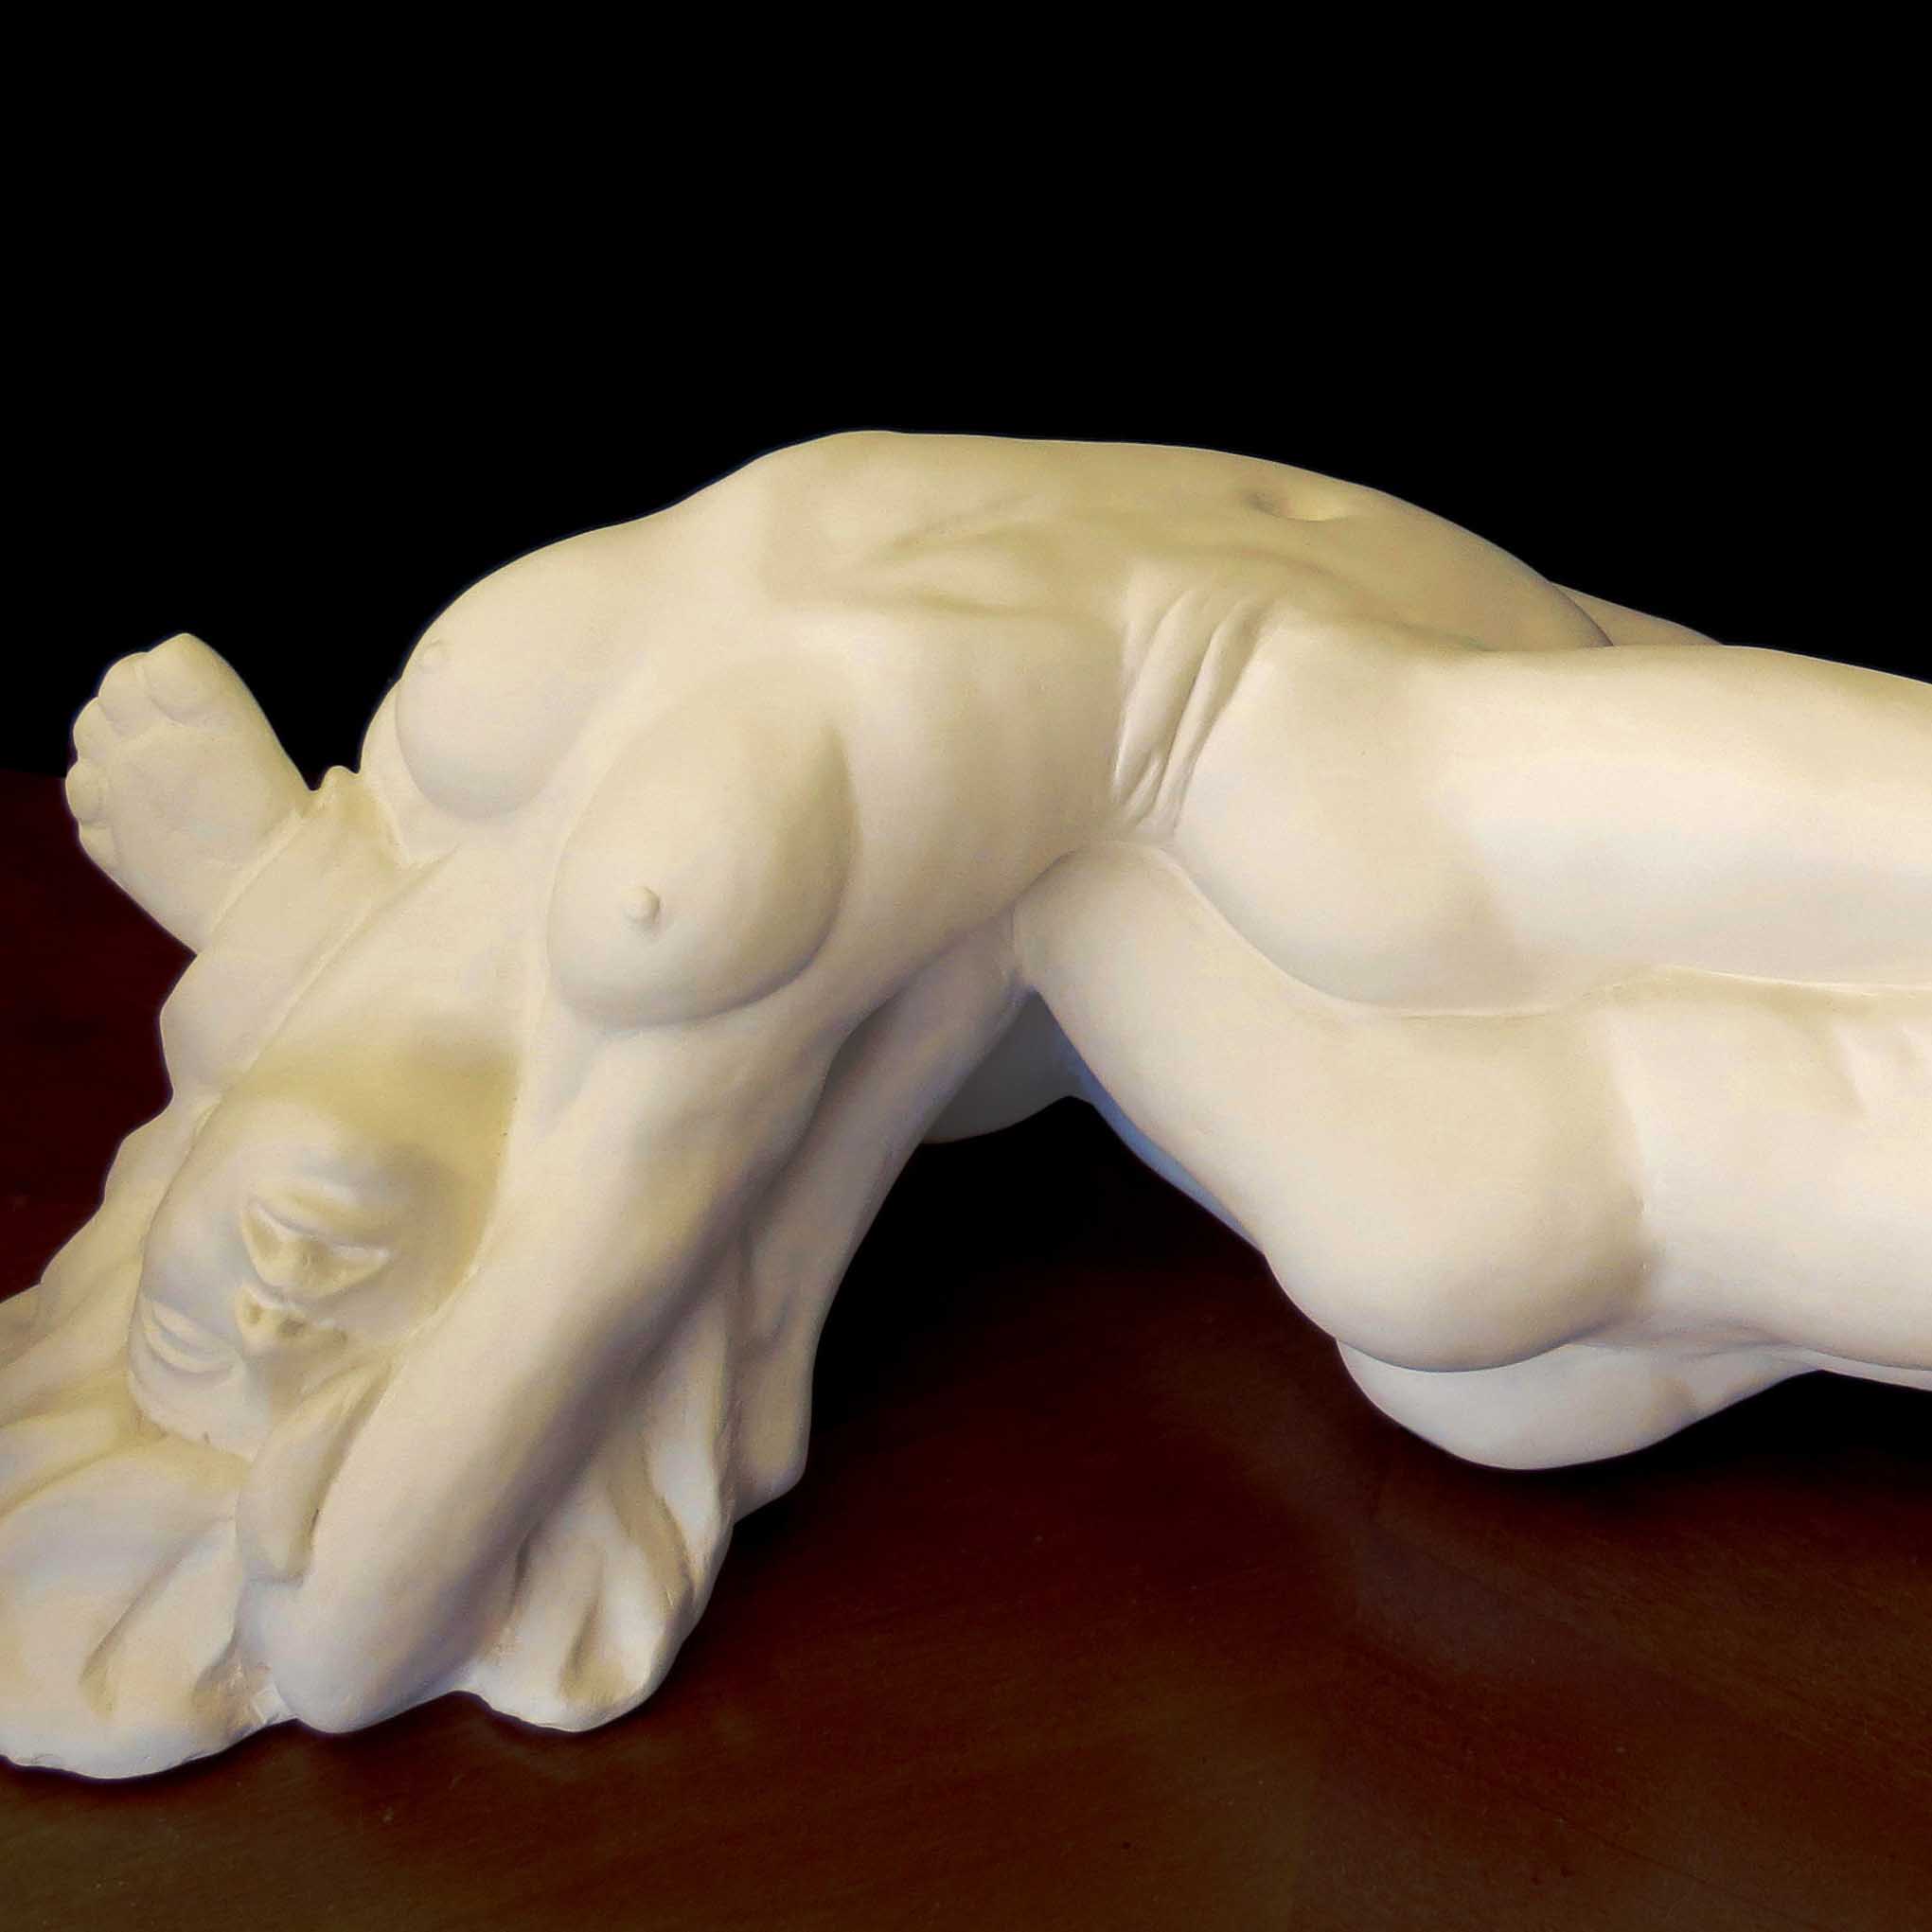
From the front, the Pieta looks fine, however, when viewed from another angle, the mistake reveals itself.   The arm is disproportionately longer than the forearm.  Using Michelangelo’s Adam, we can see that the distance from the underarm to the front of elbow, to the front of wrist are approximately the same.  For me, a big mistake.  However, there is still room to repairAdam Arms Lenth

This is were patients really is needed, and why I always leave a little wiggle room within the layout plan.  I have space within the stone to adjust the length of the arm by lowering the elbow.  With any luck, this may work to my advantage by forcing a more creative line.

Mistakes like this really bring to light Michelangelo’s genius.  All I can hope for is to continue to working diligently around the statue, this time paying closer attention to perspective and proportions.  More to follow.

Randall Bezeau Randy Pieta Aug 2017

Pouring Slip Clay into The Pear

Michelangelo loved to sketch; as is evident by the copious amounts of drawings he left behind.  Modelling on the other hand, whether in wax or clay, was more of a necessity than a passion.  Though many of his surviving terracotta maquettes show a skill and flair that rivals his marble, the master believed that the process of ‘adding’ clay material, required less skill than the purity of ‘taking away’ stone.  The hatched line sketching technique he had perfected was similar to carving in its unforgiving quick and permanent strokes.       Ink, like stone shared a confident certainty that Michelangelo admired.

michelagelo figure sketch

Still, he was a great creator of clay models, statuettes that survive as examples for us today.  Not just as functional maquettes, tools to aid in blocking marble, but as works of art, as permanent as stone.  And this is why I love to draw in clay.  There is a beauty in its fluid nature.  Just imagine if the Master had chosen to sketch in clay rather than charcoal or quill…  how many more masterpieces would we have to share?  Of the two methods of dimensional sketching, the drawing provides the greatest economy of persevering ideas.  An artist can sketch out dozens of designs in less time than it would take to complete a single maquette.  Michelangelo would continue to return to both his sketches and models time and time again as he advanced from one project to the next.  The Sistine Chapel, and the Medici Tomb build upon his earlier studies.   Inspiration captured in ink or terracotta is realized through fresco or marble.

michelagelo dusk sistine

And so it is with my work, though much more humbling and much less masterly.   My  Adam & Eve, The Pear has been cast in plaster and is now ready to be poured in clay. The proof is in the pudding… my jigsaw jenga puzzle is now dry and ready to be assembled.  Adam & Eve Randall Bezeau Cast aAs there are so many sections, and these must all pull away from each other in oddly opposing angles, it is impossible to build keys within the forms.. (normally key structures  – male and female – prevent slipping or sliding) due to the irregular design, I will have to assemble each piece while ensuring the internal edges are aligned…

There is little structural integrity or stability until the mould is completely assembled, siliconed and then duct taped….  Once this is done, I can tip the unit on its side and give it a push into the tipping box.

Once inside, and secured from wobbling, the whole box can be teetered 90 degrees and locked upright.  Plasticine is used to form a dam and aids in preventing spills and waste when it’s time to pour the slip out.  ( it would surprise you how much liquid is sucked into the plaster, the slip that is poured in will be absorbed dropping the level down several inches, the Dam allows for extra slip to rest above the mould, ensuring clay doesn’t dip below the top –  clear as mud?)

Once the clay has begun to set to the consistency of a chocolate brownie the inner sections can be removed and the assembly is ready to be righted.  This time will vary depending on the size and thickness of clay, but expect between 6 and 12 hours.

Open one section at a time, clean and repair as you go.  Take your time.  If you try to remove the plaster too quickly, the clay will be too damp.  The whole project could collapse and fold into itself, or simply tear away.  If you need more time, extra days, spray with a little water and wrap with cellophane.

Adam & Eve Randall Bezeau Cast oBy thoughtfully removing each section, you can move around the statue, relying on the remaining plaster to hold up the weight.  As needed, add extra support with cut out high density foam.  As you go, use a paint brush to wet polish the clay.. this is the most gentle form of smoothing.  Adam & Eve THE PEAR Randall Bezeau Randy copyIf at all possible Do Not pick up and handle greenware; it is Very VERY fragile.  So, hold off with attempting to finish sanding or adding refining details.  I have chosen to send this project to the kiln, and bisque fire.  This gives it enough strength to withstand the file and drill. Trust me on this one… a three legged statue is supper breakable… Cooking will add weeks to the timeline, what with ensuring the statue is bone dry, but better to wait then suffer the consequences of impatience.

Now that The Pear is low fired, it is strong enough to finish, but that will have to be saved for another day… It’s the end of April and temperatures have warmed up outside.  It’s time to get my marble on…  open up the summer studio and get back to stone.

The Pear – pouring plaster mold for Adam & Eve

I’m not sure why I enjoy plaster mold making as much as I do.  Maybe its the texture of slapping muck that makes me nostalgic for grade school arts and crafts.  Maybe its the strange science, pseudo alchemy, that tickles my brain.  Certainly its the challenge of designing the perfect puzzle, re-engineering a Jenga masterpiece. The Pair Adam Eve Maquette Randall 1a The Pair Adam Eve Maquette Randall 1b The Pair Adam Eve Maquette Randall 1cThe smart way to pour this piece would be to separate Eve’s Arm, and Adam’s leg from their bodies.  Pour them separately and then reattach later.  But Fun and Smart are not always equatable, and I’d rather have fun.  So with a little forethought, all the sections are staked out in advanced…  with break away lines being predicted.  The plan, naturally, last only for the first few sections….

The Pair Adam Eve Maquette Randall 1d The Pair Adam Eve Maquette Randall 1e The Pair Adam Eve Maquette Randall 1f

One piece builds upon another.. and my eye is always searching for the hidden lock, avoiding the undercut that would trap the plaster in place.  As you can see, there is lots of opportunity to play with plasticine.  As an afterthought, one more reason why this is fun.

The Pair Adam Eve Maquette Randall 1g The Pair Adam Eve Maquette Randall 1h The Pair Adam Eve Maquette Randall 1haKeep in mind that plaster is heavy, and so make sure you build your forms strong enough to hold back the weight.  Also, don’t forget to use Vaseline between the plaster sections. Plaster sticks best to itself…  And yes, in the past I have forgotten this step and entombed my original. With over a dozen sections, just miss greasing on side, and the whole piece is ruined.

The Pair Adam Eve Maquette Randall 1j The Pair Adam Eve Maquette Randall 1o The Pair Adam Eve Maquette Randall 1s

Around and around you go…  Just imagine all the effort and time invested within that block of plaster.   Could be a complete disaster, a colossal waste of time.  Did I forget to Vaseline one side?