Michelangelo use of Models for Marble

It’s tempting to just release your artistic forces and throw caution to the wind; certainly it’s quicker… but then there is good reason to regularly revisit your original maquette design.

Michelangelo certainly invested much time into his smaller scale models, and from these he could ensure the grace and majesty he imagined would continue to transfer to his marble…

Michelangelo models maquette wax and clay

The model is key to ensuring your chisel stays on course.  Angles and expressions, curves and subtleties are often realized in the clay maquette, but lost in translation to stone.   You have devoted so much thought to your message….  The strength of sorrow,  the passion found in purpose, the embrace of life and death,  all represented within the pyramidal yin-yang.   This ideal is now trapped in the stone and is relying on you to release it from its bonds.

Michelangelo believed the artist ultimate purpose was to reveal the ideal human form that was trapped within the marble…  the stone did not inspire the vision, but was chosen because it conformed to his vision.  This is a significant difference from the renaissance style of sculpting to both modern and traditional art techniques. Continue reading

Michelangelo and the Bow Drill

The Bow truly is the innovation that subdued our species. Transformed us from wild wonderers to social builders. The Bow pre-dates agriculture, and is more significant than the development of the written word. Could our societies exist today without the invention of the Bow?

Did Michelangelo understand the power of this tool to bend this world to his vision? To shape history as David shaped the Hebrew nation?

Within an afterthought, the briefest of prose, he writes:

Davicte cholla Fromba e io collarcho, Michelagniolo
David with his sling, I with the bow, Michelangelo

Michelangelo David with his sling and I with the bow

David with his sling, I with the bow….  With this simple tool, Michelangelo transformed metamorphic rock Epochs old, into a cultural statement that defined his time and continues today to reflect our humanity… Within David’s eyes is revealed the strength, the confidence that we all have to chose our own path.

Michelagelo David

Michelangelo had a personal connection to the Bow. Specifically, the Bow Drill, a tool that he used with such precision as to render completely natural the flowing contours of fabric and locks of curly hair. Continue reading

Renaissance Realism

With my Pieta Amare fired to a bisque I can once again focus my attention to the marble Pieta Spero. April is a cool month here in Atlantic Canada, and with nights still dipping well below freezing and daytime temperatures just inching above zero, all I can do is prepare my stone work site and wait for warmer days just around the corner.

Having several statues on the go at the same time ensures that, regardless of the seasonal temperature, I’m always busy advancing my art, switching from one project to another.   The trick is to not get lost in the creative process, and never actually get around to finishing any of the work. Currently I have four statues on the go…. The Pieta Spero, and Pieta Amare, The Pear, and Bruisin

All are, to varying degrees, along the road to completion.

This is the difficulty with the creative mind… it’s leaps and bounds ahead of the creative process.  There are so many designs that I would like to do, but am trapped within this temporal egg timer.

Not enough hours in the day, not enough days or months; why are there only four seasons in a year, and so few years and just one life.

Michelangelo pined that if he could have more lifetimes to dedicate, he would carve a colossus from the cliffs of Carrara.

Time is scarce, and this is why many artist prefer not to finish… or ‘Non Finito’;  an artistic style that Curators and Critics applaud, and was credited to Michelangelo as its originator. What better way to witness the creative process than to trace the chisel marks or suppose what truths are trapped behind the un-carved stone.

In truth, the master had too many great ideas, too many commissions on the go, and was far too optimistic on how much he could actually complete. Pope Julius ll Tomb, was originally intended to have forty full figured statues, more than any one sculptor could complete in a lifetime. In fact most of Michelangelo’s statues were left Non Finito.

Michelangelo never intended to advance this unfinished style. When he had the time, he carved and polished to perfection. Consider; Vatican Pieta, David, Madonna of Bruges, and Moses. Also consider his monumentous achievement, The vault of the Sistine Chapel and The Last Judgement. His greatest works were all masters of completion. His Non Finito Style was simply a result of not being able to turn down a hefty commission.

In modern times, the non realistic statue is the norm; cubism, geometric abstraction, natural stone, rough, unpolished. All these expressions have the aesthetic value of balancing the visual with the emotional… but this was not the Renaissance way. As this period progressed from Michelangelo, to Giambologna, then transitioning with Bernini, the intent was always to compel emotion through captured realism.

Michelangelo Giambologna Bernini

Unfortunately, the Achilles heel to this Renaissance style is time. And this form of art is very time-consuming, and as such, very expensive.

As much as anything, the move away from realism to geometric modernism was a product of necessity. Non Finito is less expensive.

Cutting your marble down to size

Up in the mountains of Carrara, while the marble was still at the quarry, Michelangelo would have cut his original block down to size. This was needed to reduce weight and transportation cost. Today, this is less important, and the extra stone that will be feathered away can be used for smaller carvings.

In my last post I probed my block looking for flaws that could prove disastrous if ignored. Now that I have settled on a safe layout for my Pieta, I can continue to cut the extra stone away. Ideally, this will conserve large pieces for later… no sense reducing half the original weight into chips and chunks of expensive gravel.

So once again I follow the same procedure… Saw, Hammer & Feather along my demarcation lines.

Continue reading

Pouring Plaster

Plaster is one of the oldest man made building materials, after fired Clay.  Dating back almost 10,000 years, it was first used in Jordan and then expanded throughout all ancient cultures; from Egypt to China.

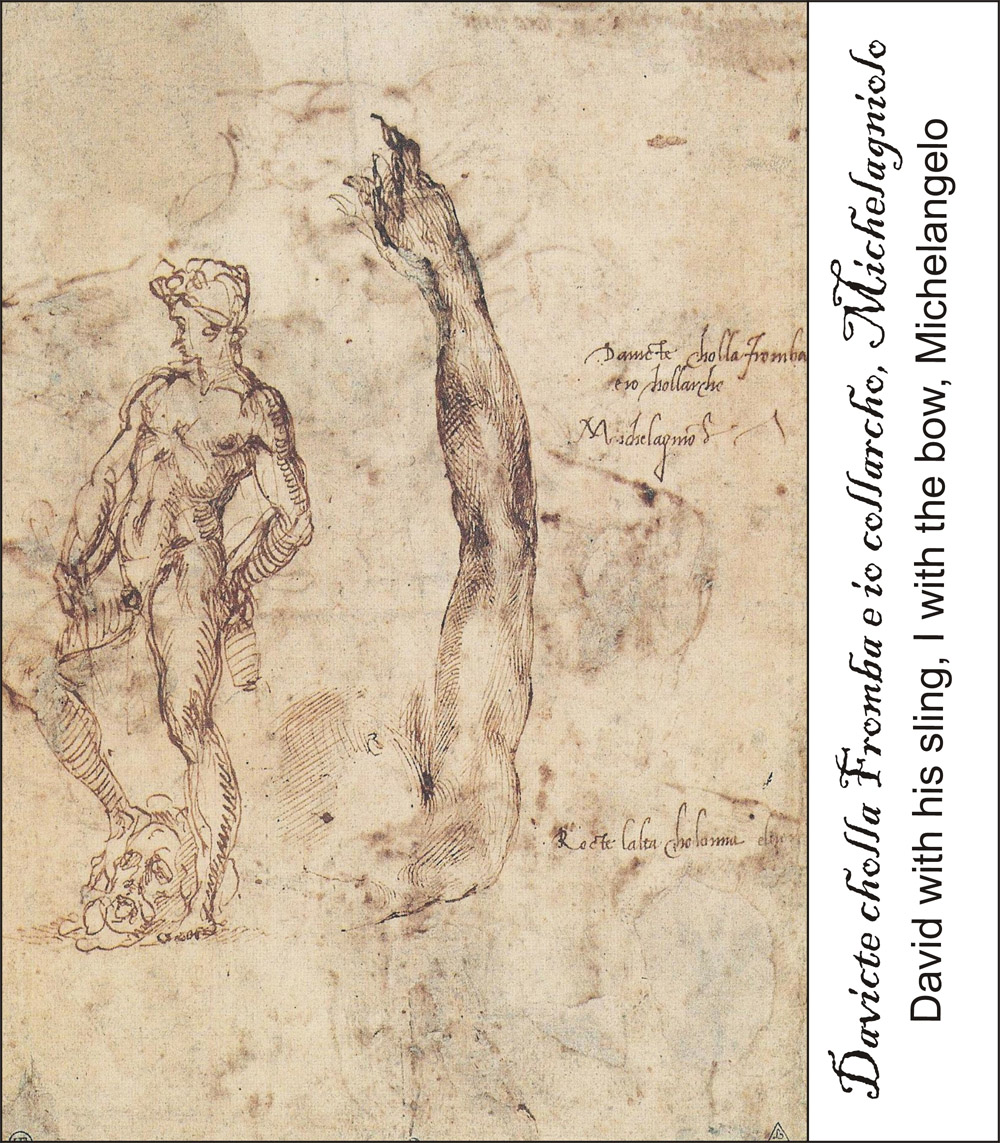
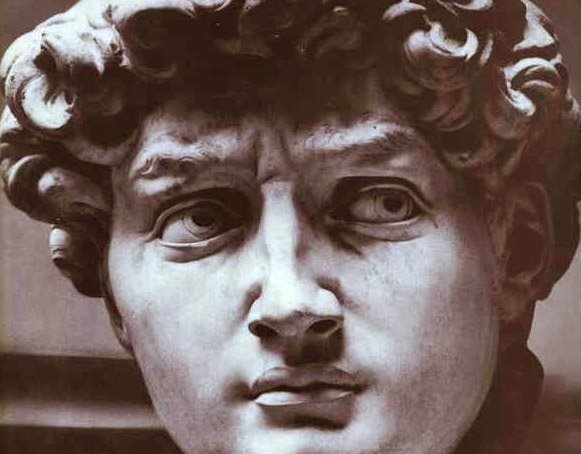
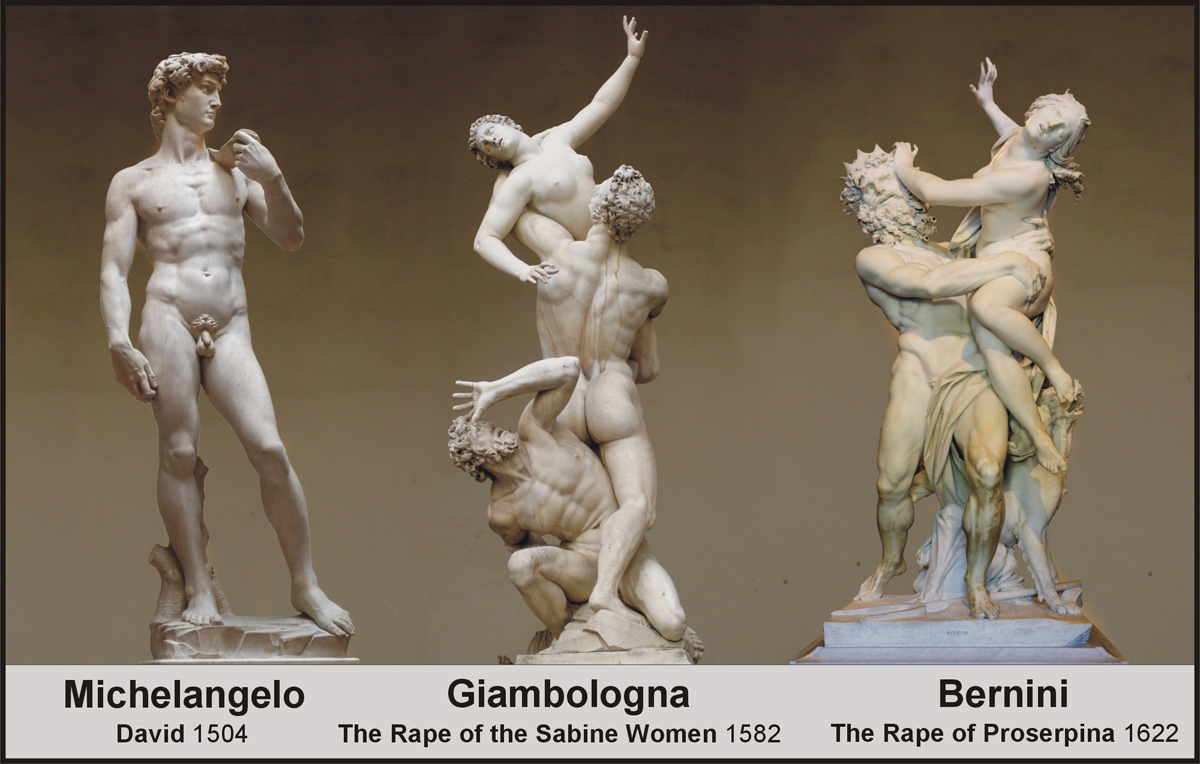
Michelangelo was very familiar with this medium, used to create his brilliant fresco the Last Judgment, and the ceiling in the Sistine Chapel.

As an artist, I can’t help but feel awe inspired as I continue to use this material following in the footsteps of a thousand generations.

Before getting started pouring the mold for the maquette, make sure you gather all supplies in advance and have them ready at hand. (see Tools of the Trade)

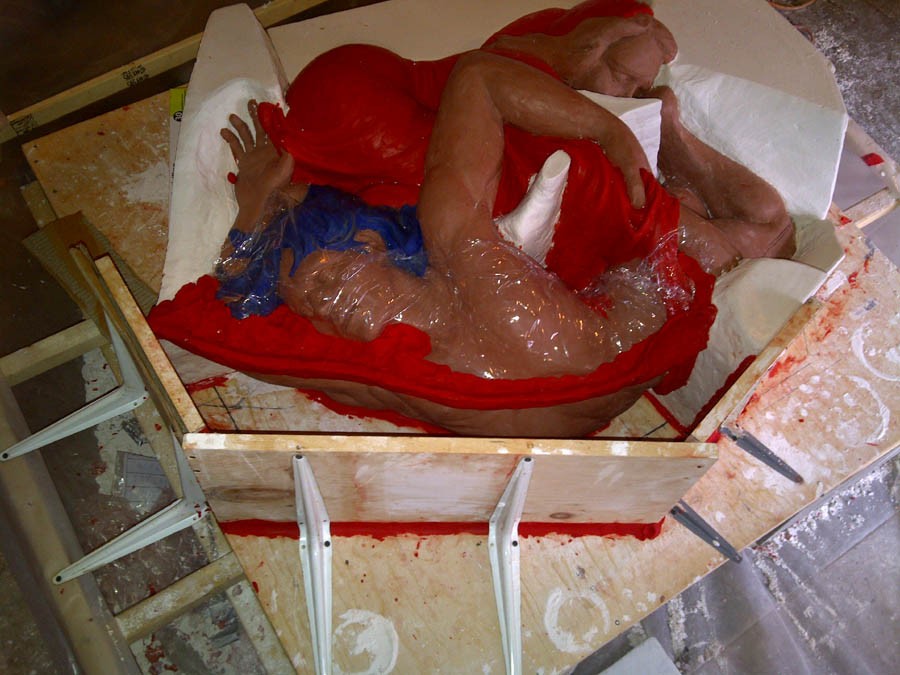
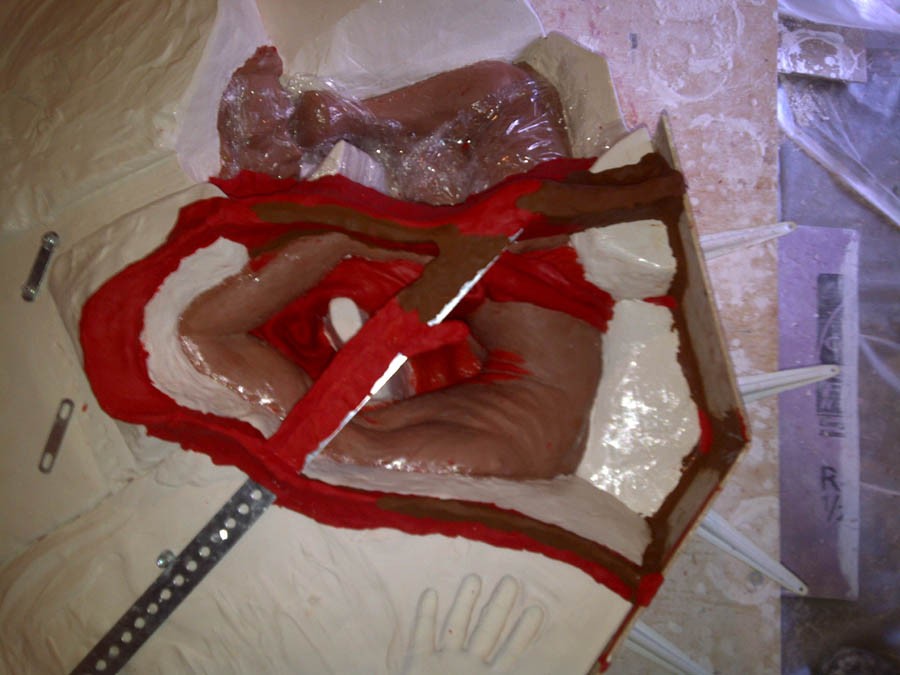
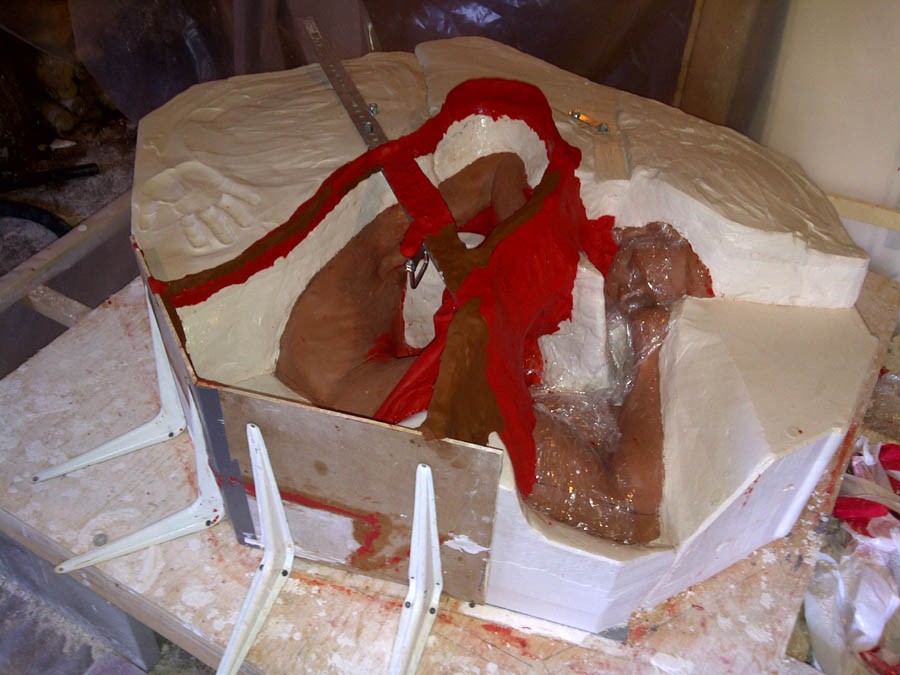
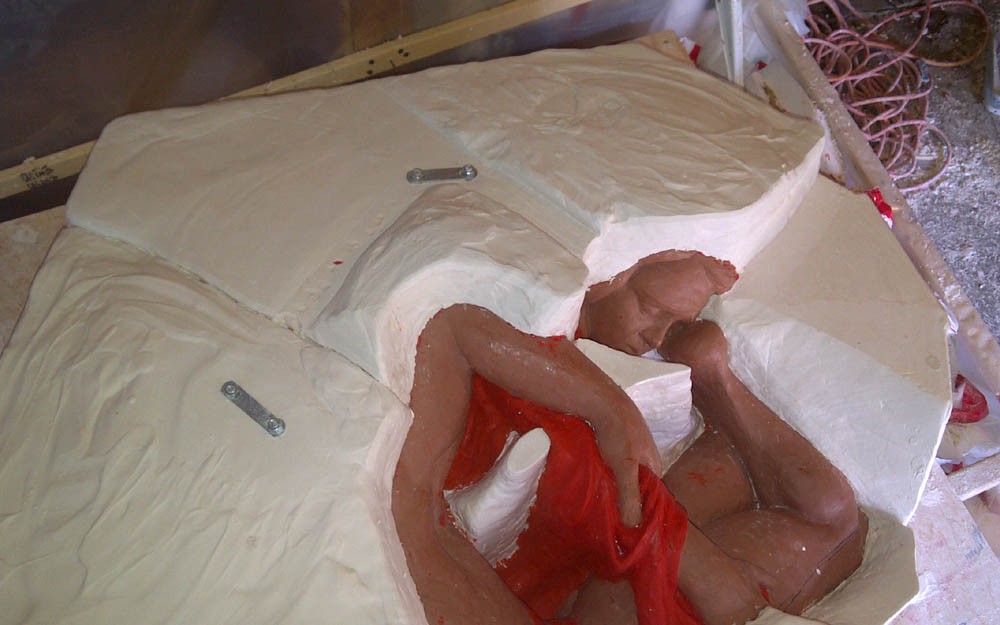
You will naturally pour one section at a time. Each piece will have a defined border that you will mark with an indelible pen or scribe with a knife.

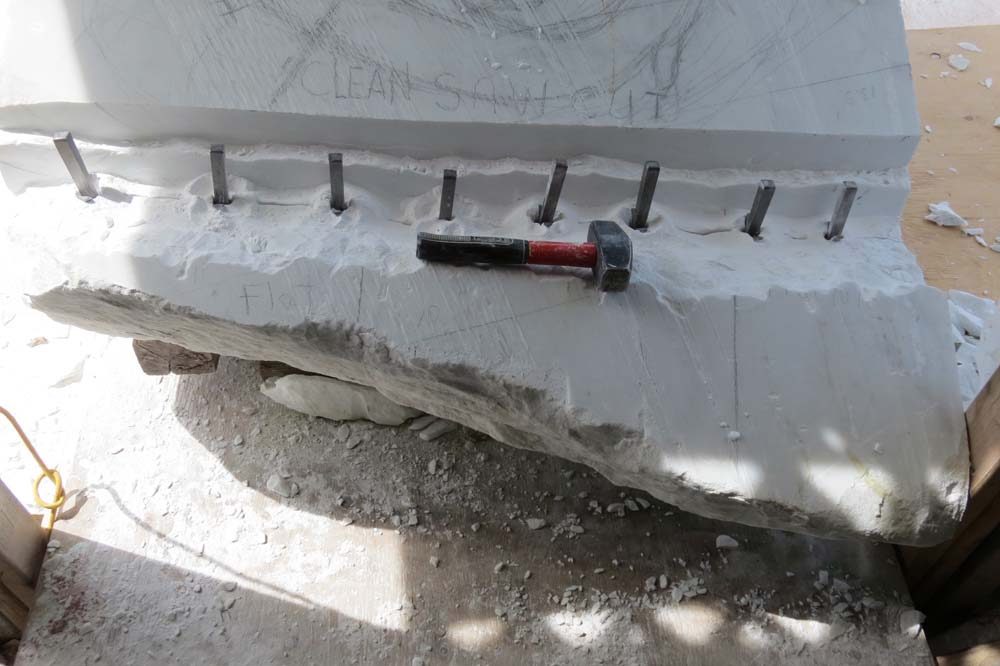
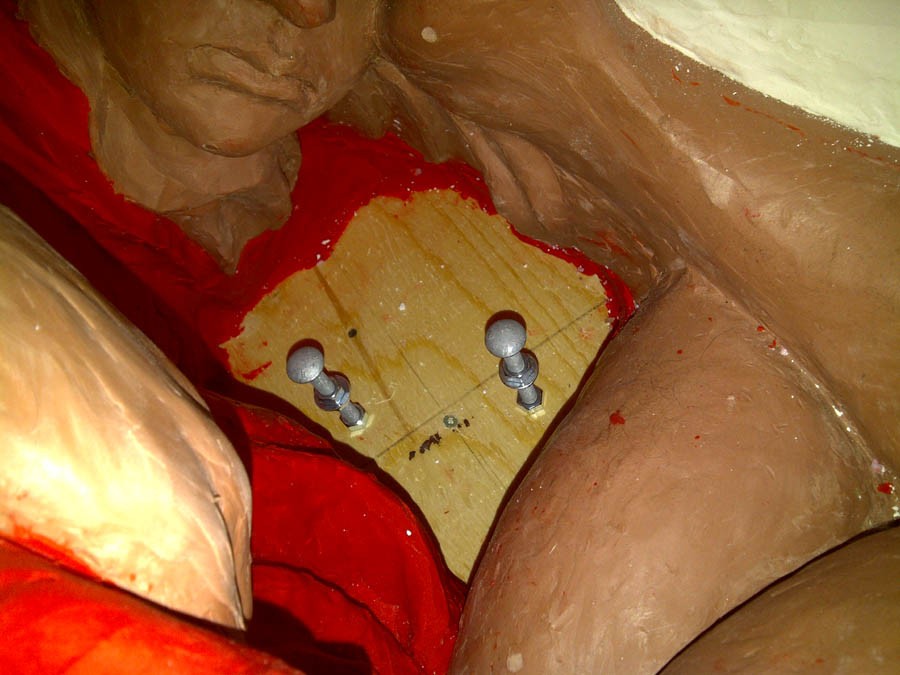
Look down a straight edge to see if there are any “undercut areas” this can now be filled in with plasticine. Remember that if your plaster form wraps behind your Maquette, then later, as you separate the mold, the clay behind this undercut will be gouged or clawed away. Do your best, but remember that clay is forgiving and you can repair mistakes later on in the process.  As this will be a very heavy piece, I have planned for bolts to be cast within the plaster.  This way, later I will be able to attach a winch to help lift the weight.

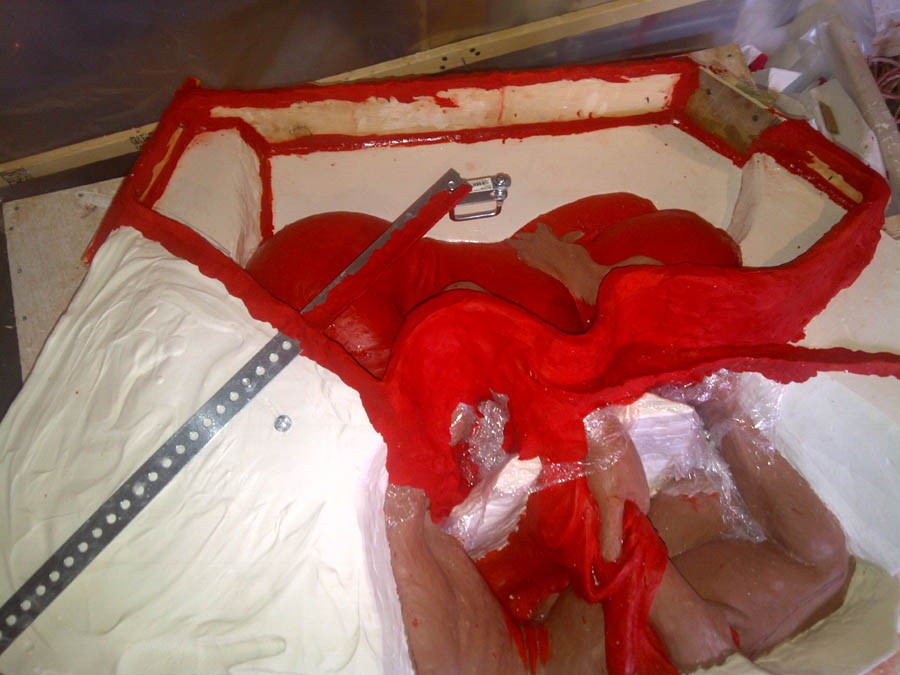
Your wood forms, having been pre-cut, will be fastened to the workspace deck using shelf brackets and “Robertson” screws.

Warm your plasticine in a used electric skillet and then run this paste into the edges between forms and the deck of your work area.

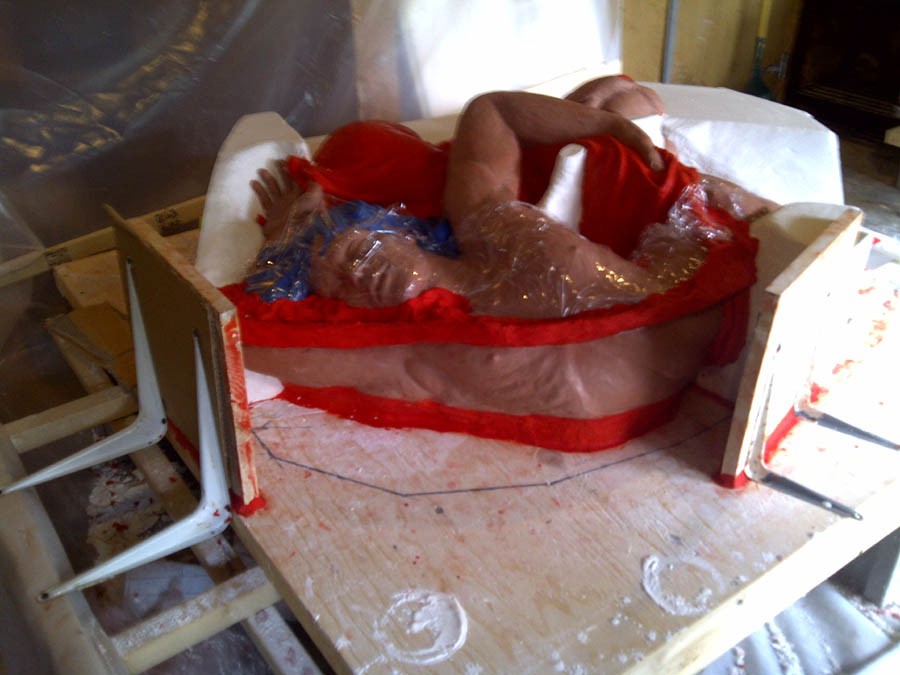
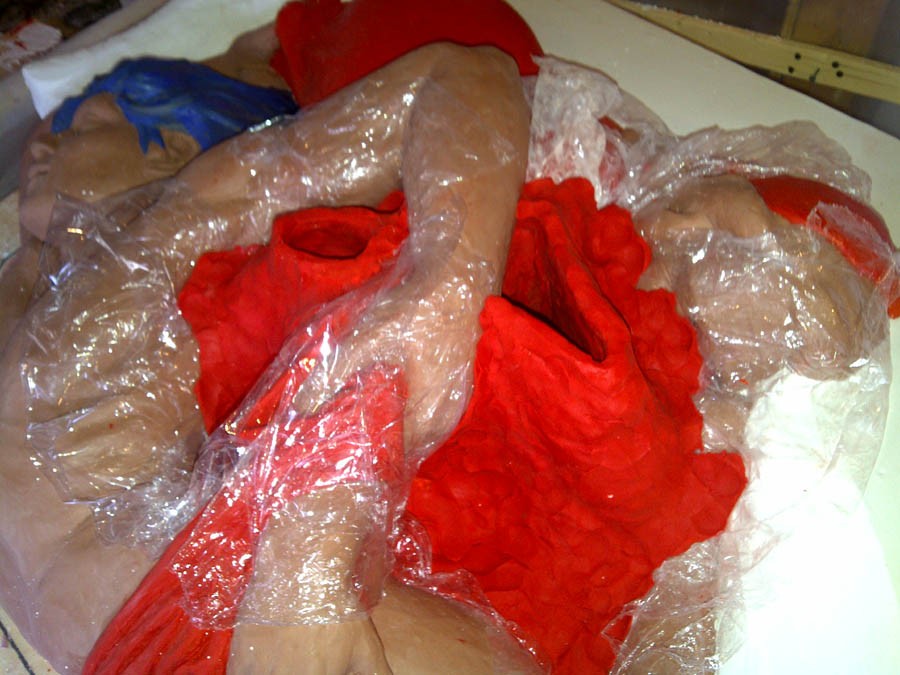
To avoid a mess, spills and sticking, protect the adjacent area with plastic wrap. Soft plasticine will be used to follow the contours of your statue and provide a watertight seal against the wood form. (just make sure that the plasticine and your Maquette are separated by the plastic wrap or they will stick together)

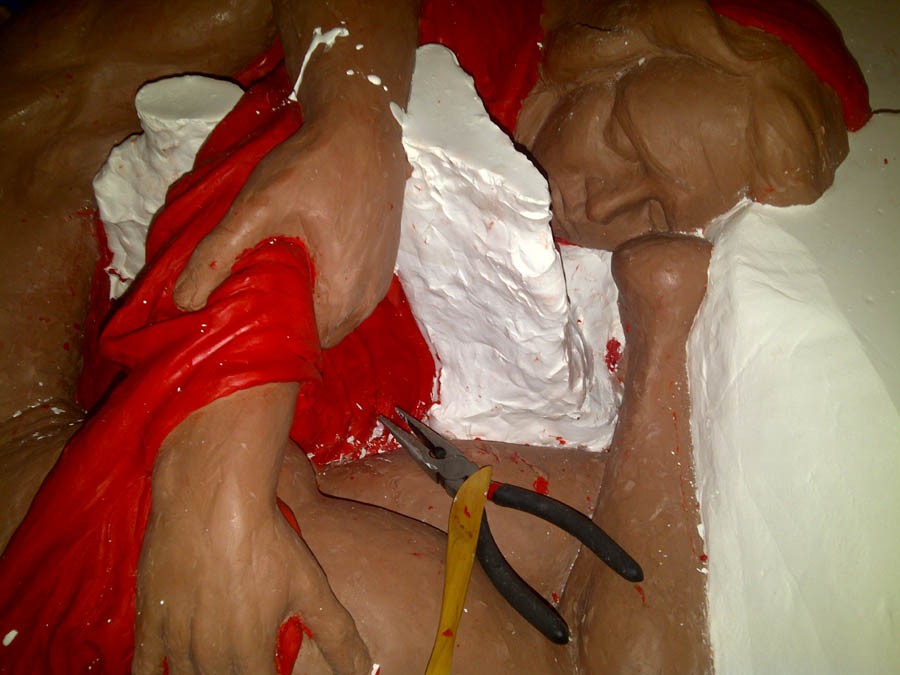
Coat all exposed previous sections of plaster with brushed on Vaseline. This will ensure that pieces will separate once finished. (without Vaseline, this 12 piece mold would end up as one solid block of plaster.) Plaster will not stick to modeling clay, or plasticine, but bonds permanently to itself.

As you become familiar with the weight of liquid plaster, you will adjust the thickness and strength of your forms… When I started I had several “Blow Outs” and there is nothing worse than a gallon of plaster slipping out over your statue and onto the floor. So always construct your form as strong as possible.

Now you’re ready to mix and pour. (remember.. you must use a mask and eye protection)

If you click on this link, you should be able to download a PDF with all the mixing details. But, don’t bother, art is all about hands and eyeballs.

From my experience, the best mixture is 73 parts water, to 100 parts ‘No 1’ Plaster…

So, to make life easy, mark two equal sized buckets – Fill the first with 5 measured litres of water (mark the shadow line “5 Plaster”) – and then Fill the second bucket with 3.65 litres of water (mark the shadow line “3.65 Water”)

A third larger 10 litre bucket will be used to mix.  Sift the plaster into the water letting the water naturally absorb the powder.  When done correctly, you should see an island slowly submerge into the milky water.  Once all the plaster has been added and is under water, wait a minute, and then mix with your hand feeling for any lumps.  Within approximately 5 minutes of gently stirring, the water will resemble milky coffee cream and will be ready to pour.

Remember to only mix as much as you can pour in 5 minutes or less. So it is important to have an idea of how much plaster is needed.

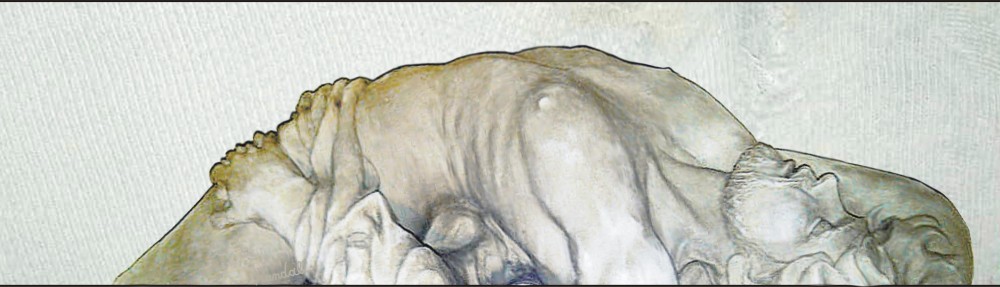
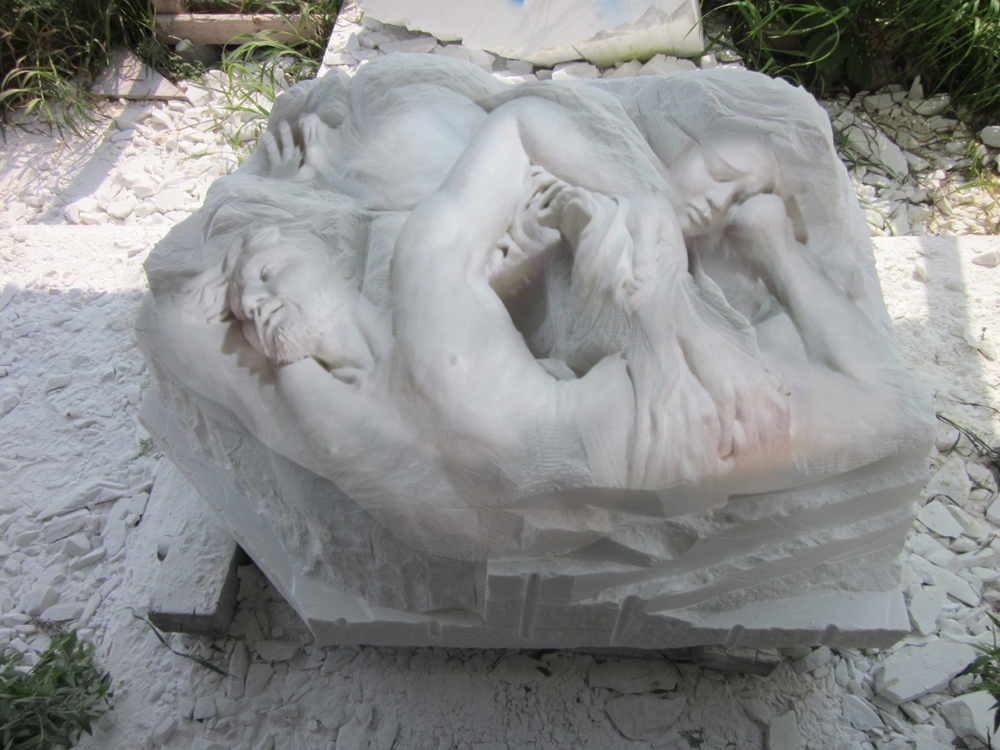
Calculating your volume is easy… length x height x width… great, if your sculpture is a cube, but not for the Pieta… so I normally have two or three pre-measured unmixed loads ready to quickly combine and add.

The plaster will cure in a hour or less, depending on water and air temperature. However, it will become impossible to work with quickly, in a matter of minutes… If you need more time, then use cold water. But 20 degrees celcius will yield the best results.

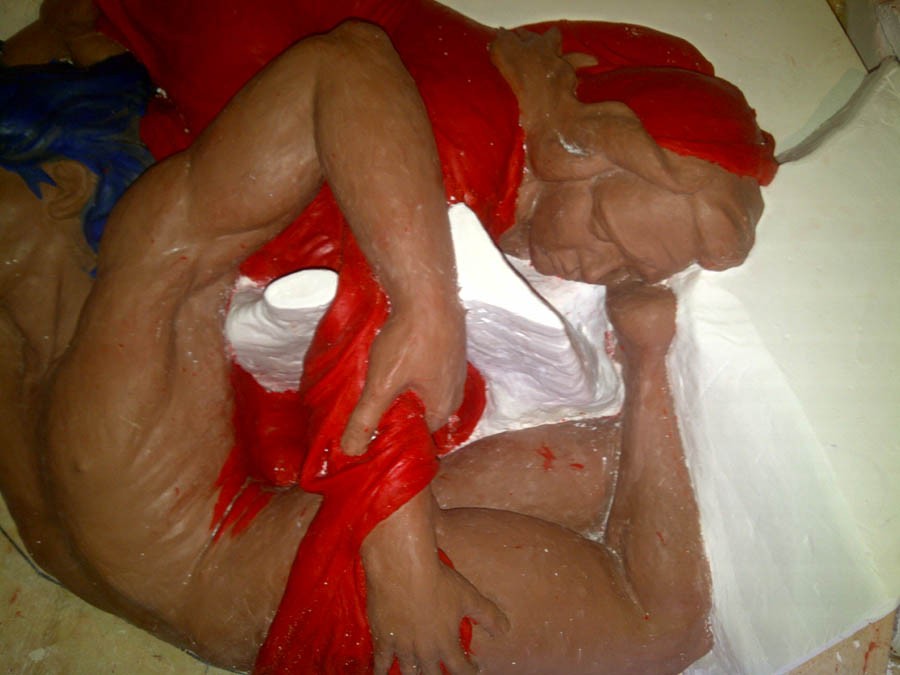
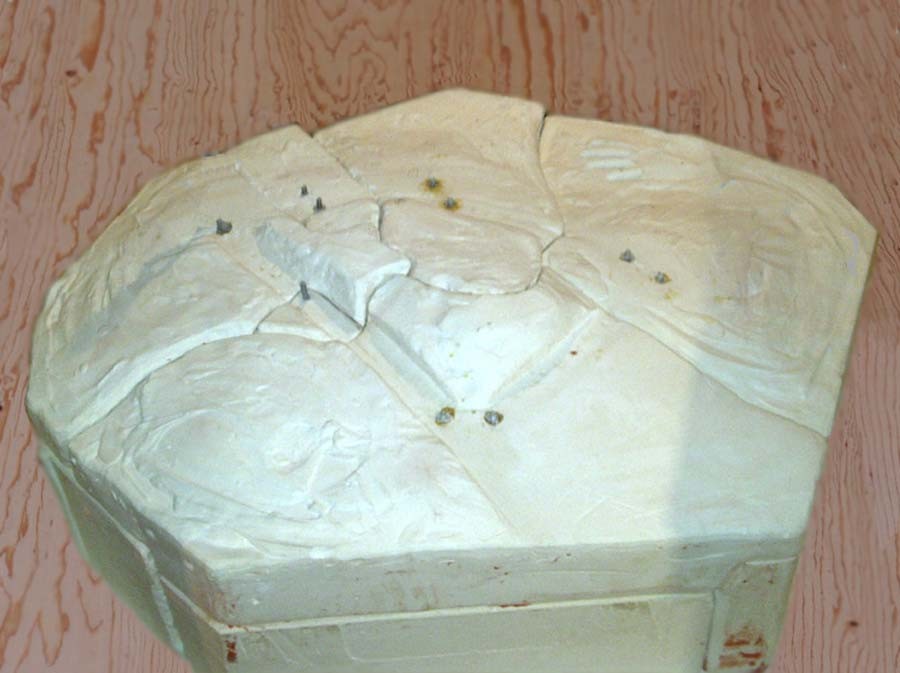
As plaster cures, it will heat, once the temperature has cooled, it will be ready to have the forms removed and cleaned. This is the best time to smooth out the surface, easily done with wooden carving tools. Once the irregular surface has been worked, then let the section dry overnight before repeating the process on the next piece.

Once done, (several weeks later), you will have a large multi-piece plaster block. This will need to dry in a well ventilated room for at least two more weeks or until dry to the touch. If the block feels cooler than the ambient air, it is still wet. If you prematurely try to open the mold while it is still damp, it may crack or crumble.

My Pieta required over a month to dry